Essentials

Uploading Data to Cloud 

In this section you'll learn how to upload data to cloud.

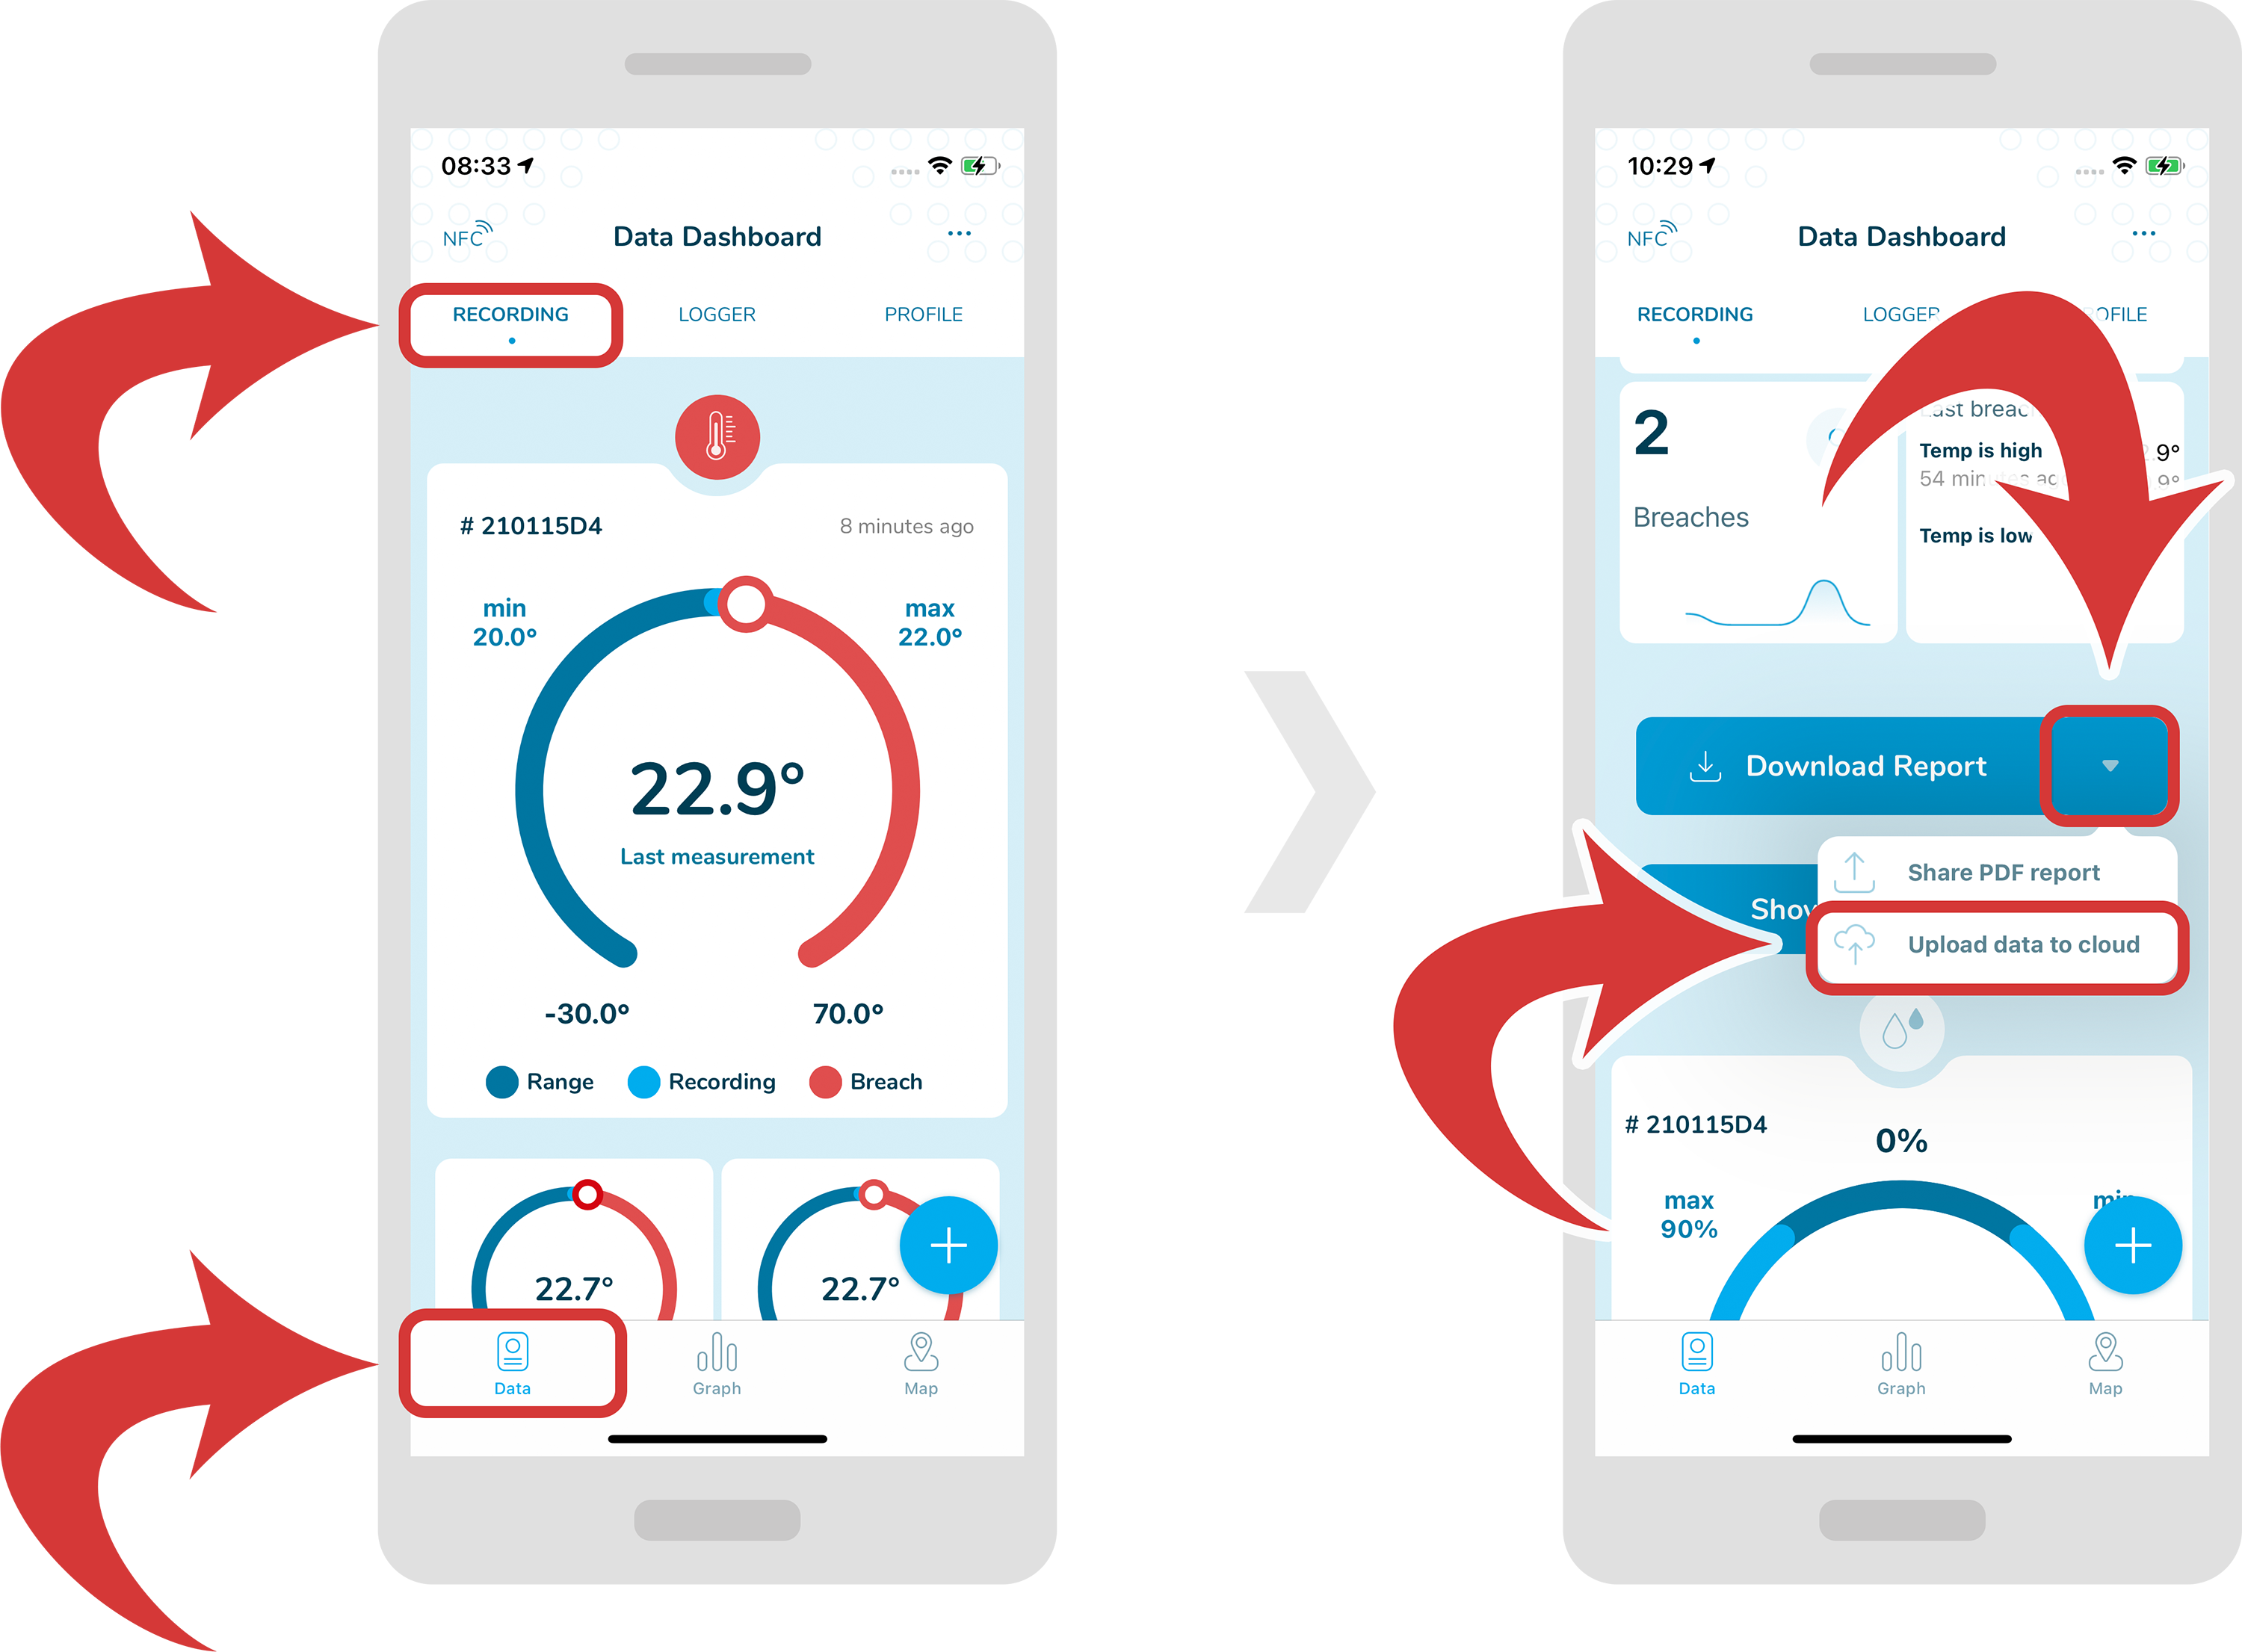
  1. In order to upload data to the cloud, first make sure you are inside a “Data Dashboard” page and you have selected a “Recording” tab.

  2. Now, scroll down and you should be able to see a “Download Report” button. Tap on the down arrow at the right of the button and from the dropdown menu select “Upload data to cloud”.

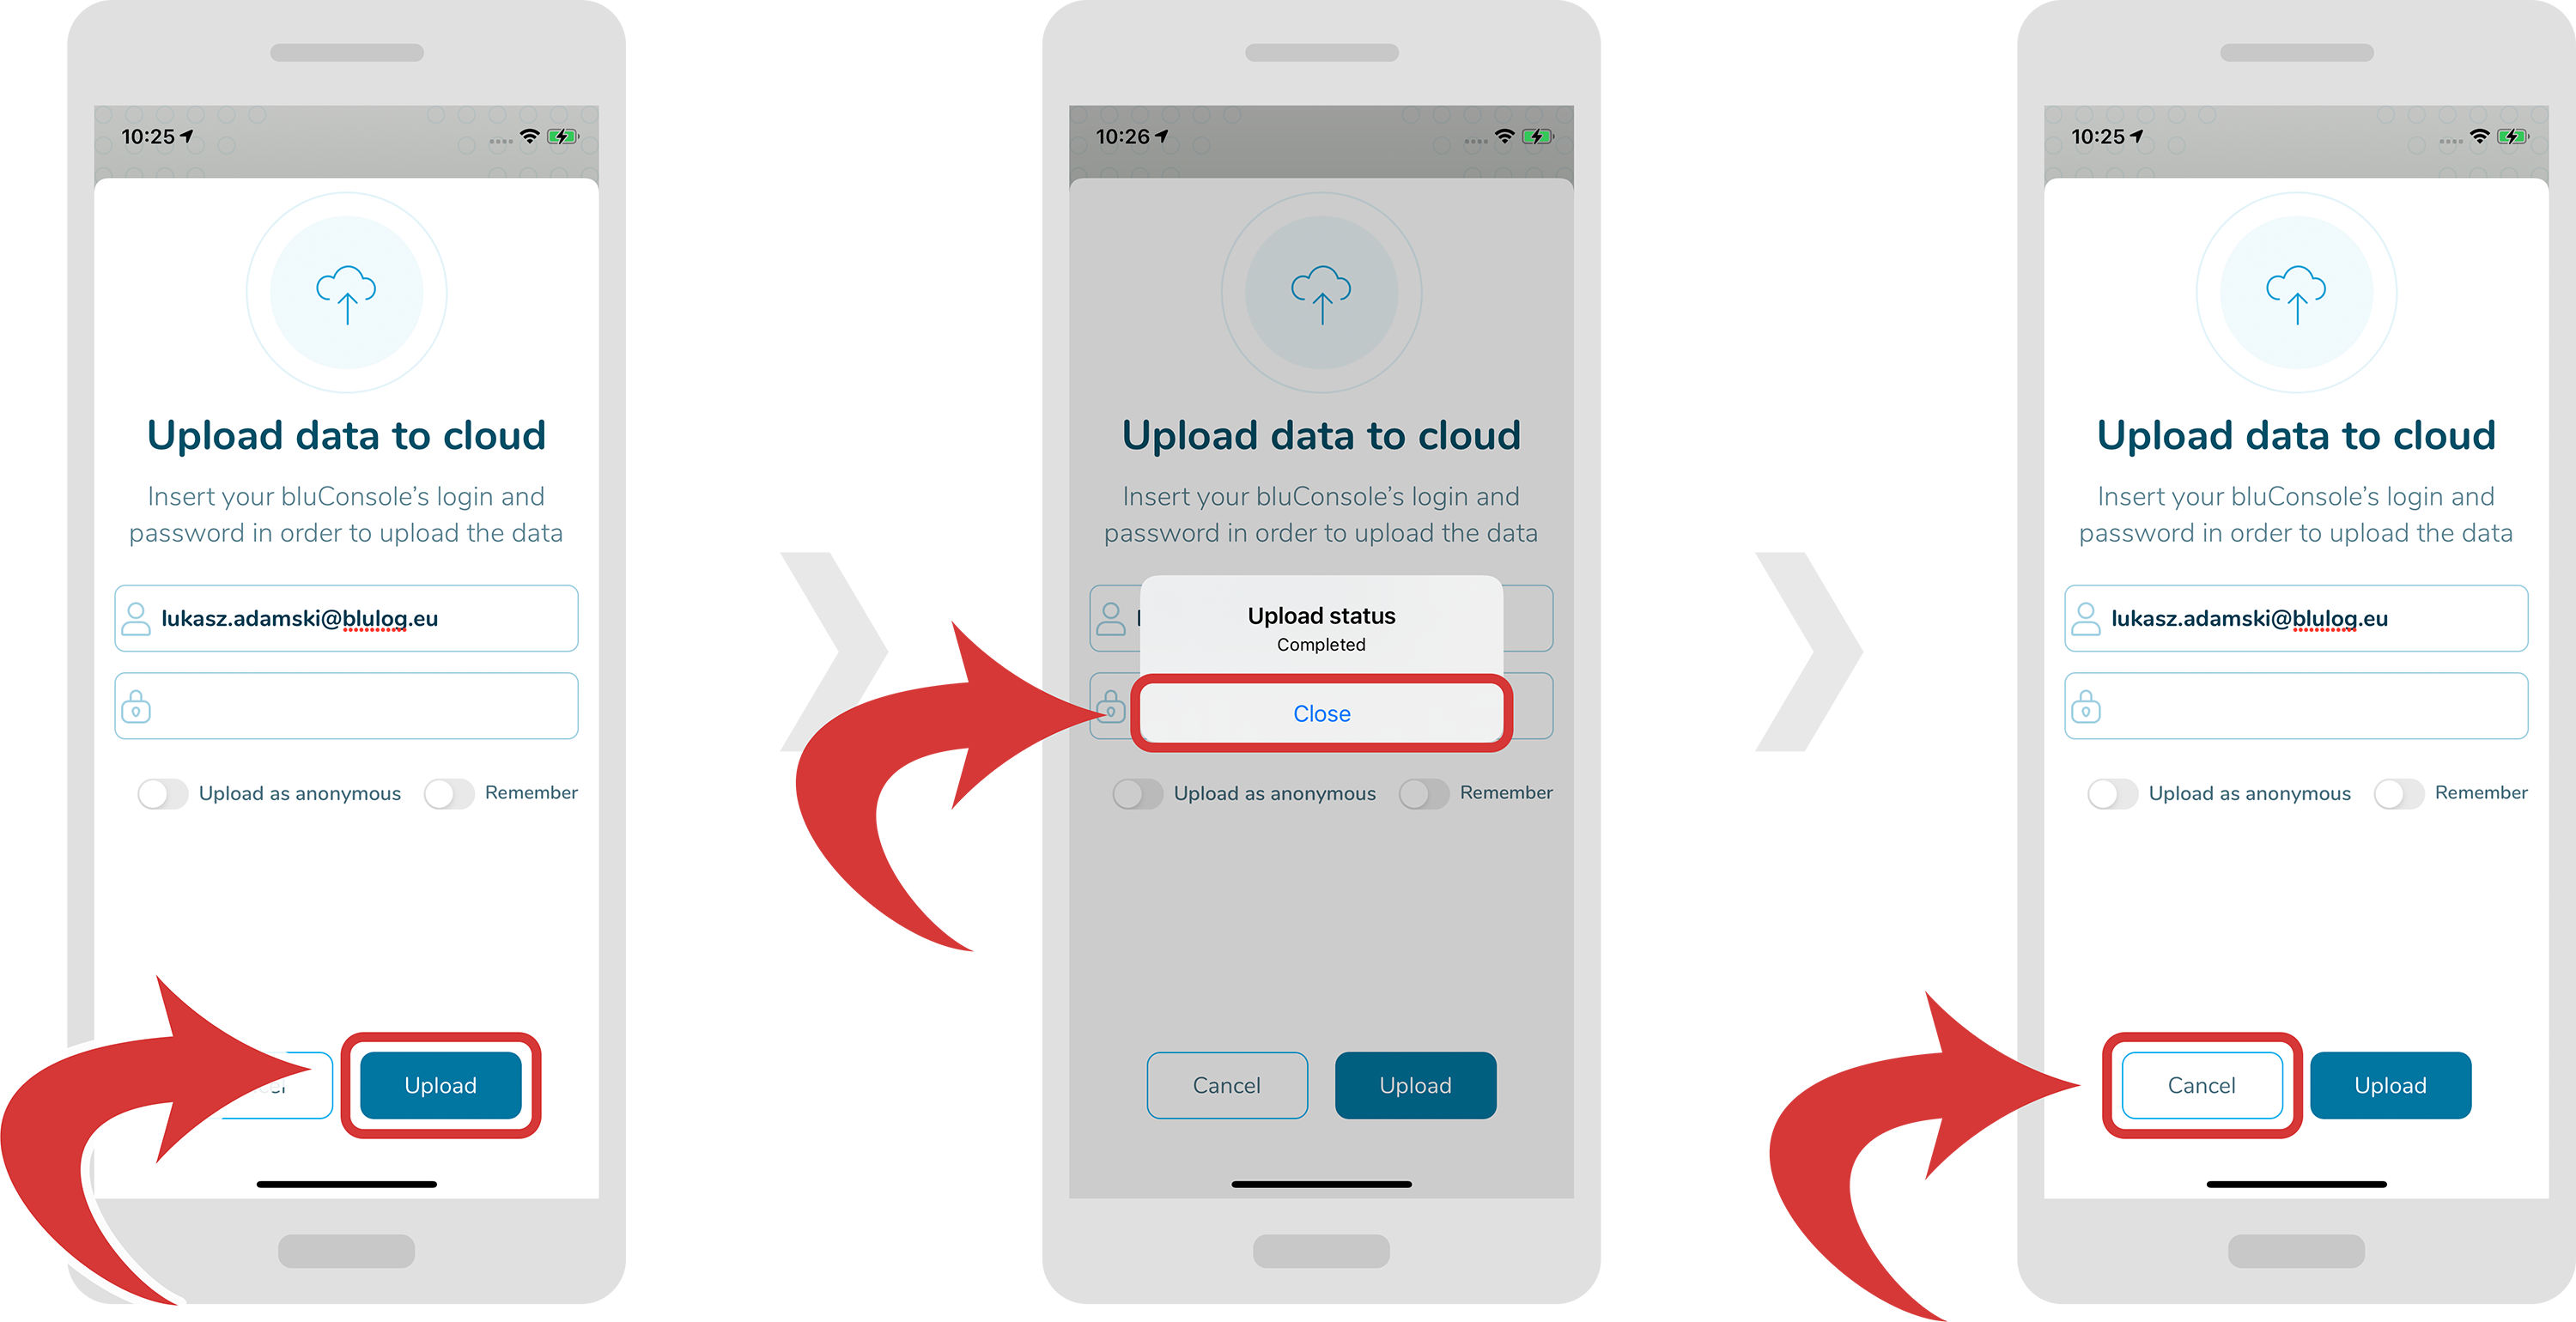
  3. Now a new pop up should appear. Fill in your login details. You can also upload data as anonymous and remember your login details for later use.

  4. Now tap on the “Upload” button and you should see a confirmation window pop up. In order to quit the upload window, tap on the “Cancel” button.

5 Mistakes to Avoid

While Choosing Your Monitoring Solution

Confused which monitoring solution to choose? Get this no-fluff report with valuable insights to save time & money!

The administrator of your personal data will be “Blulog Sp. z o.o.”, Konarzewska 4 street, 60-101 Poznań, Poland, Tax Identification Number: 7792427403. You can find details regarding data processing in the Privacy Policy. You will be able to withdraw your consent at any time.

We use Mailchimp as our marketing platform. By clicking above to subscribe, you acknowledge that your information will be transferred to Mailchimp for processing. Learn more about Mailchimp's privacy practices here.

The administrator of your personal data will be Jérémy Laurens, who runs a business under the name "Blulog Sp. z o.o.", Konarzewska 4 Street, 60-101 Poznań, Poland, Tax Identification Number: X. You can find details regarding data processing in the Privacy Policy. You will be able to withdraw your consent at any time.