Start recording
- Open the bluTag app. Place the logger near your smartphone.
For a logger that has no measurements press on the “Start new Recording” button.
For a logger that has some measurements press on the “+” button at the bottom right and select “Start recording”.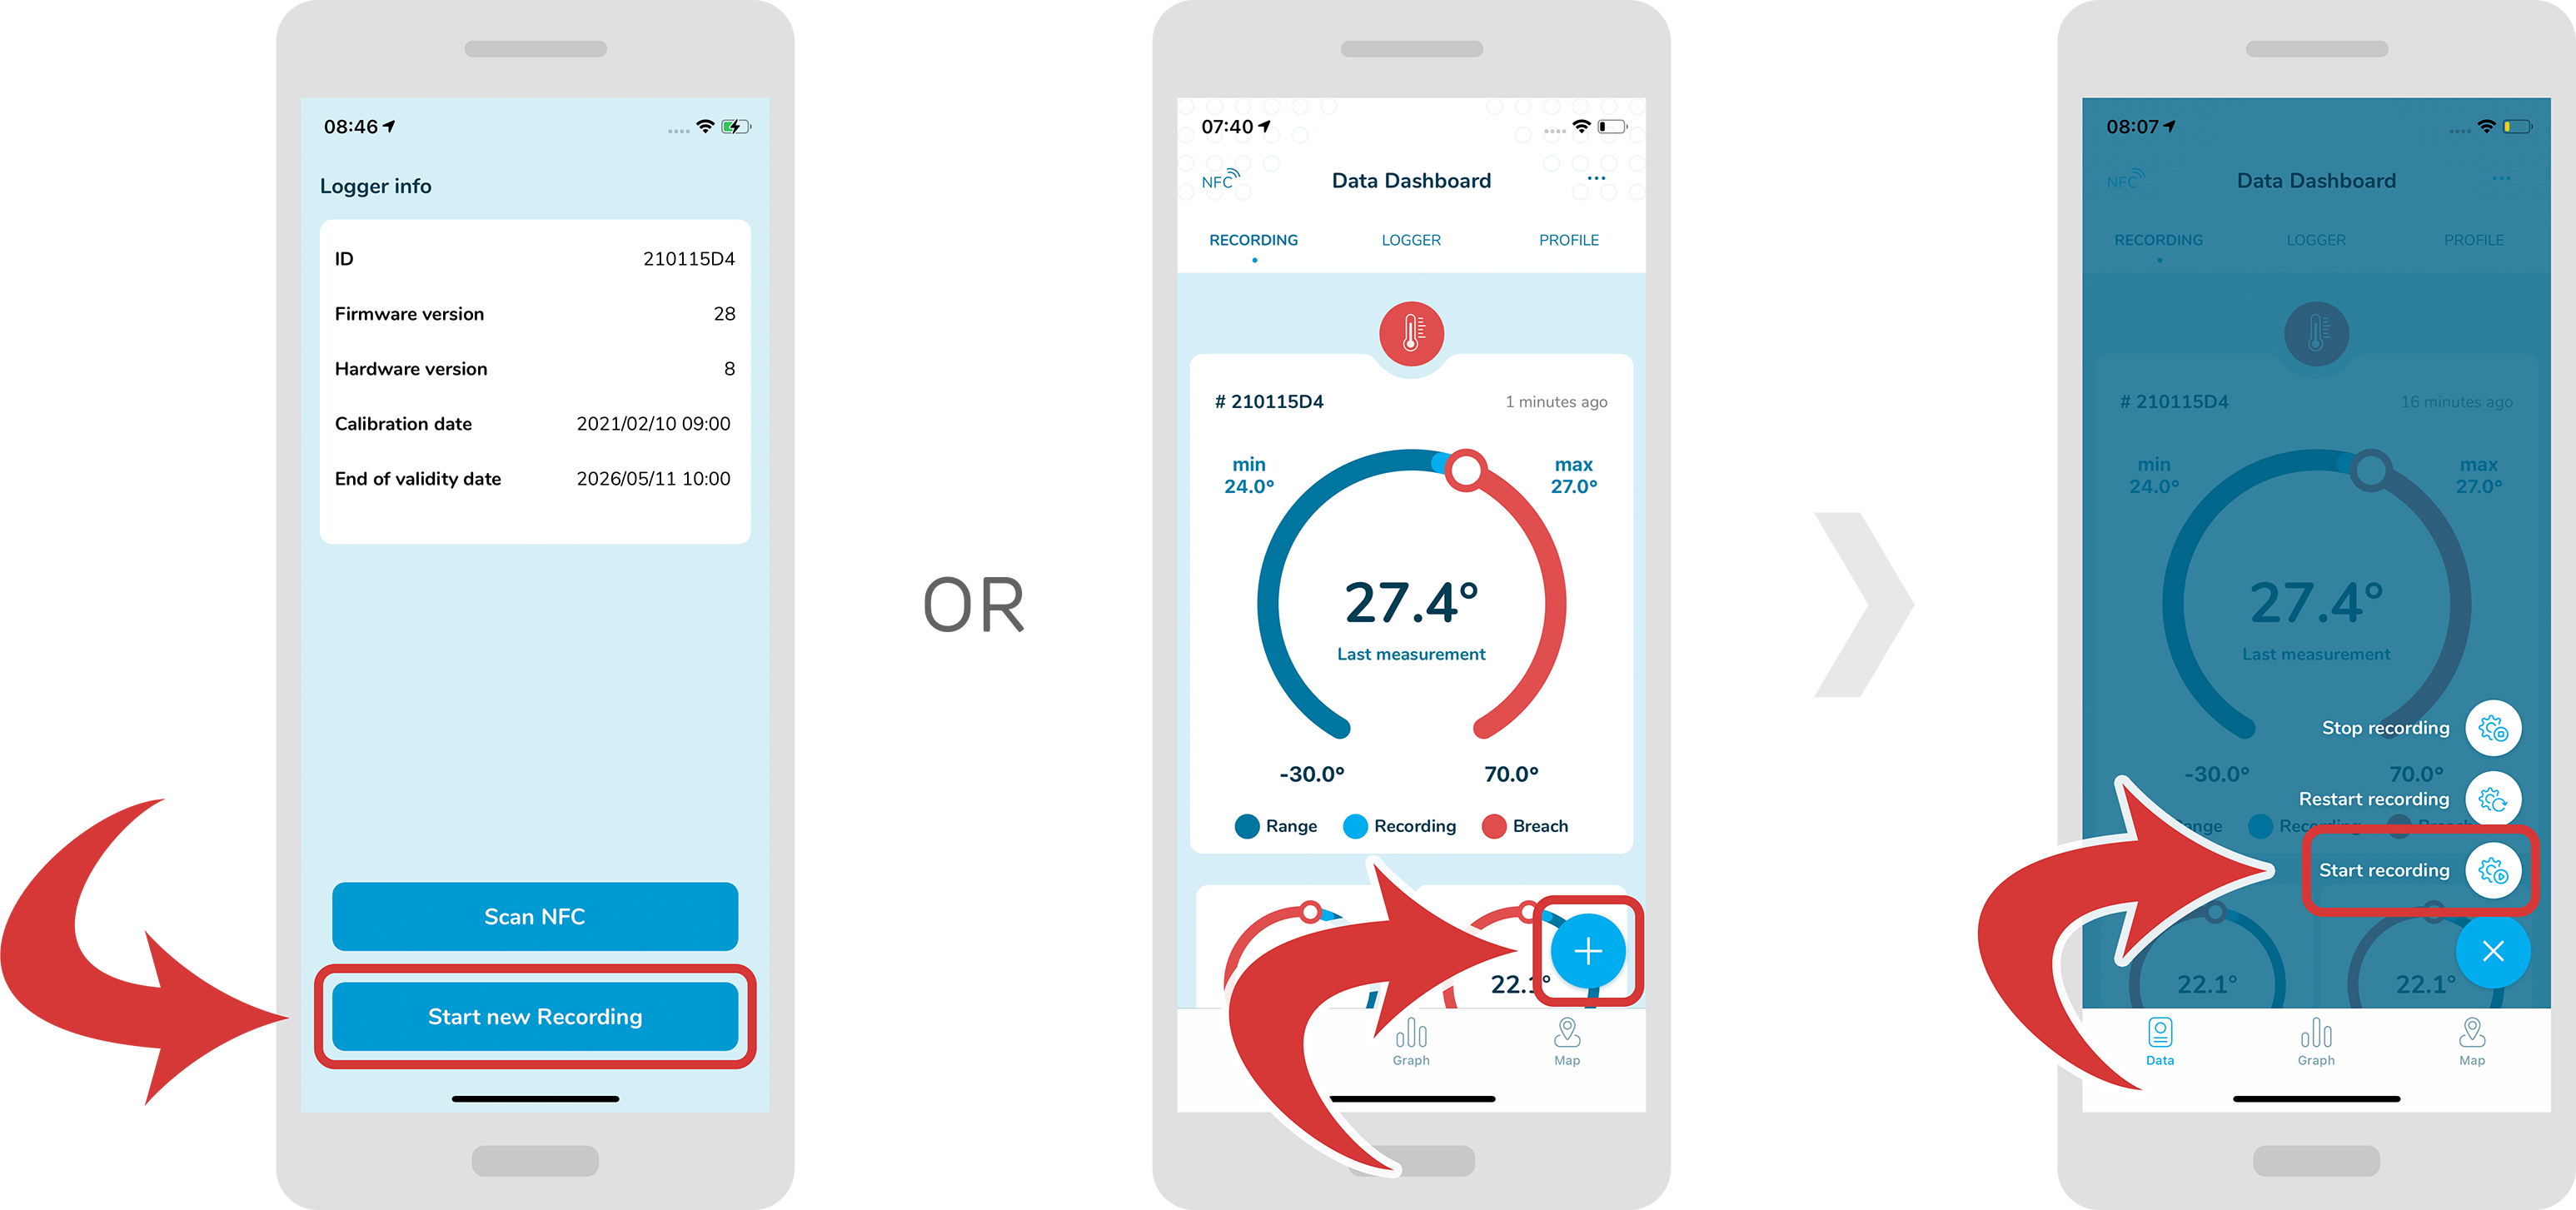
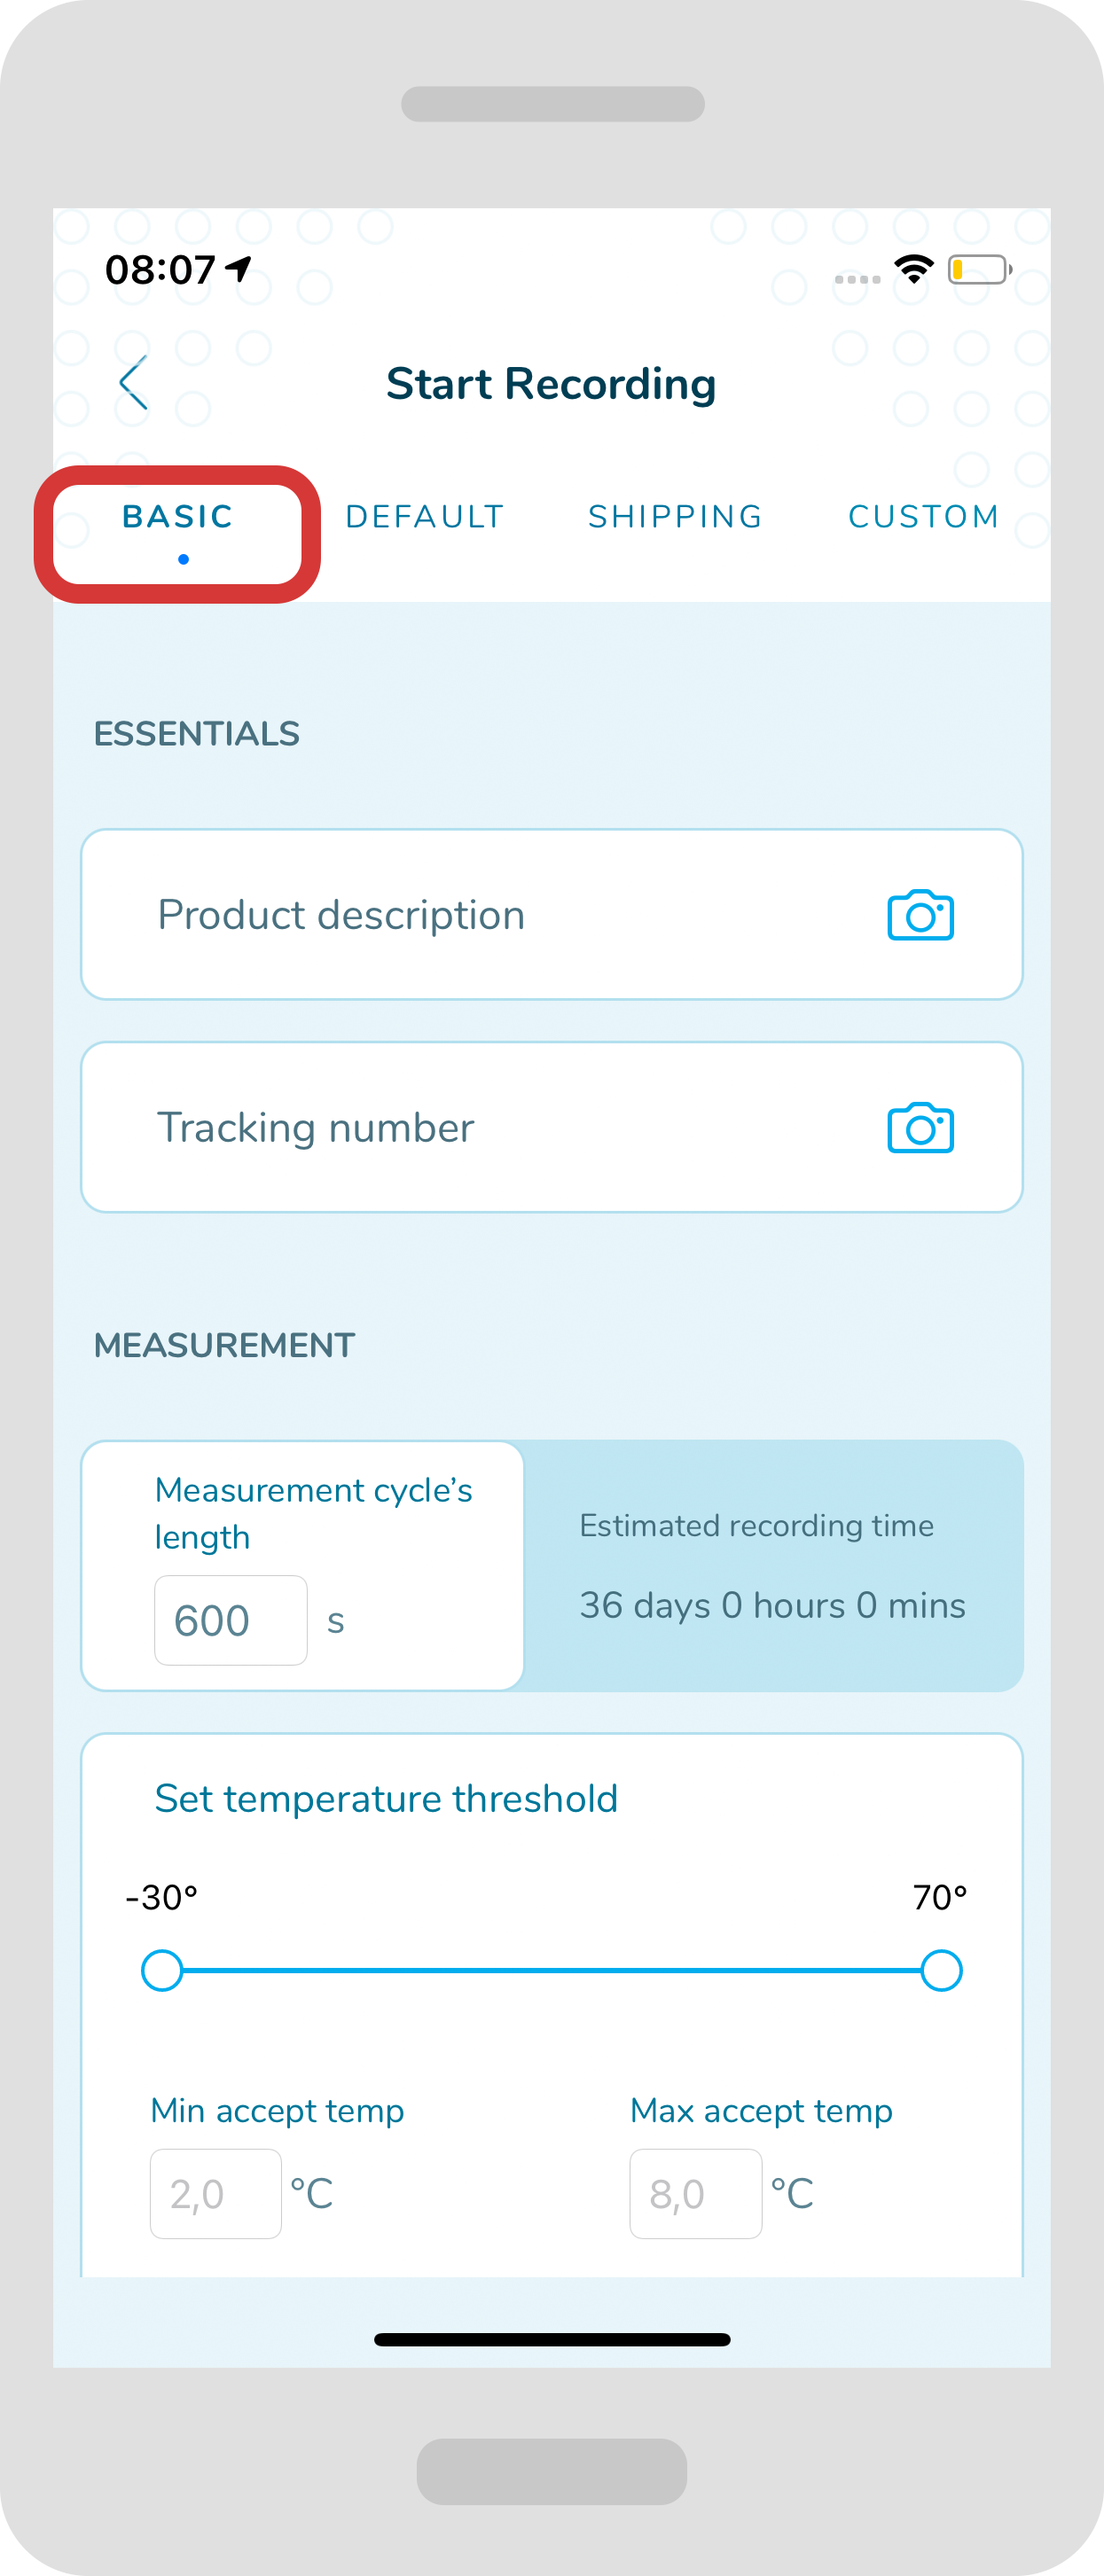
- Choose the right profile from the top bar menu. You can choose either “Default”, “Basic”, “Shipping” or “Custom” profile.
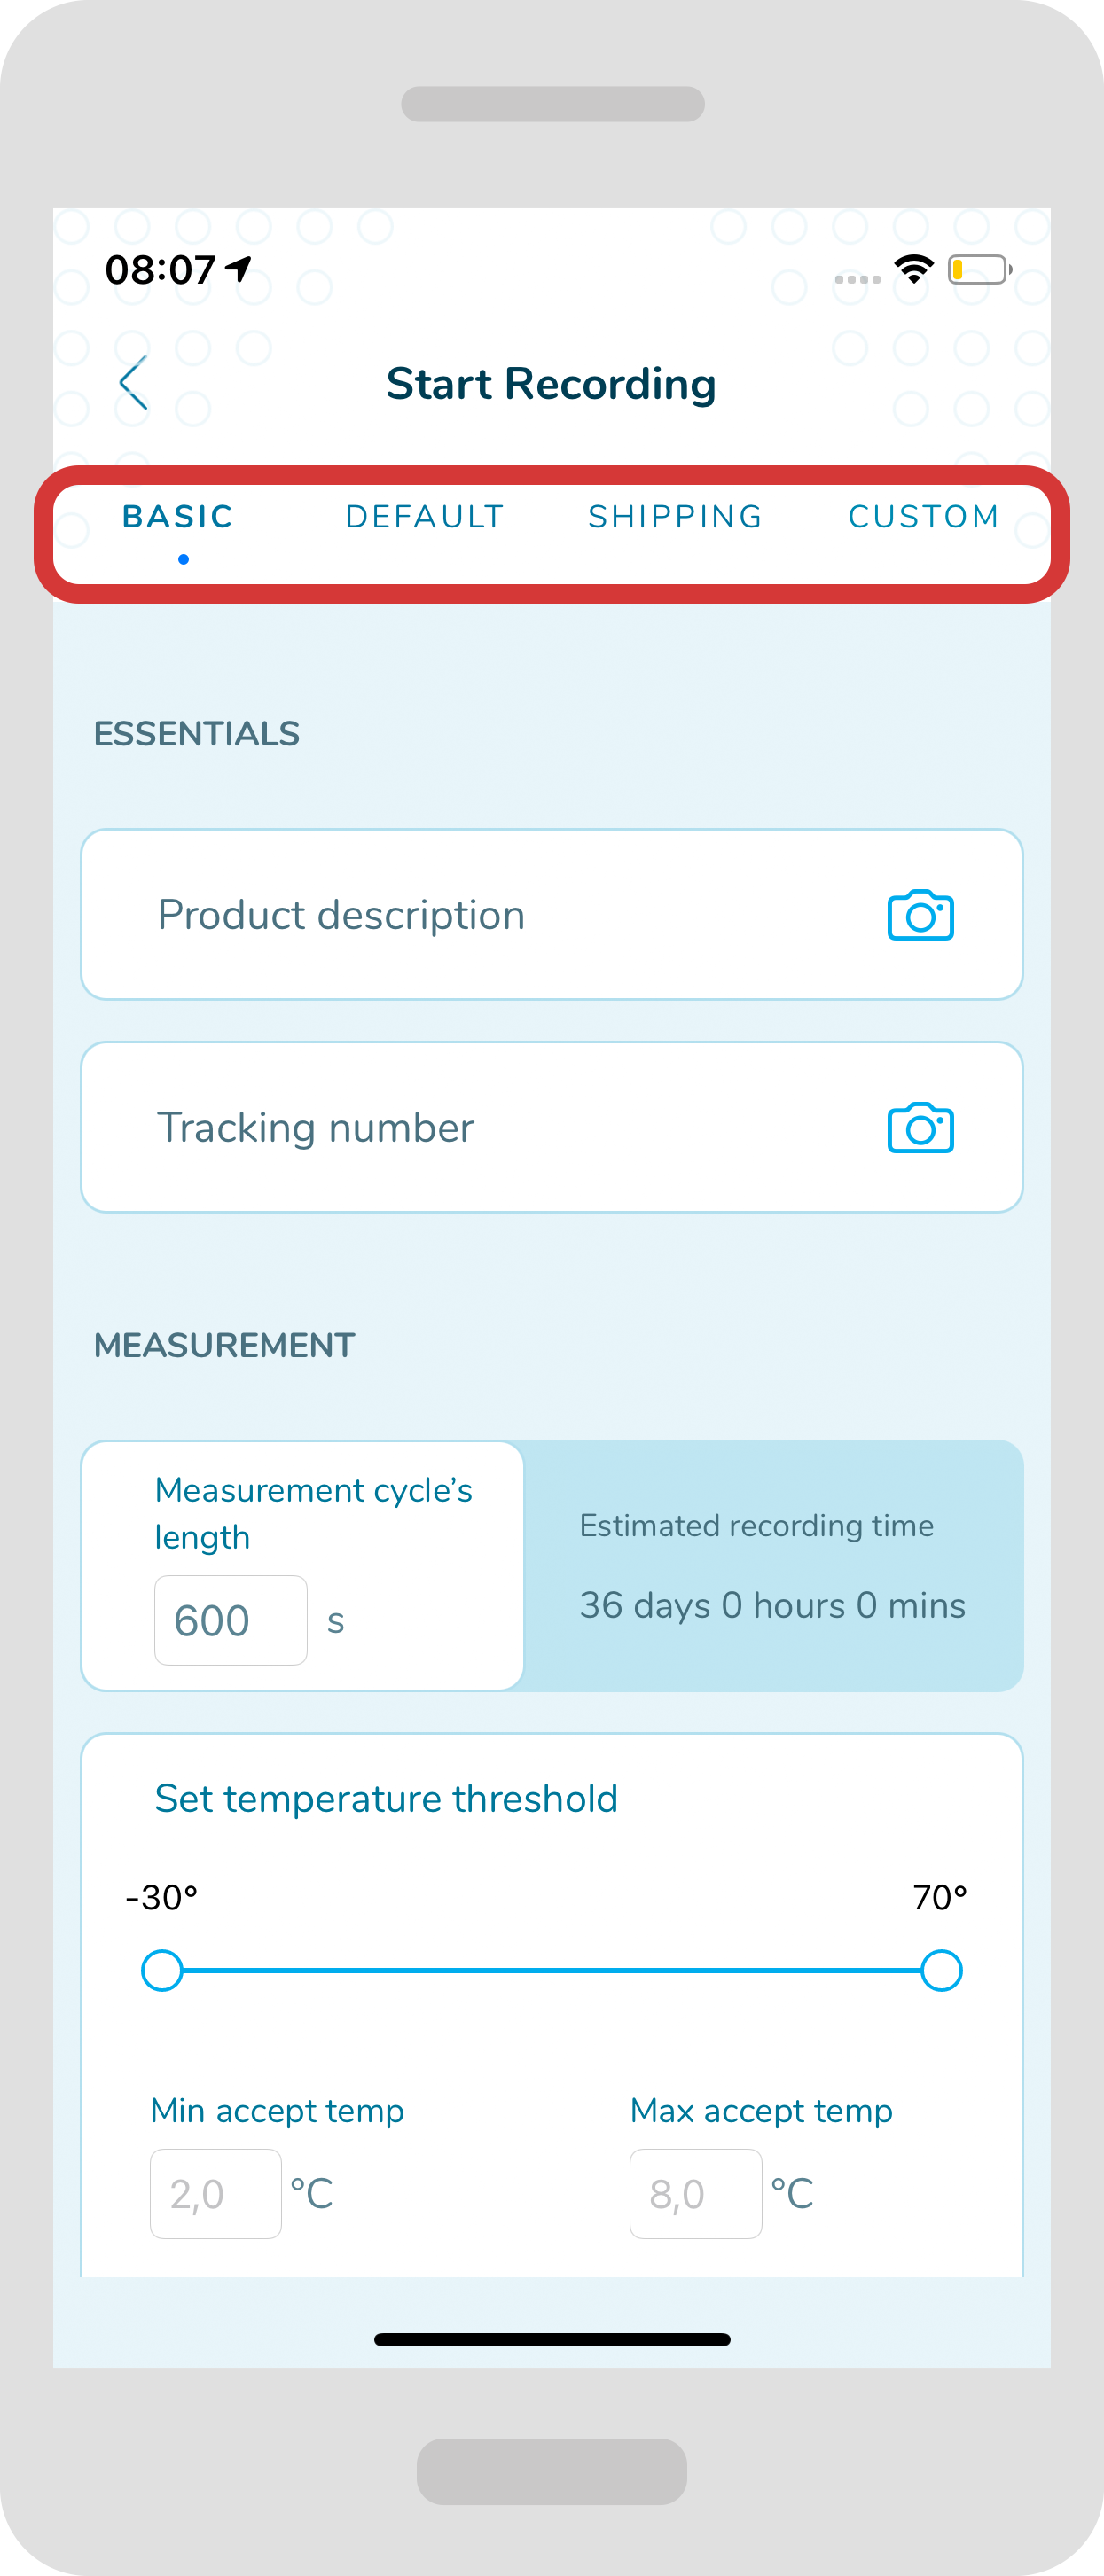
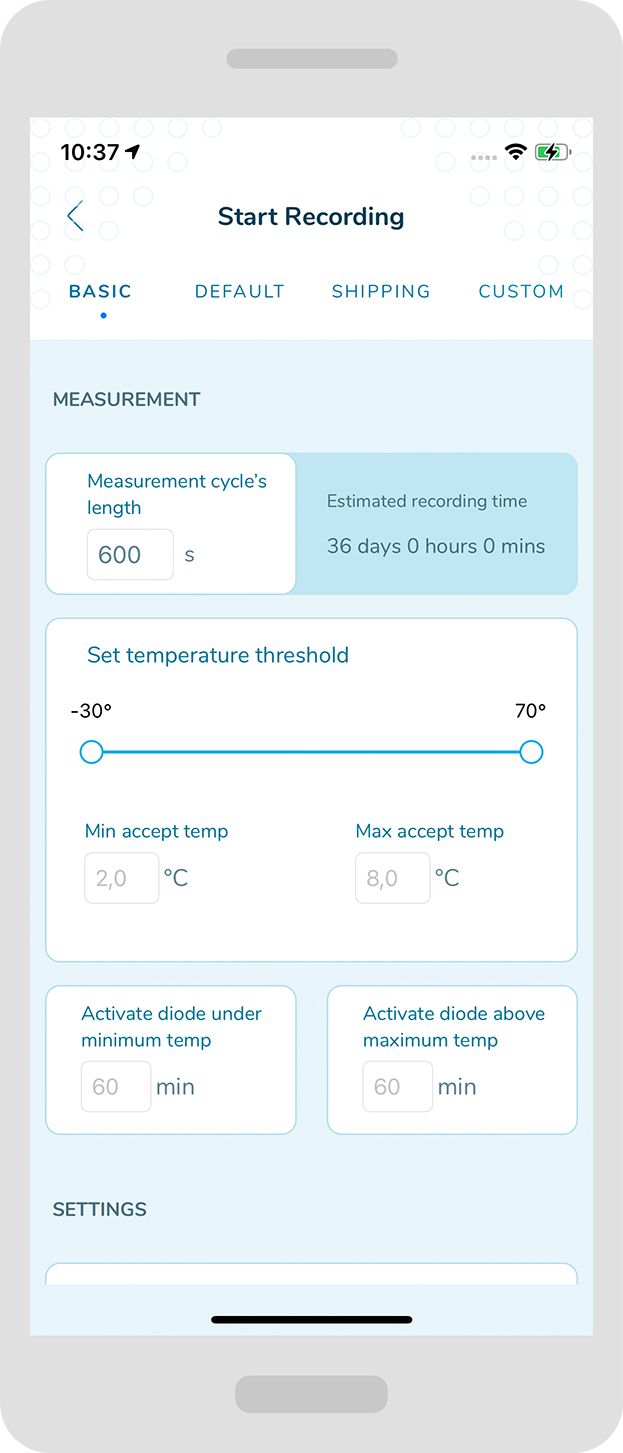
- In the “Basic” profile you can add the information regarding product description and a tracking number.
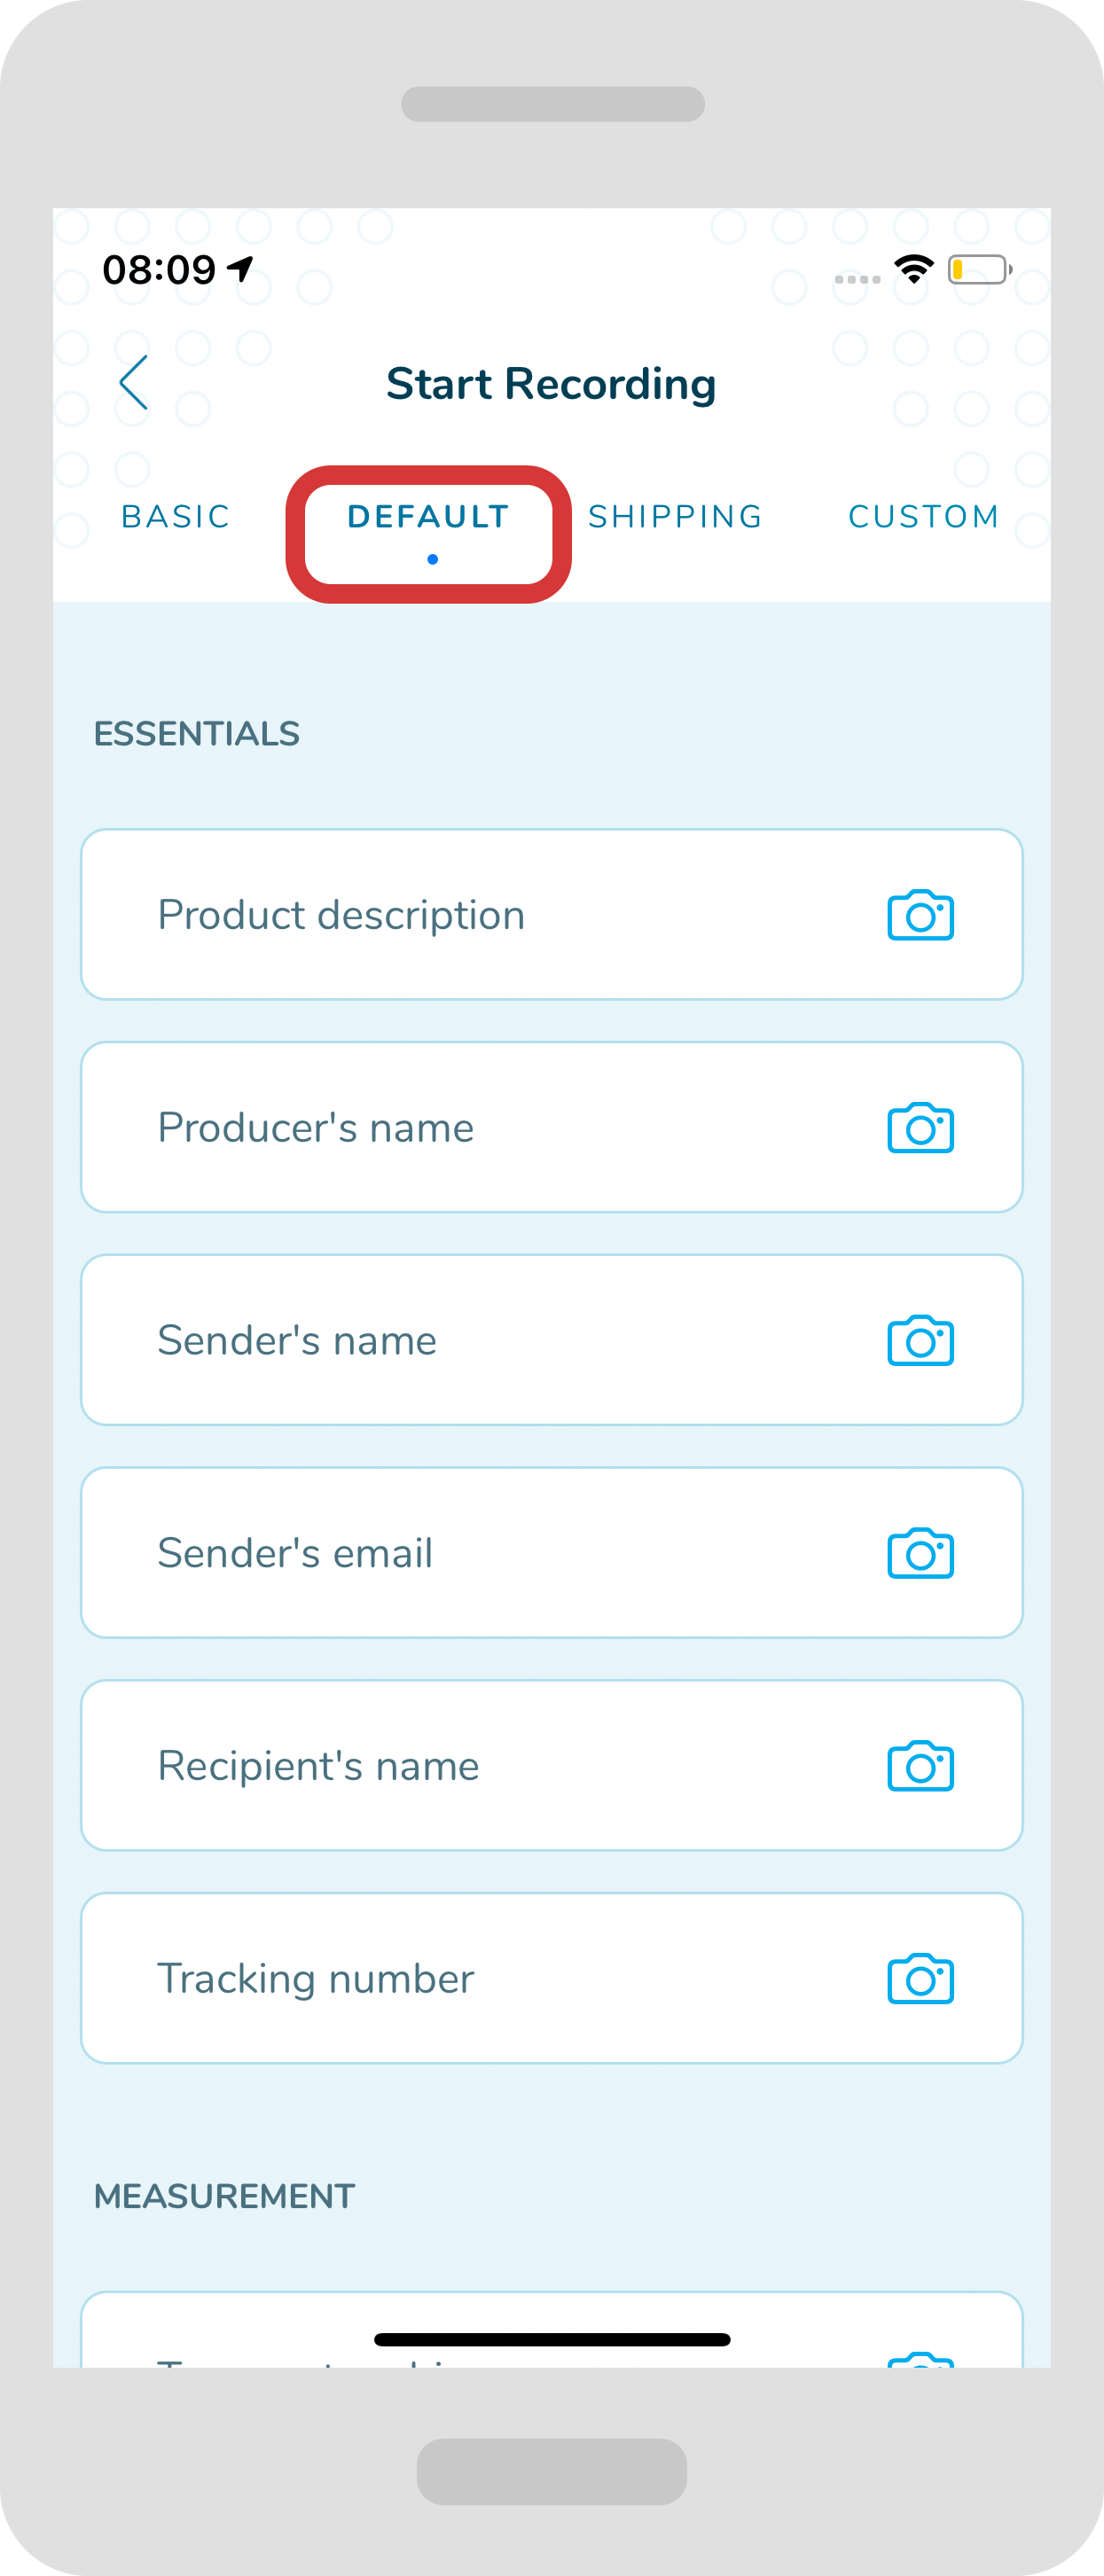
- In the “Default” profile you can add the information regarding product description, producer, sender, recipient or even a tracking number. All of these elements can help you to facilitate the logistics process.
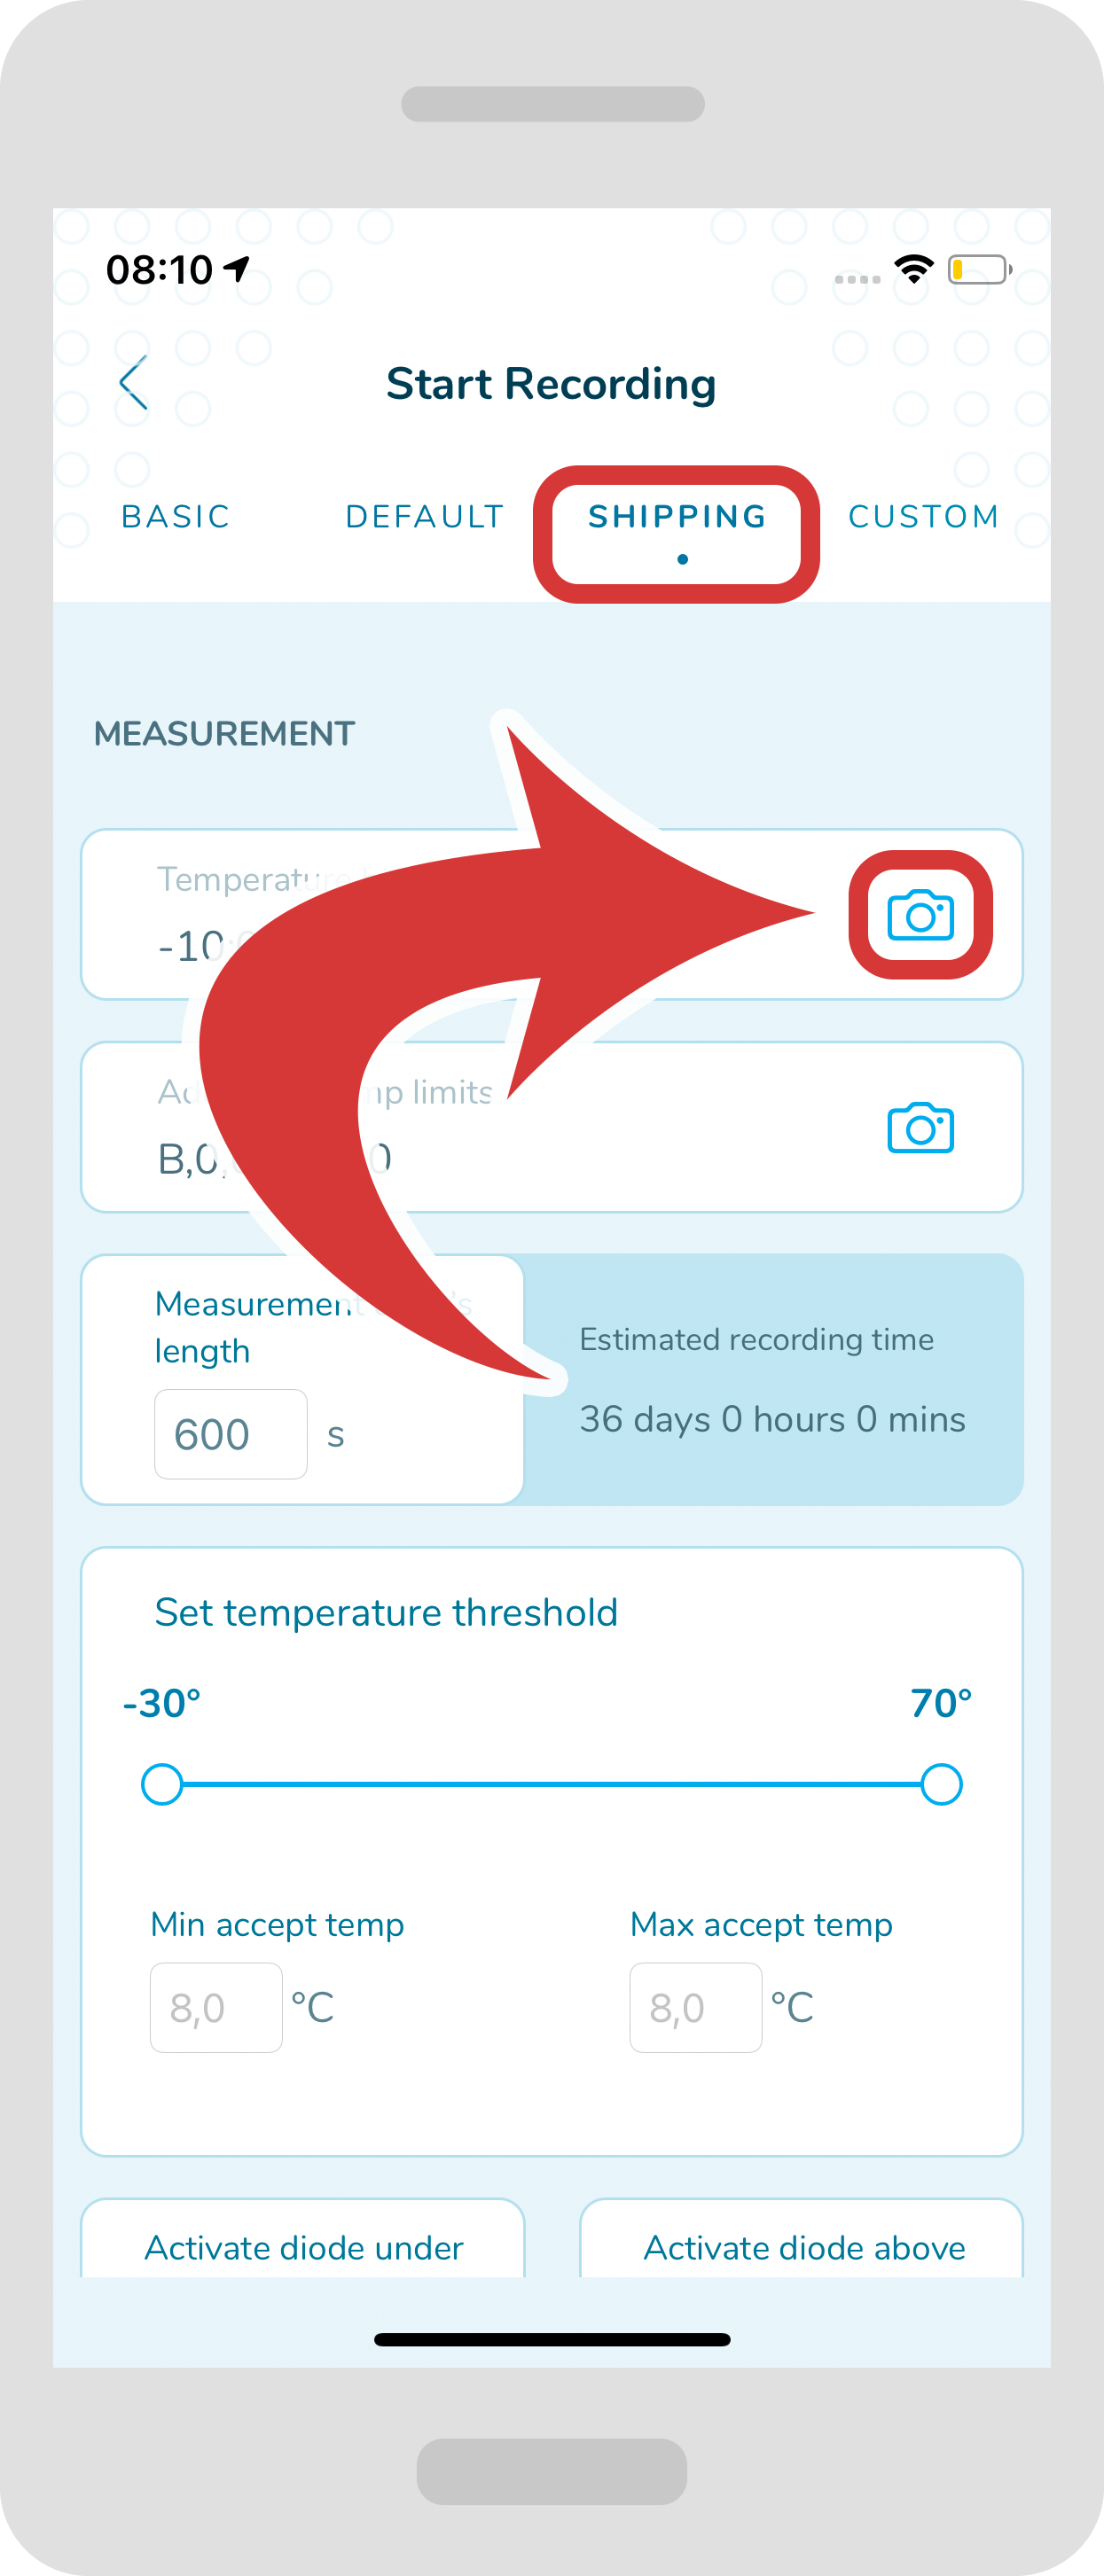
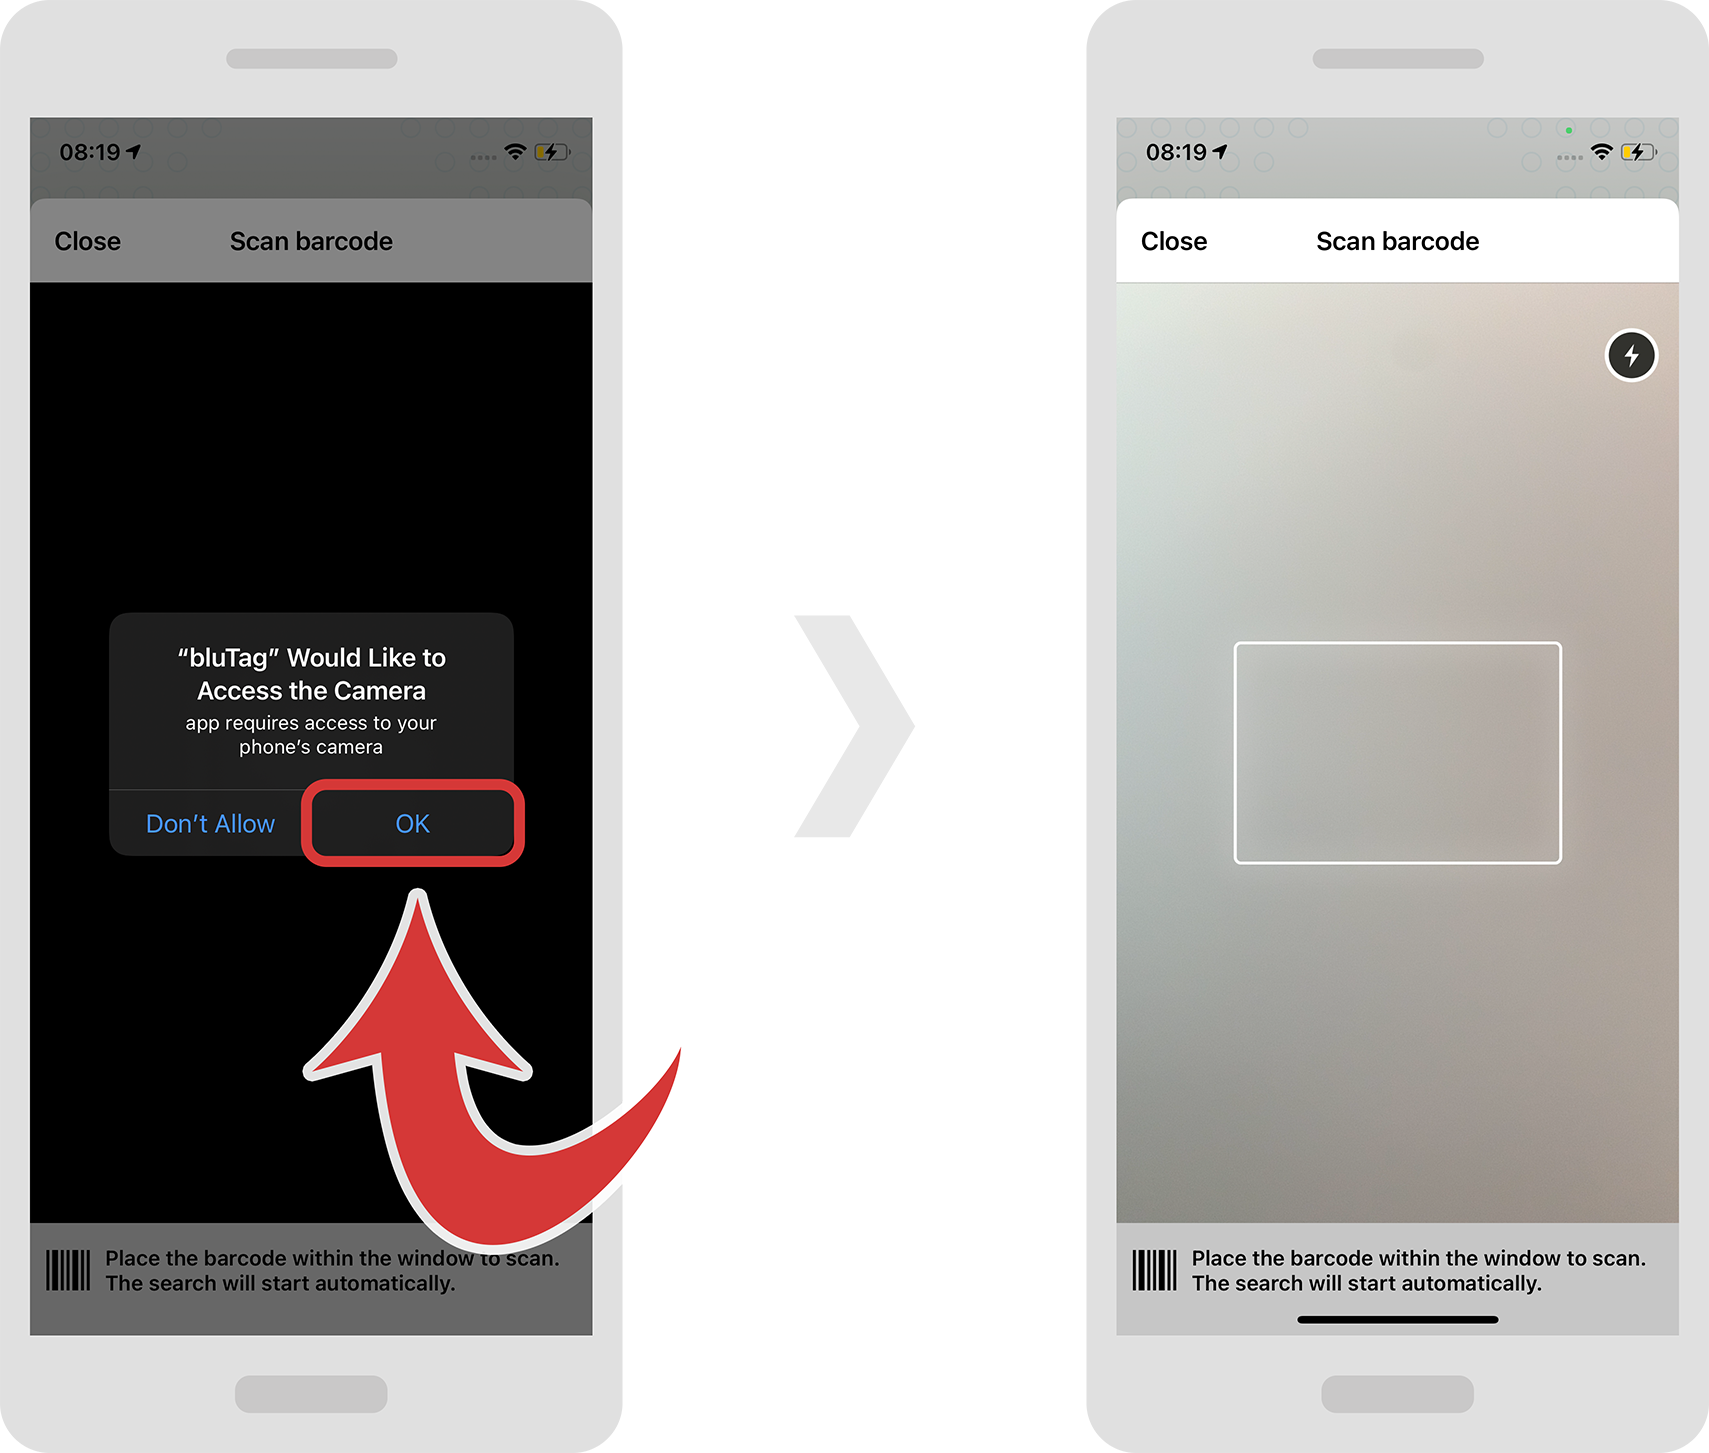
For shipping purposes choose a “Shipping” profile. Like in other profiles, you will be able to scan barcodes.Just press on the “camera” icon that is on the right side to be directed to a camera view.
Now you can scan the barcode.
- For the “Custom” profile you can choose from your already created custom profiles. Once you select a specific profile you should be able to see the fields you have specified. You will find more information how to create a profile further down the instructions.
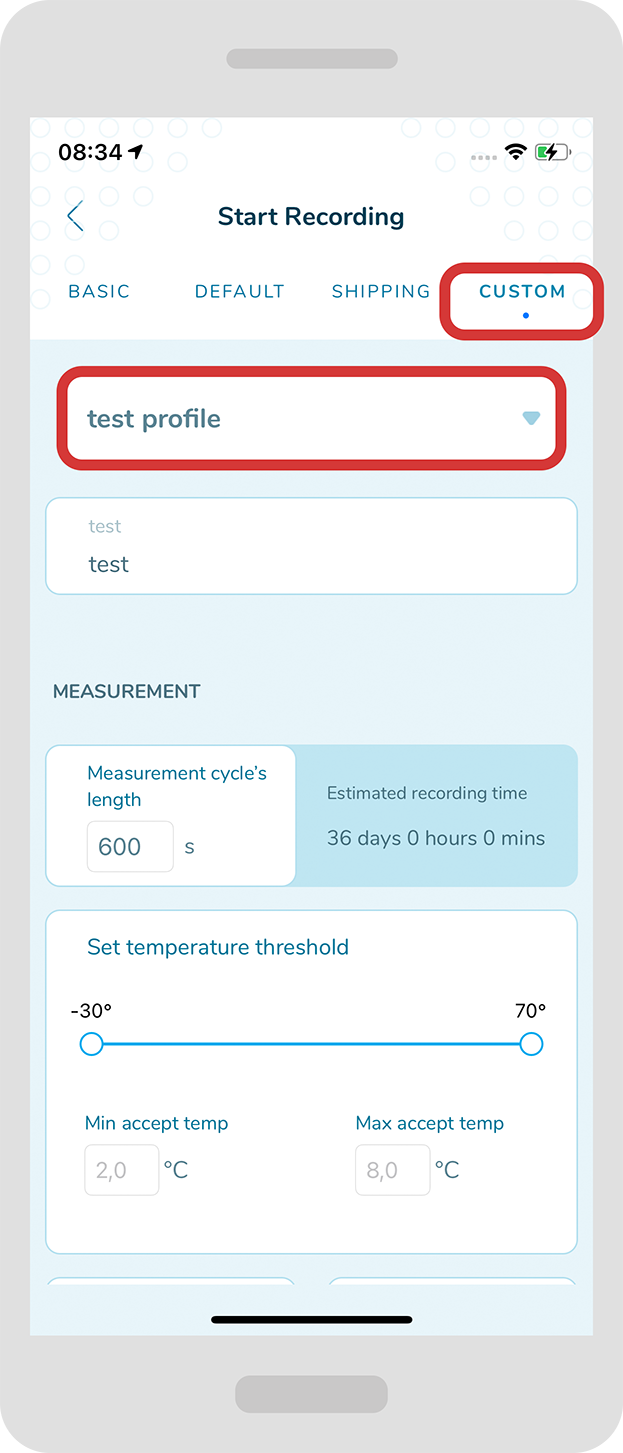
- For all the profiles you can also choose measurement cycle’s length, time thresholds for activating the alert diodes, temperature limits, cumulating duration of breach, manual start or delay of start.
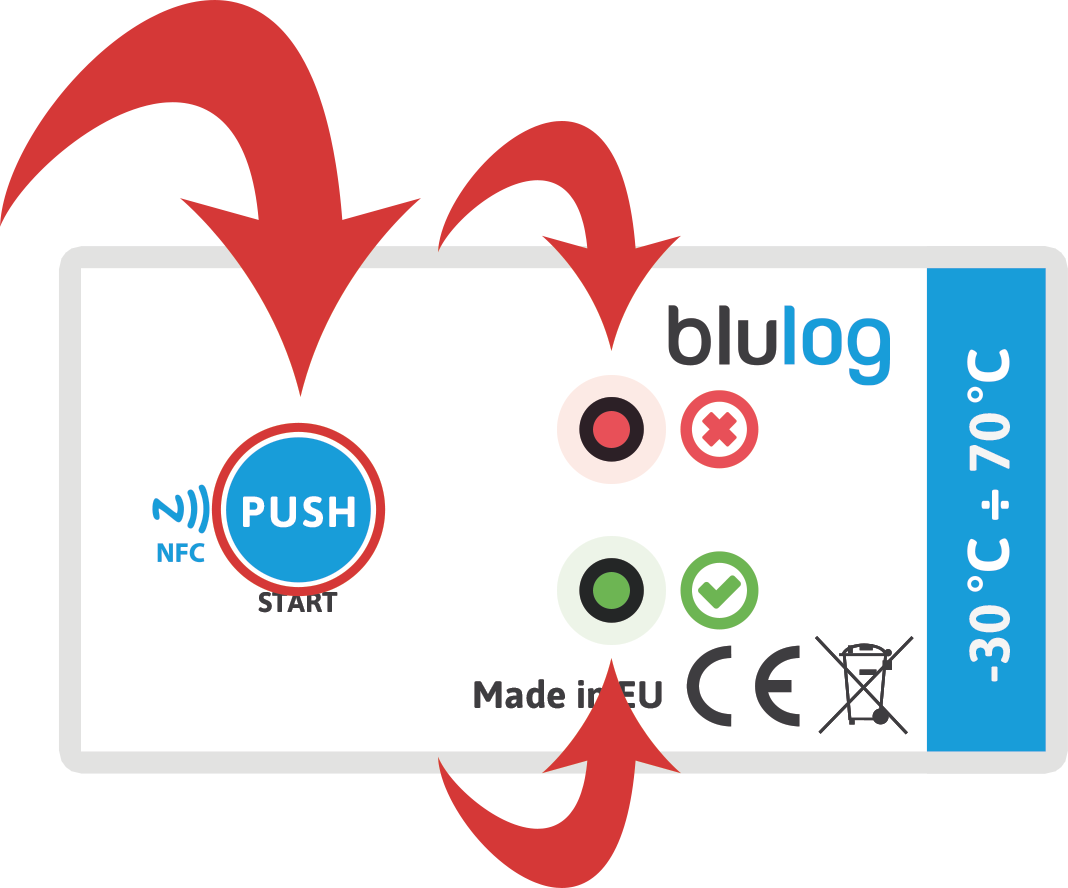
- In order to choose a manual start, just switch on “Manual start with button“.
For an instant start, just leave this switch off.
For a delayed start, just press on the “Delay of start recording” and type number of minutes.MANUAL START 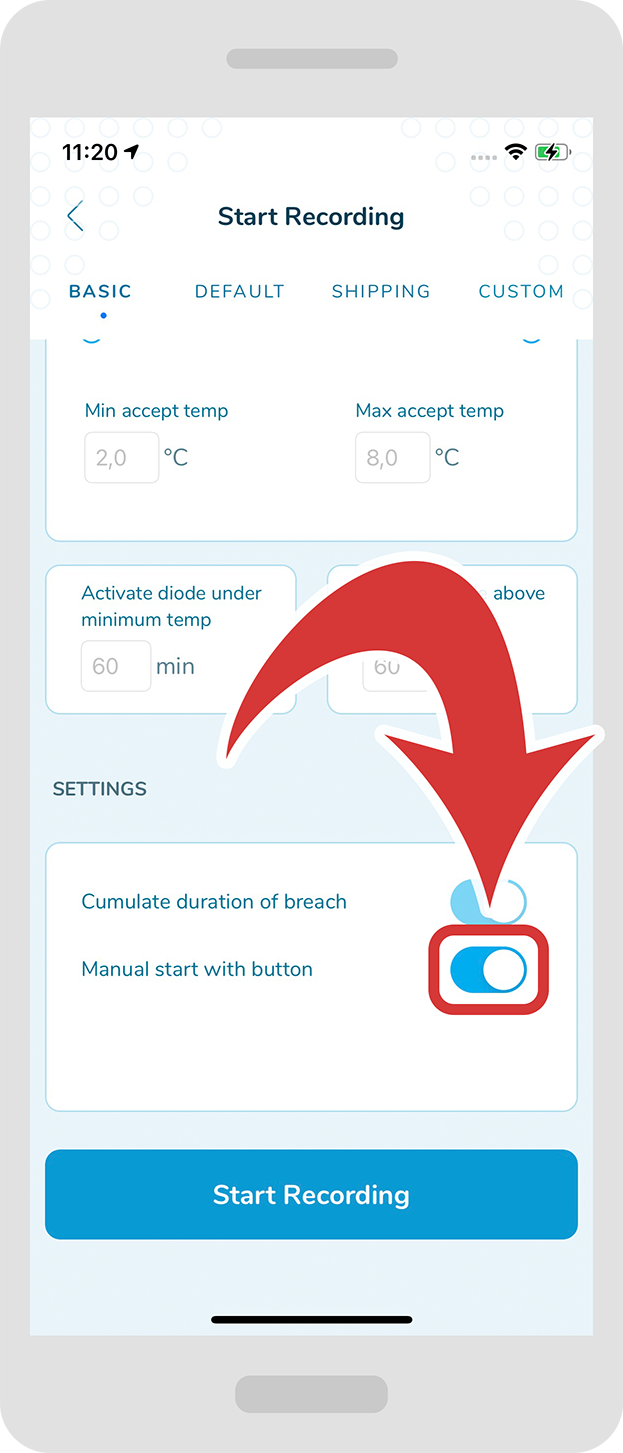
INSTANT START 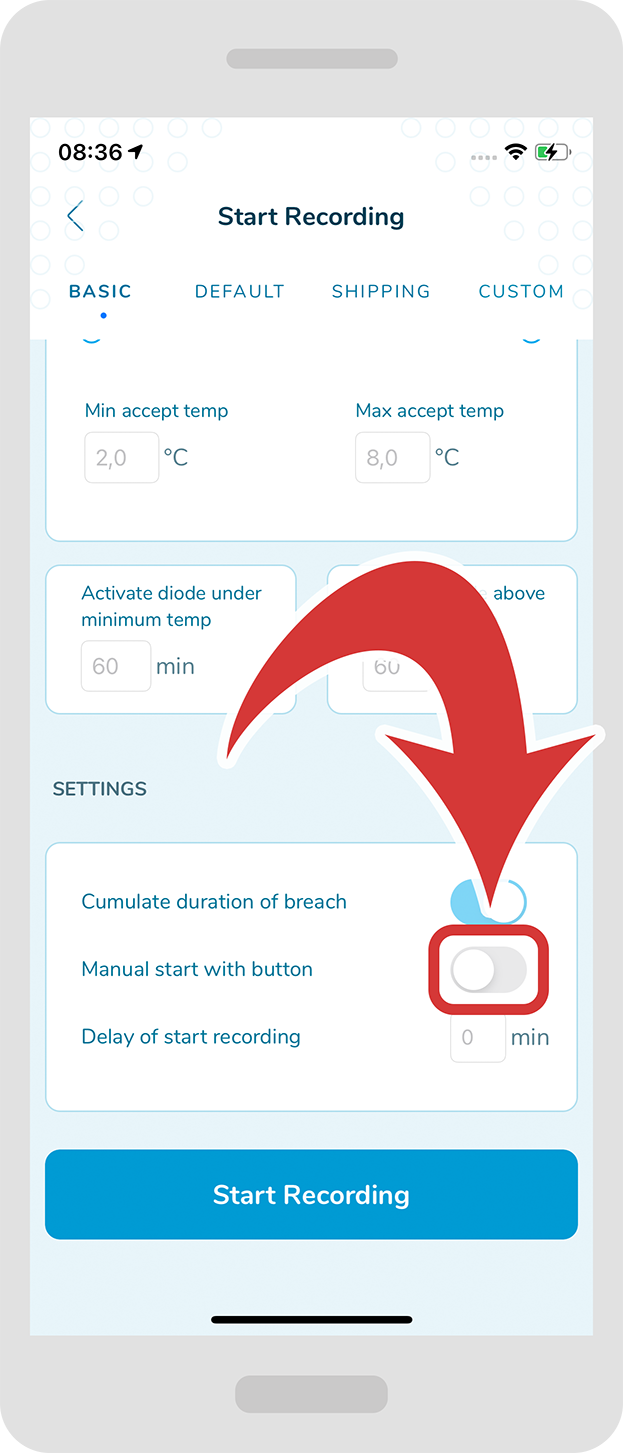
DELAYED START 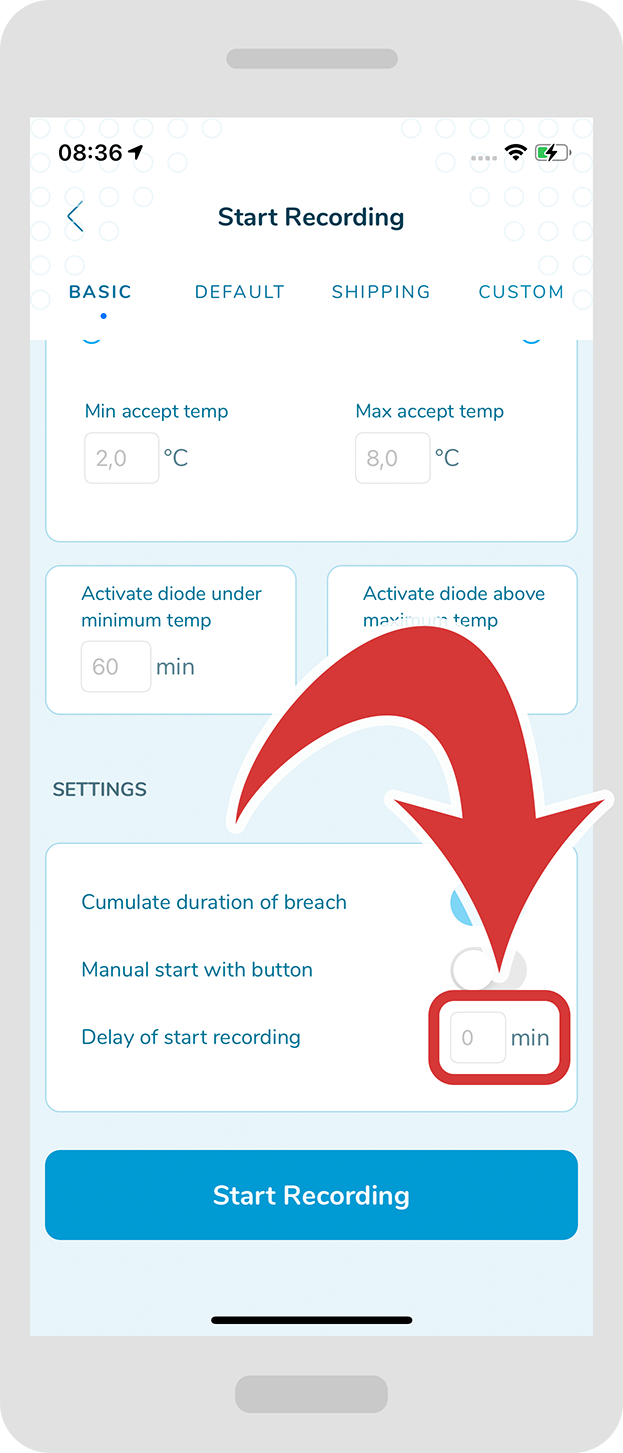
Just press the button “Start Recording” to confirm and place the smartphone in contact with the data logger. You should receive a confirmation message.
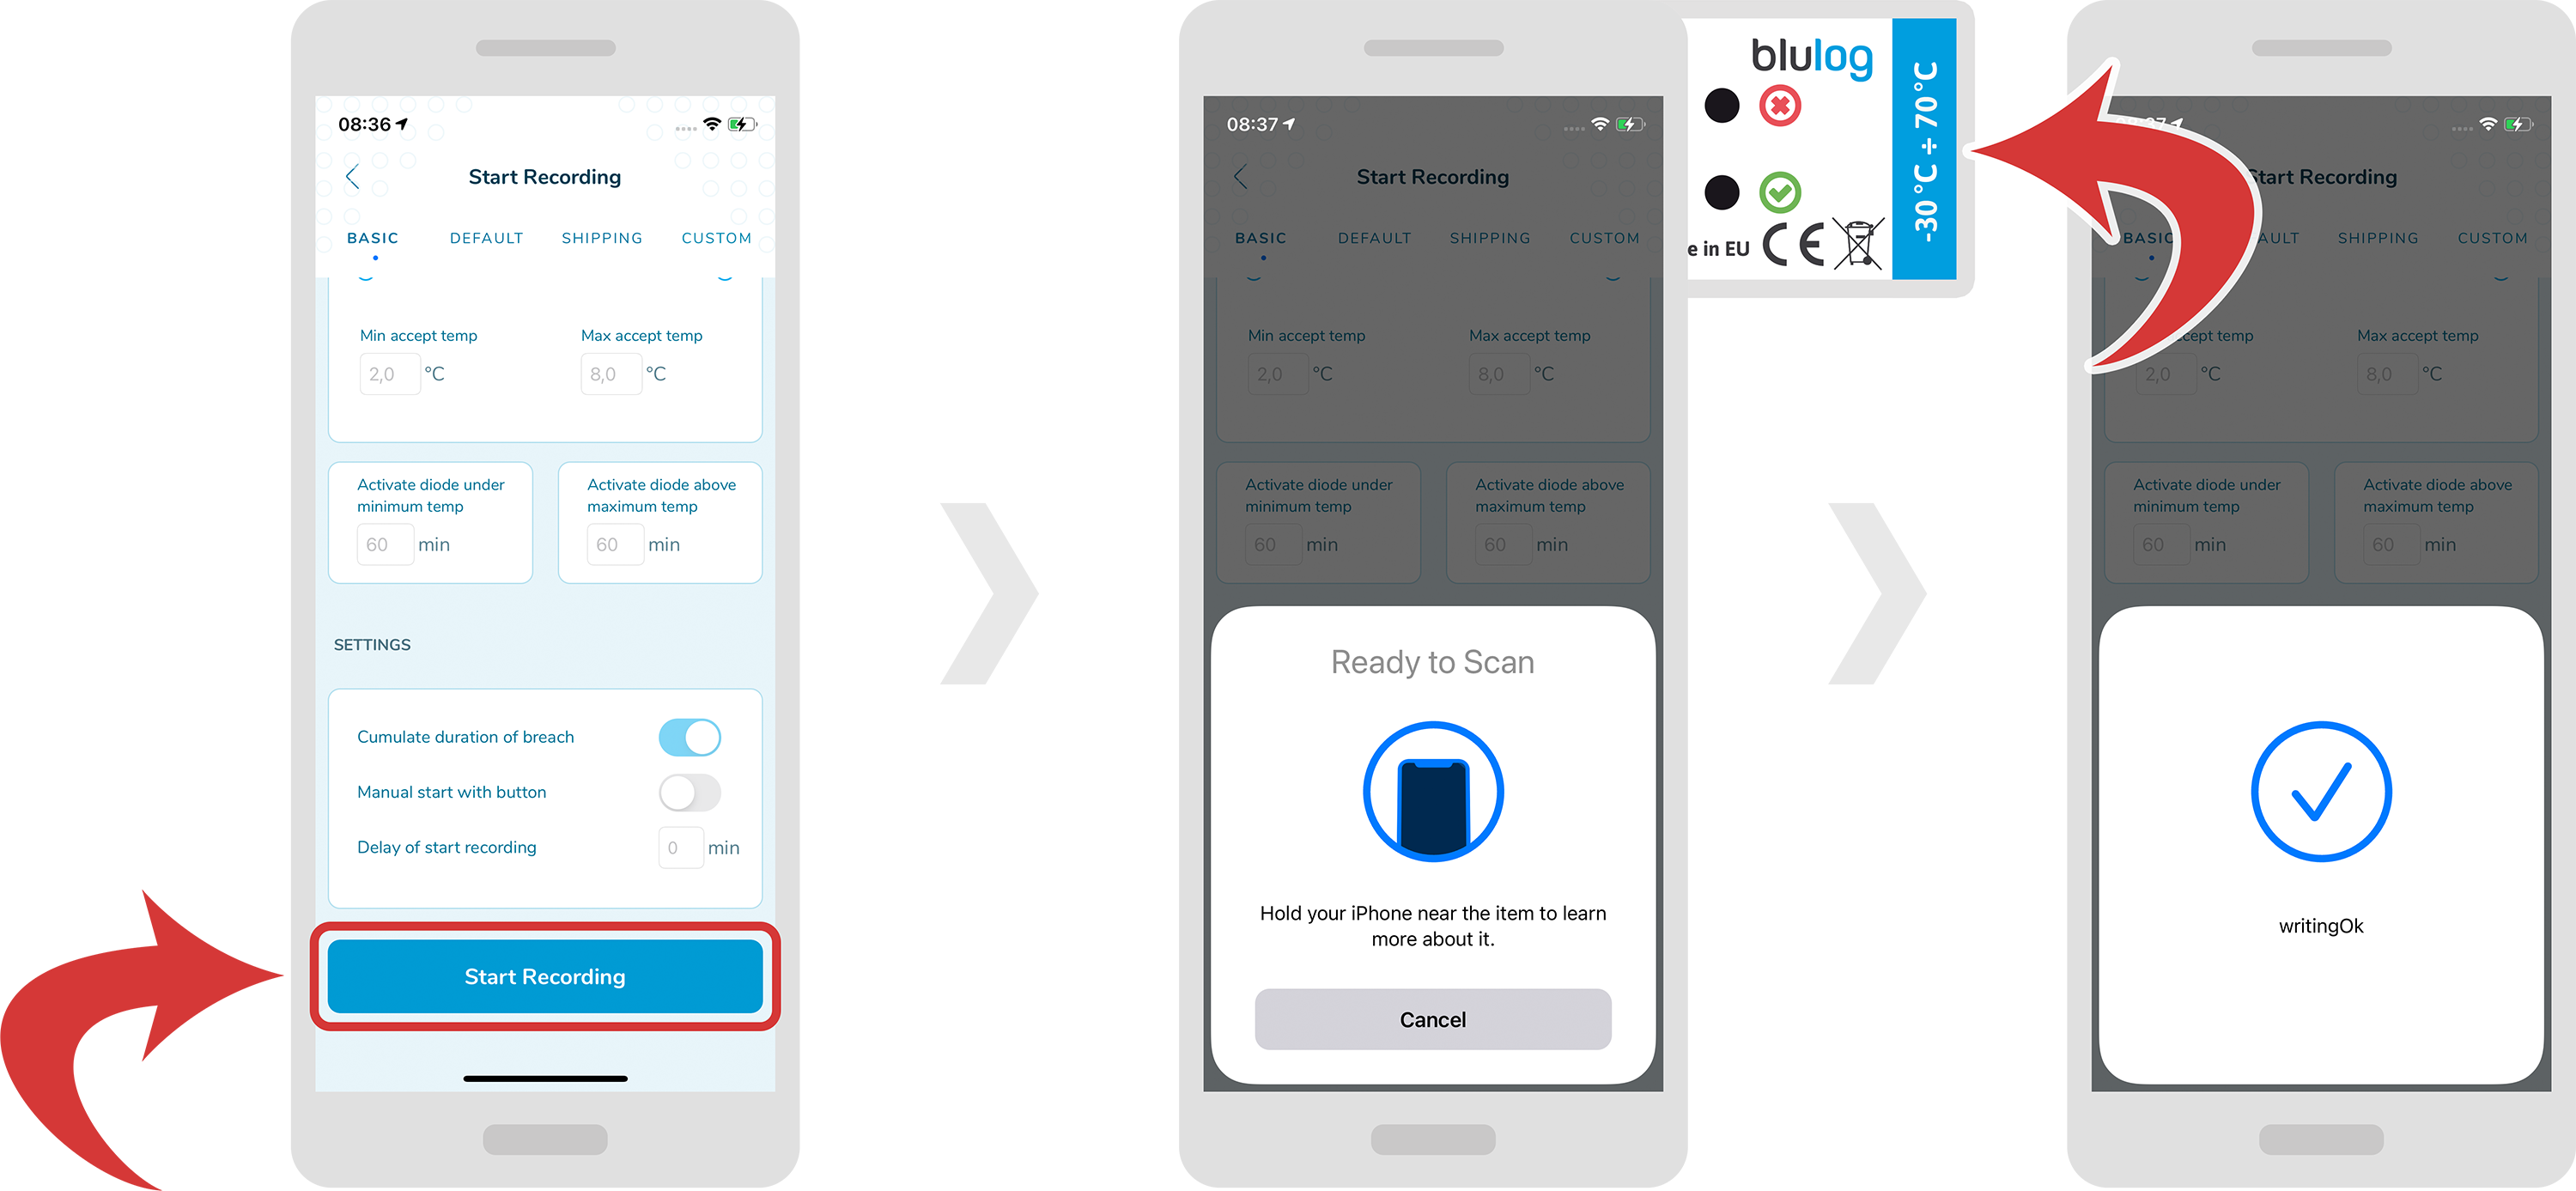
After starting a new recording you will be asked to wait 10 seconds for the logger to restart and scan it again. Once you scan it you should be able to see the confirmation message and then logger details.
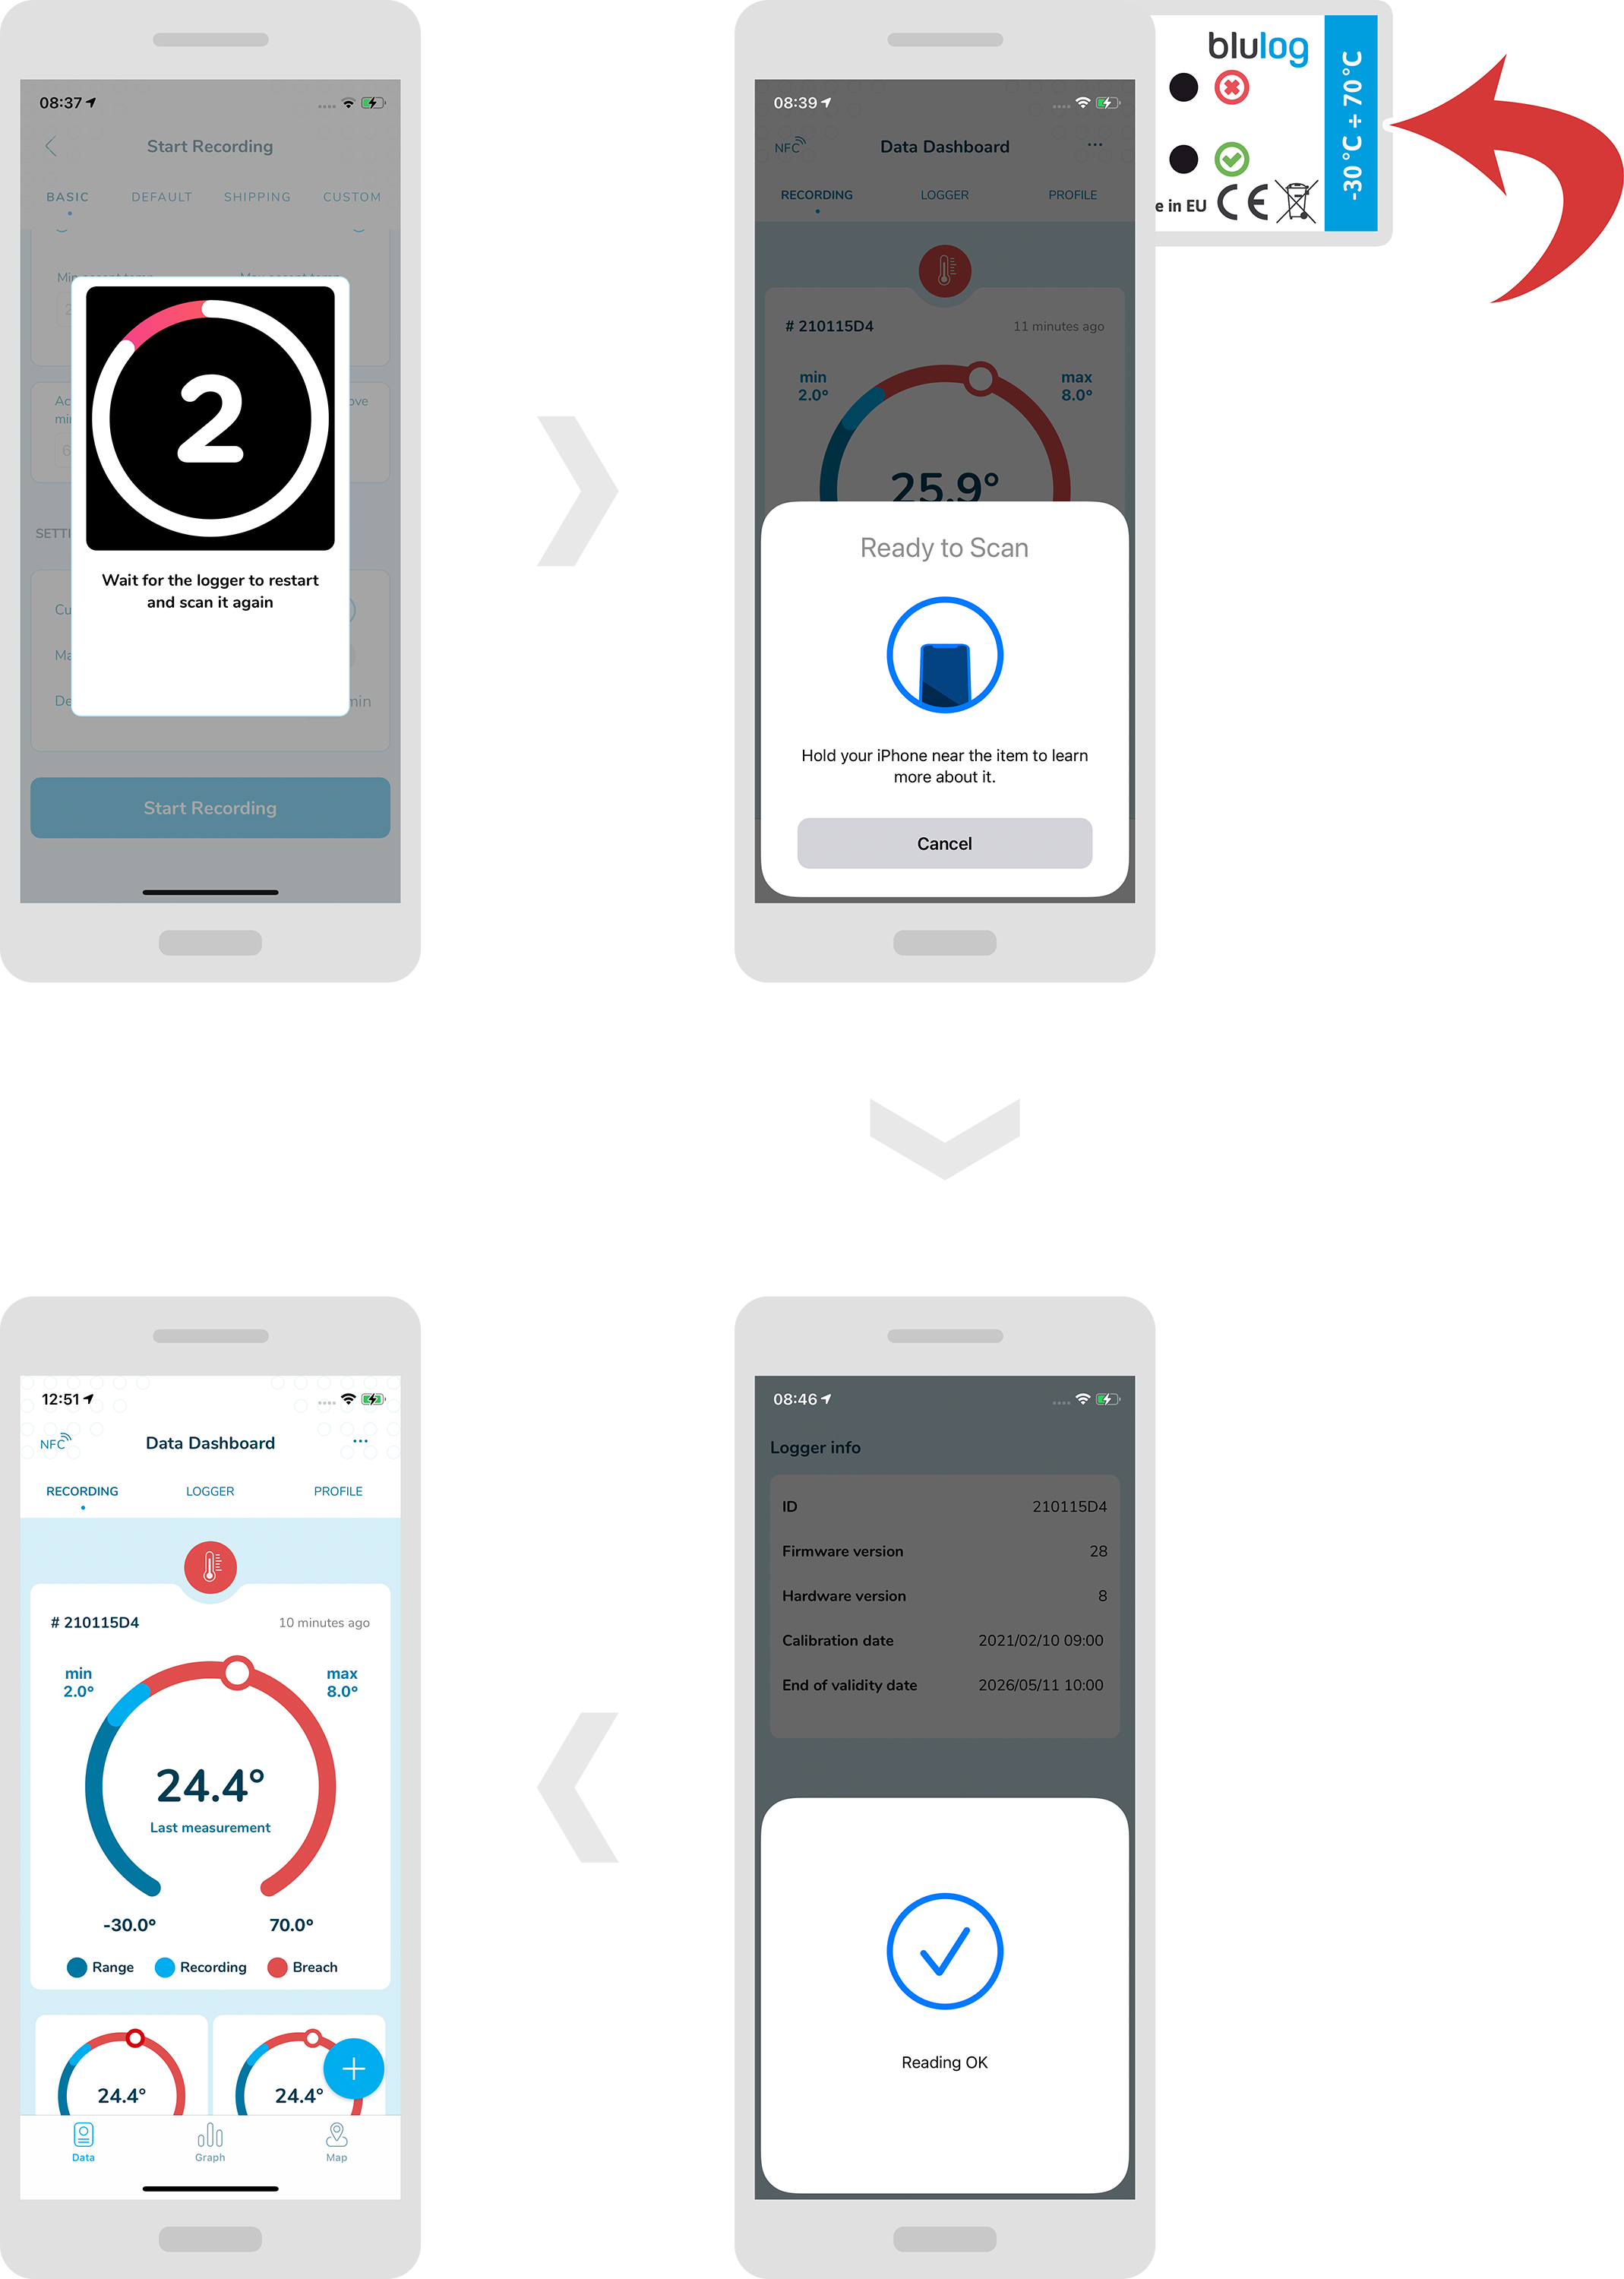
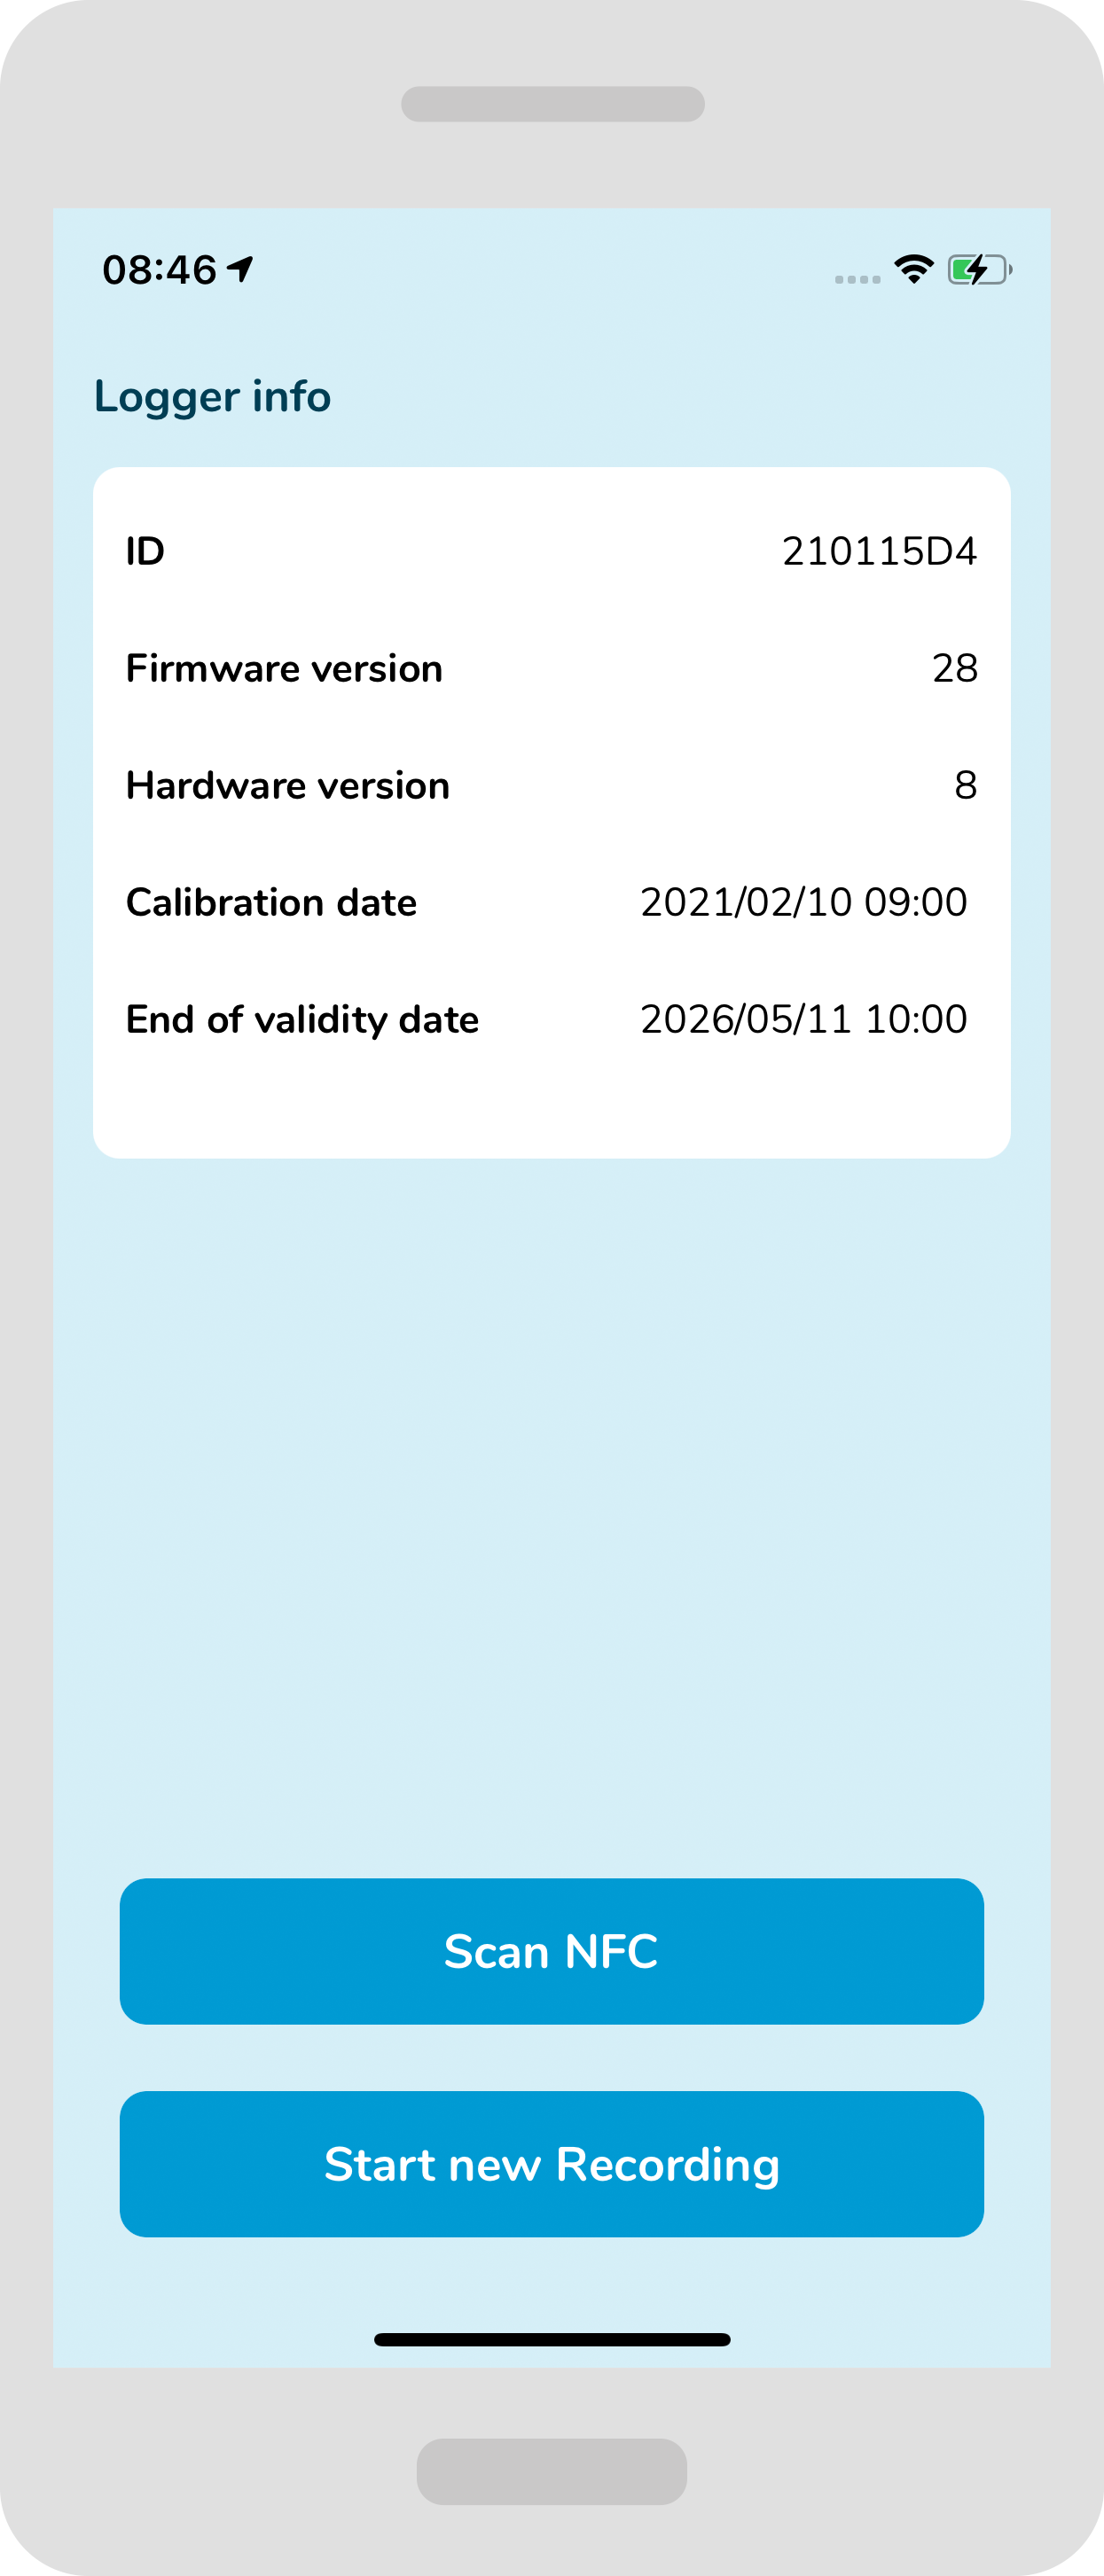 If the recording has not started yet it comes with more basic information (like in this example). Please wait few more seconds and scan again.
If you have chosen the manual start, press the “PUSH START” button visible on the logger for around 3 seconds until you see both diodes blinking.
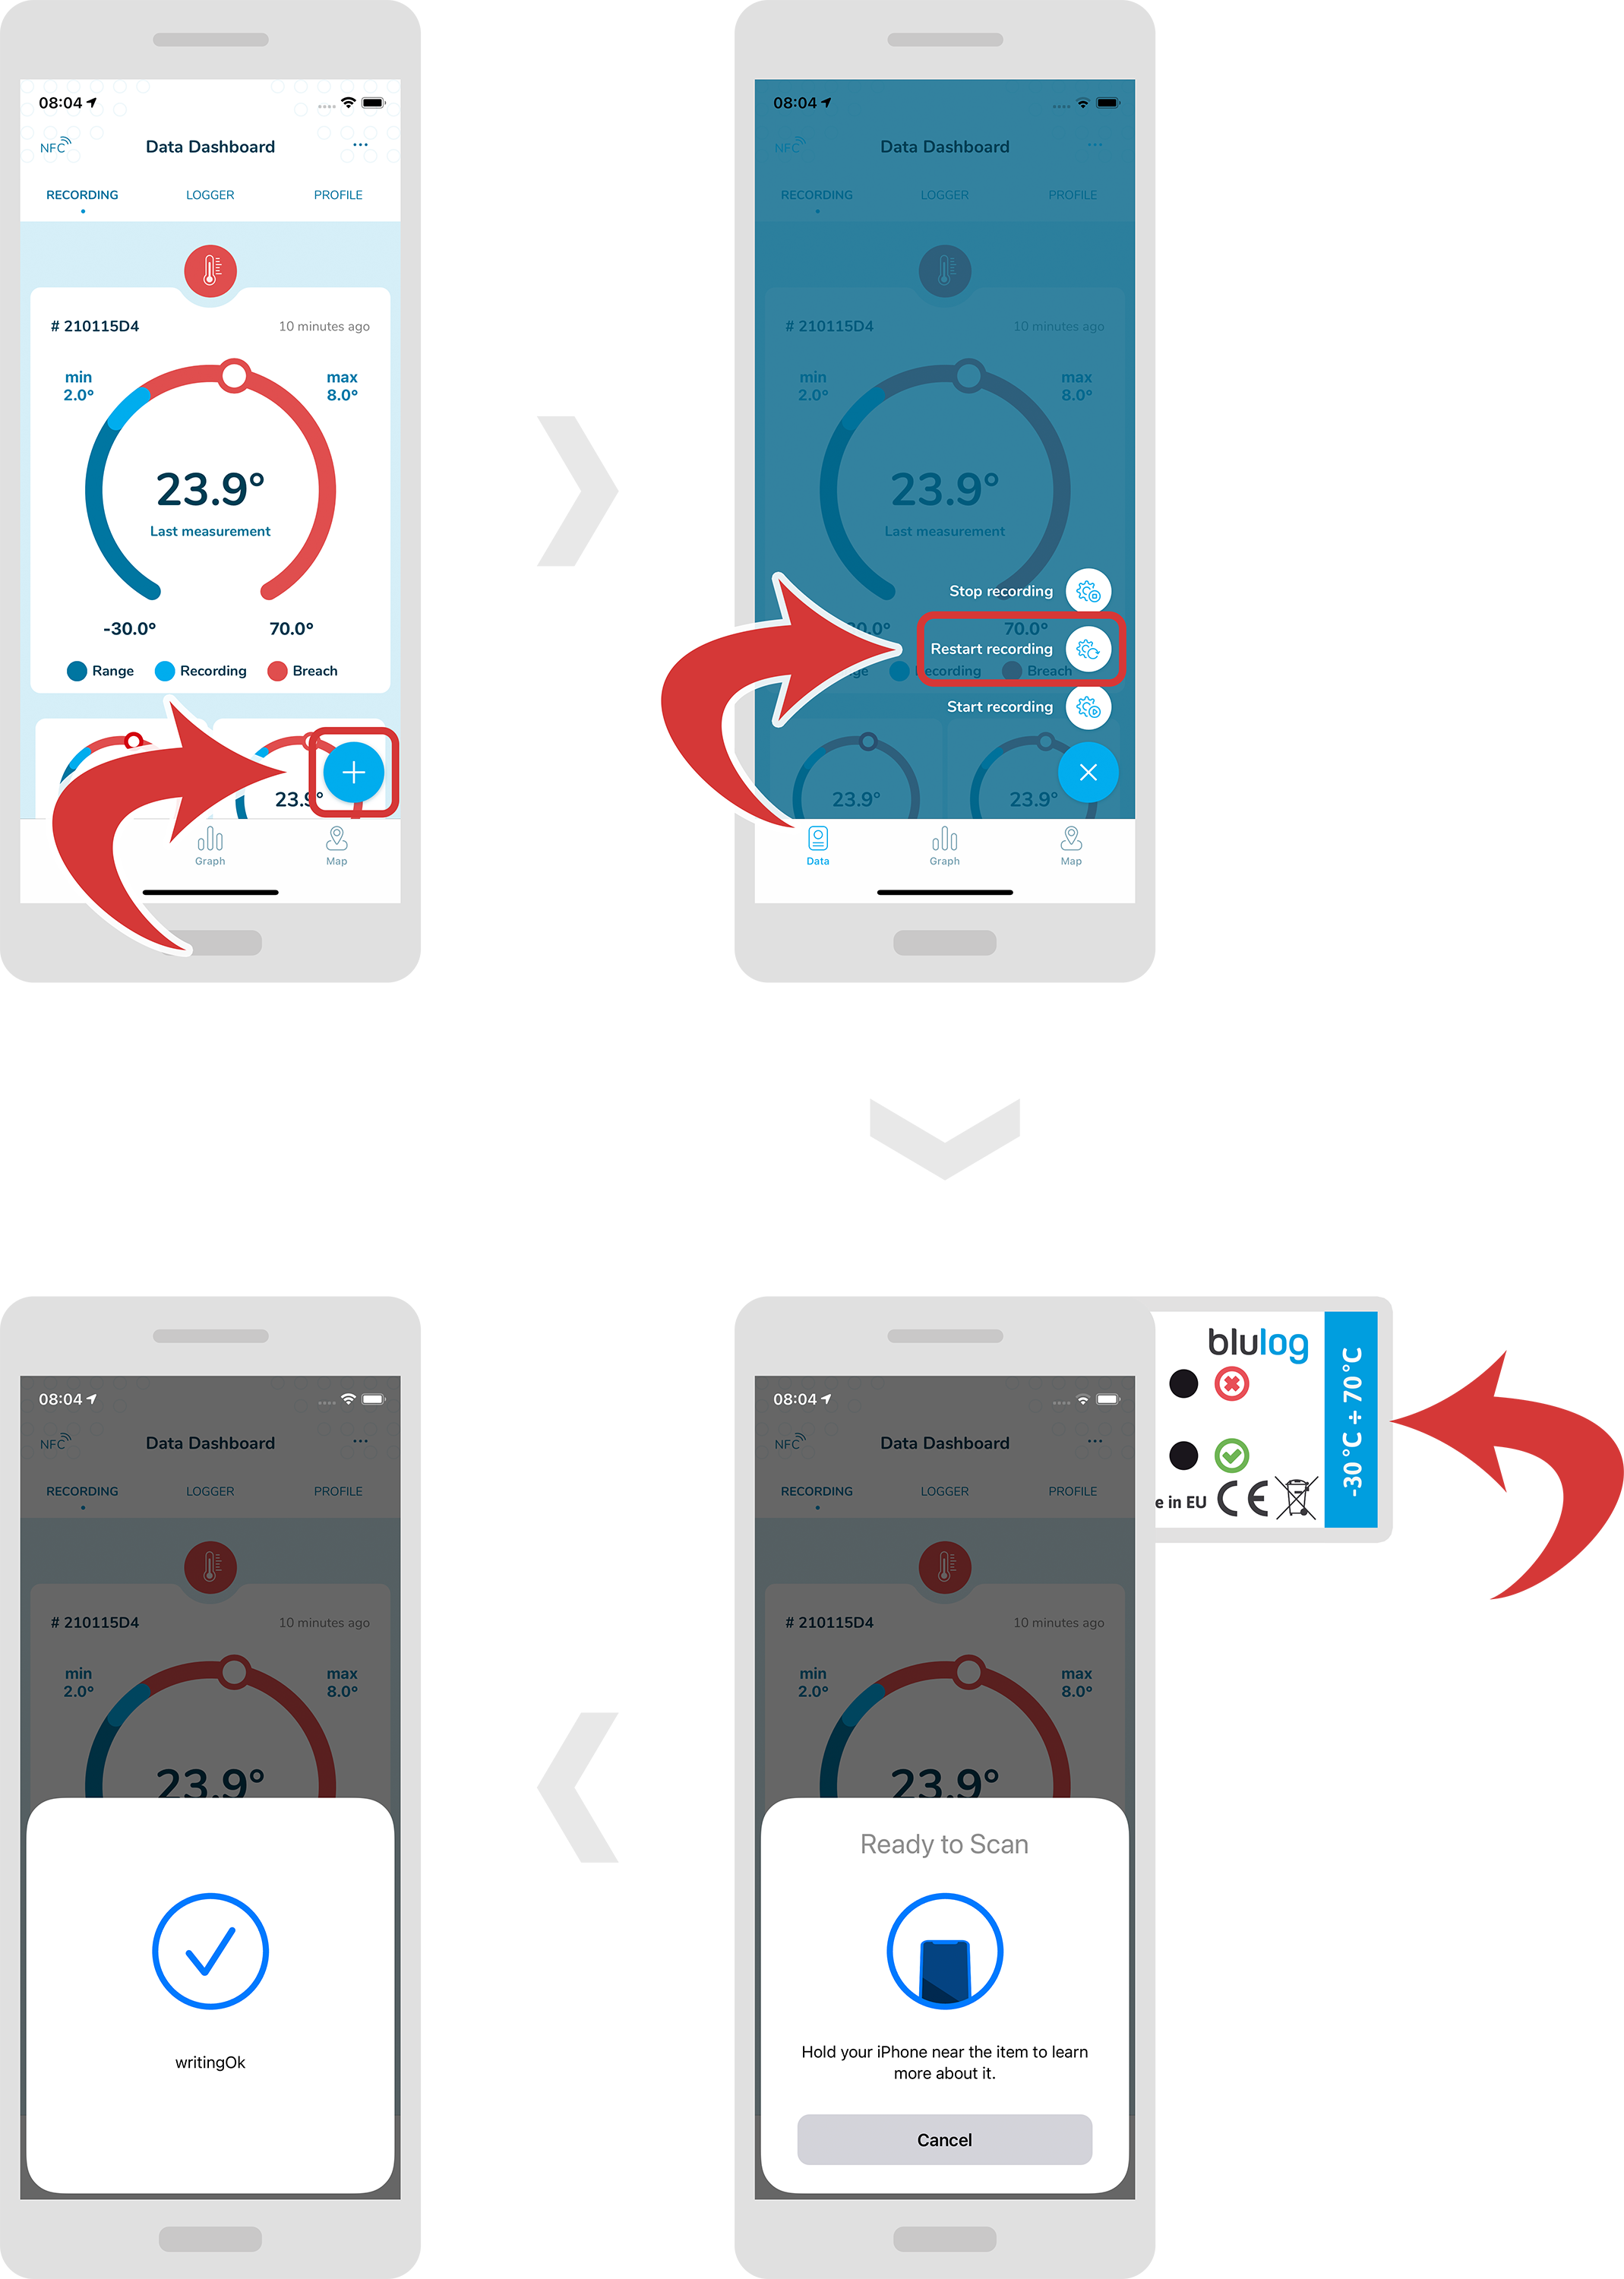
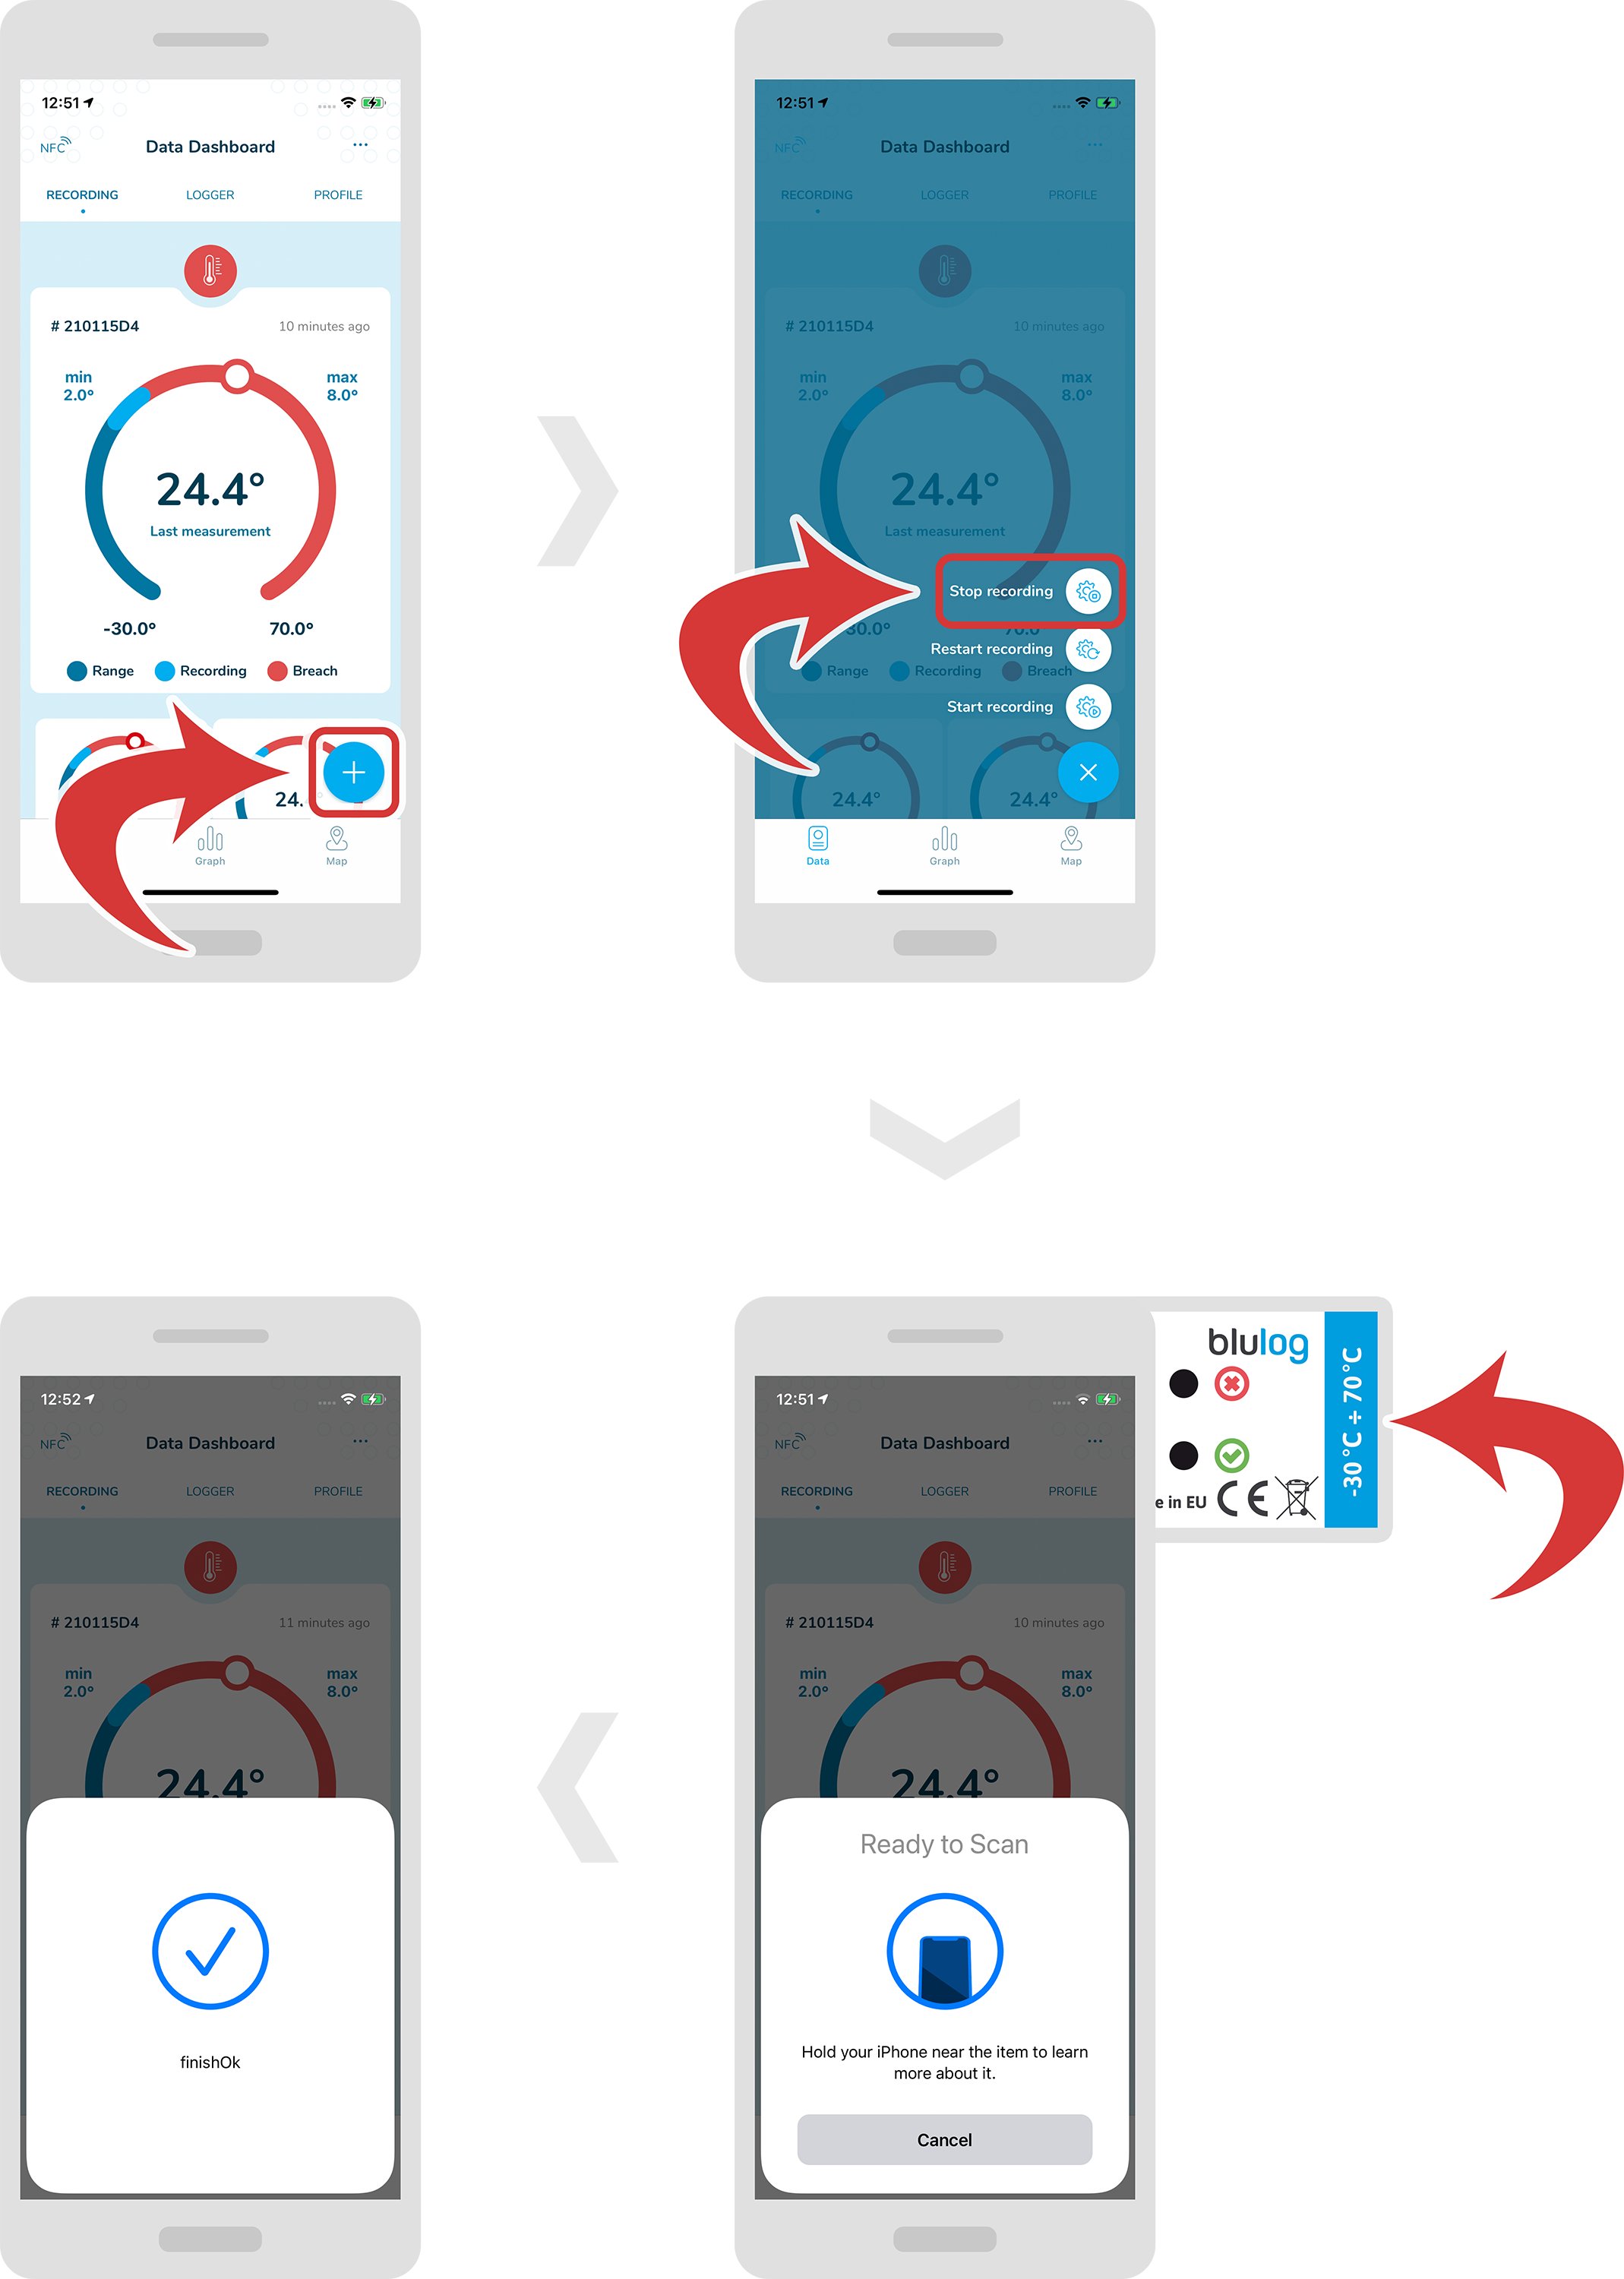
Stop recording
-
To stop the recording, press on the “+” button at the bottom right.
-
Select “Stop recording”.
-
Scan the logger and you should be able to see a confirmation message.
Restart recording
-
If you want to start a new recording using the same parameters as your previous one, press on the “+” button at the bottom right.
-
Select “Restart recording”.
-
Scan the logger and you should be able to see a confirmation message.