Overview
In order to access hubs, click the “Hubs” link on the left menu.

Legend:
![]()
Status – presents the current status of the hub. Here are the available statuses:
![]()
A “green on” icon indicates that the hub is connected to bluConsole.
![]()
A “grey off” icon indicates that the hub is not connected to bluConsole.
Last seen – presents the date and time of the last data transmission from the hub to bluConsole.
Active – presents whether the hub is active or archived.
Power status – presents whether the hub is connected to power supply or not. There are 2 options:
![]()
A “plug” icon signifies that the hub is connected to the power supply.
![]()
A “crossed plug” icon signifies that the hub is not connected to the power supply.
Edit
- In order to edit a hub, click on the hub’s serial number. A new window should pop up where you can edit the information.
- Once you are finished, click the “Save” button. Wait until the progress bar at the top finishes.

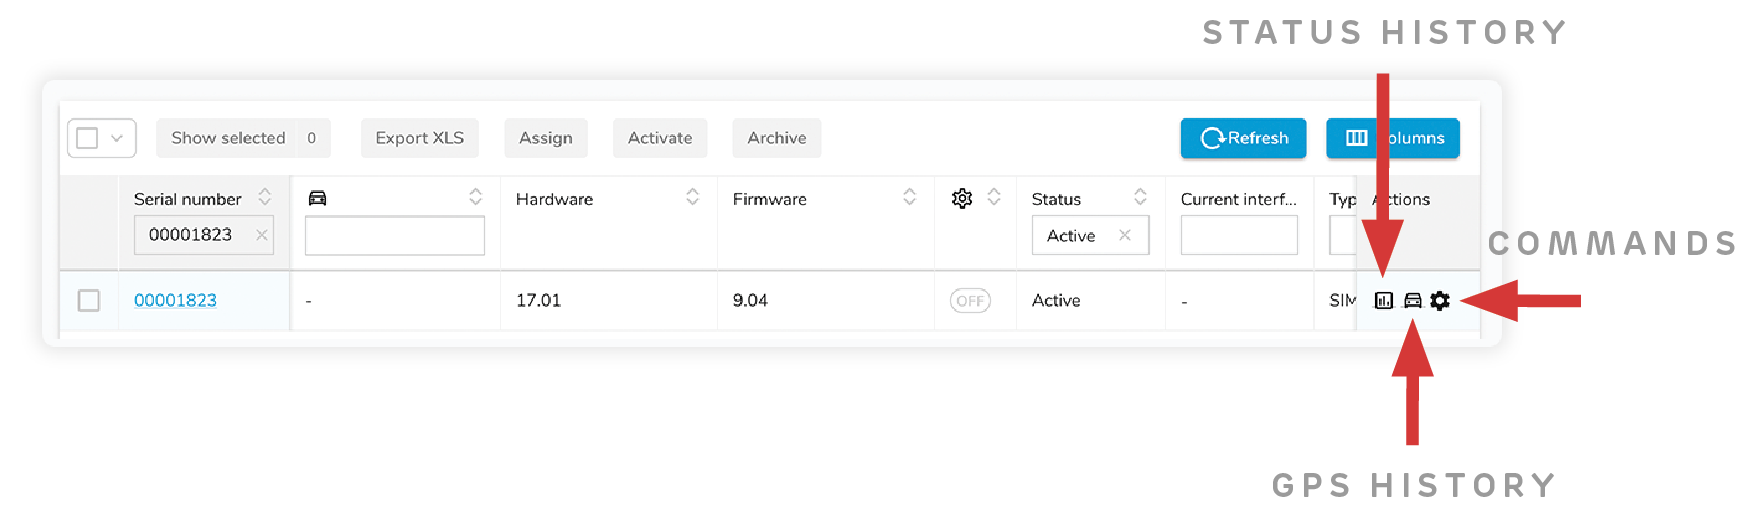
Commands overview
- In order to access commands, click on the “gear” icon.
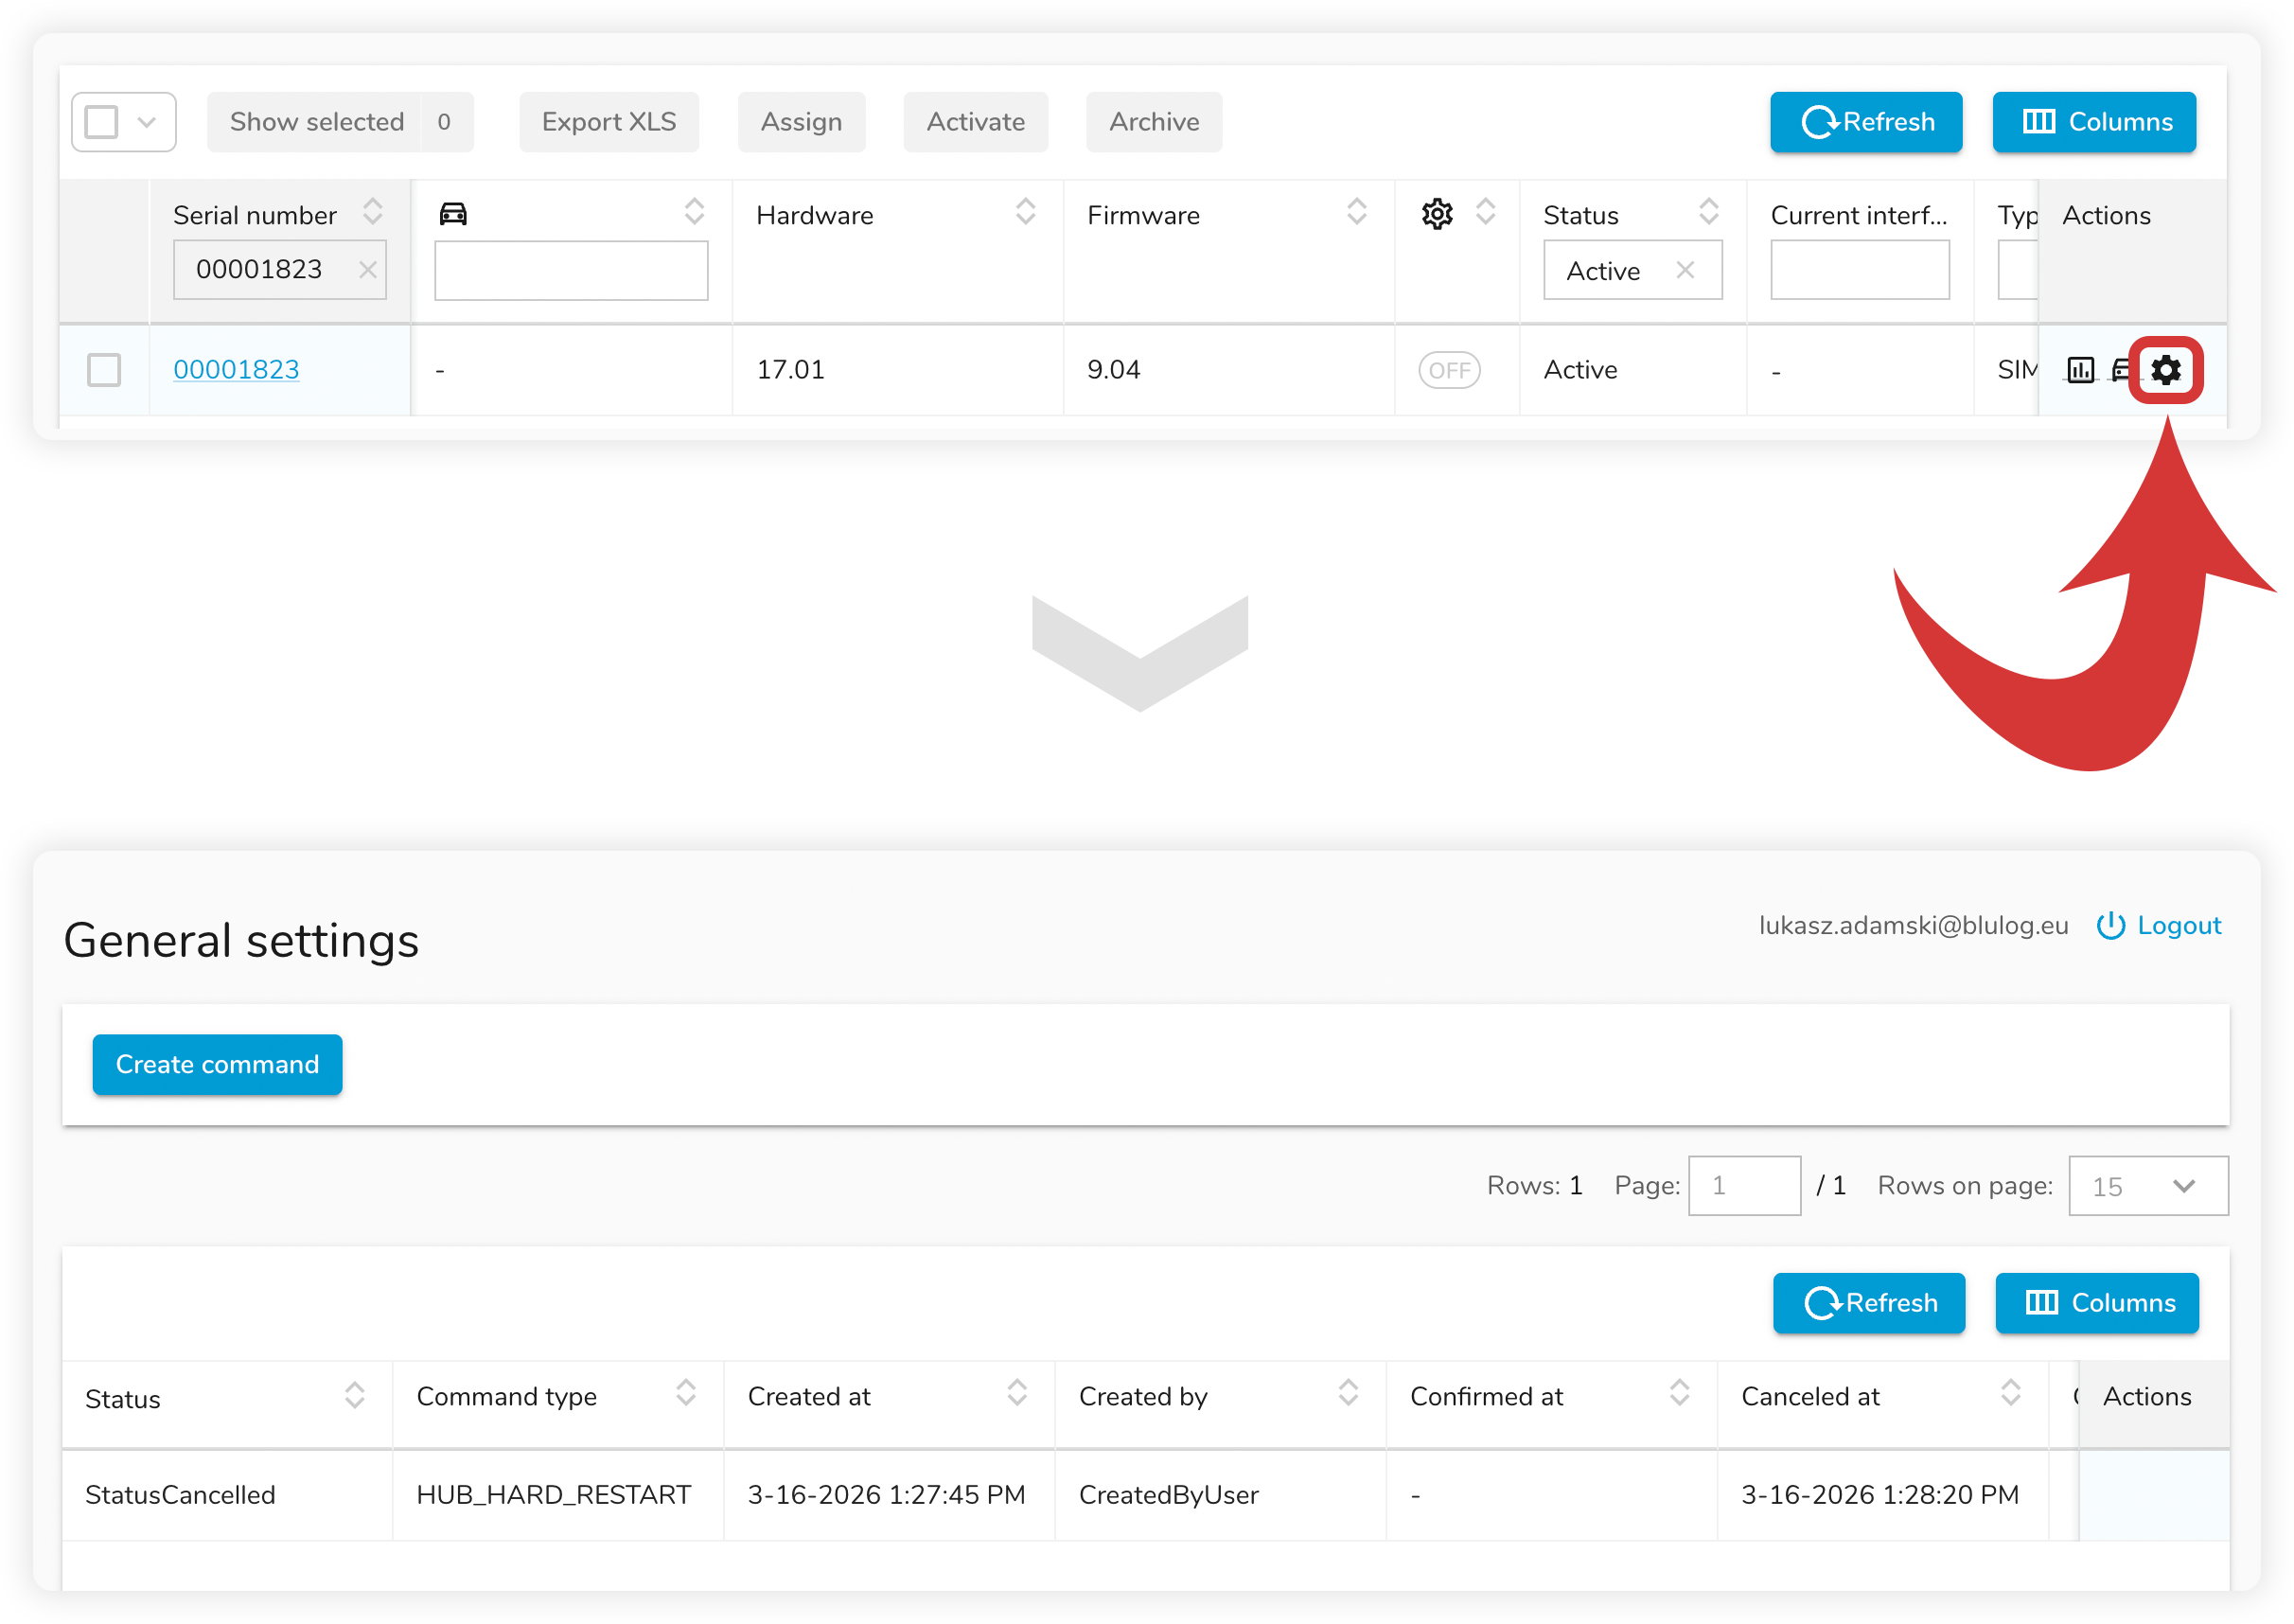
Send/Delete command
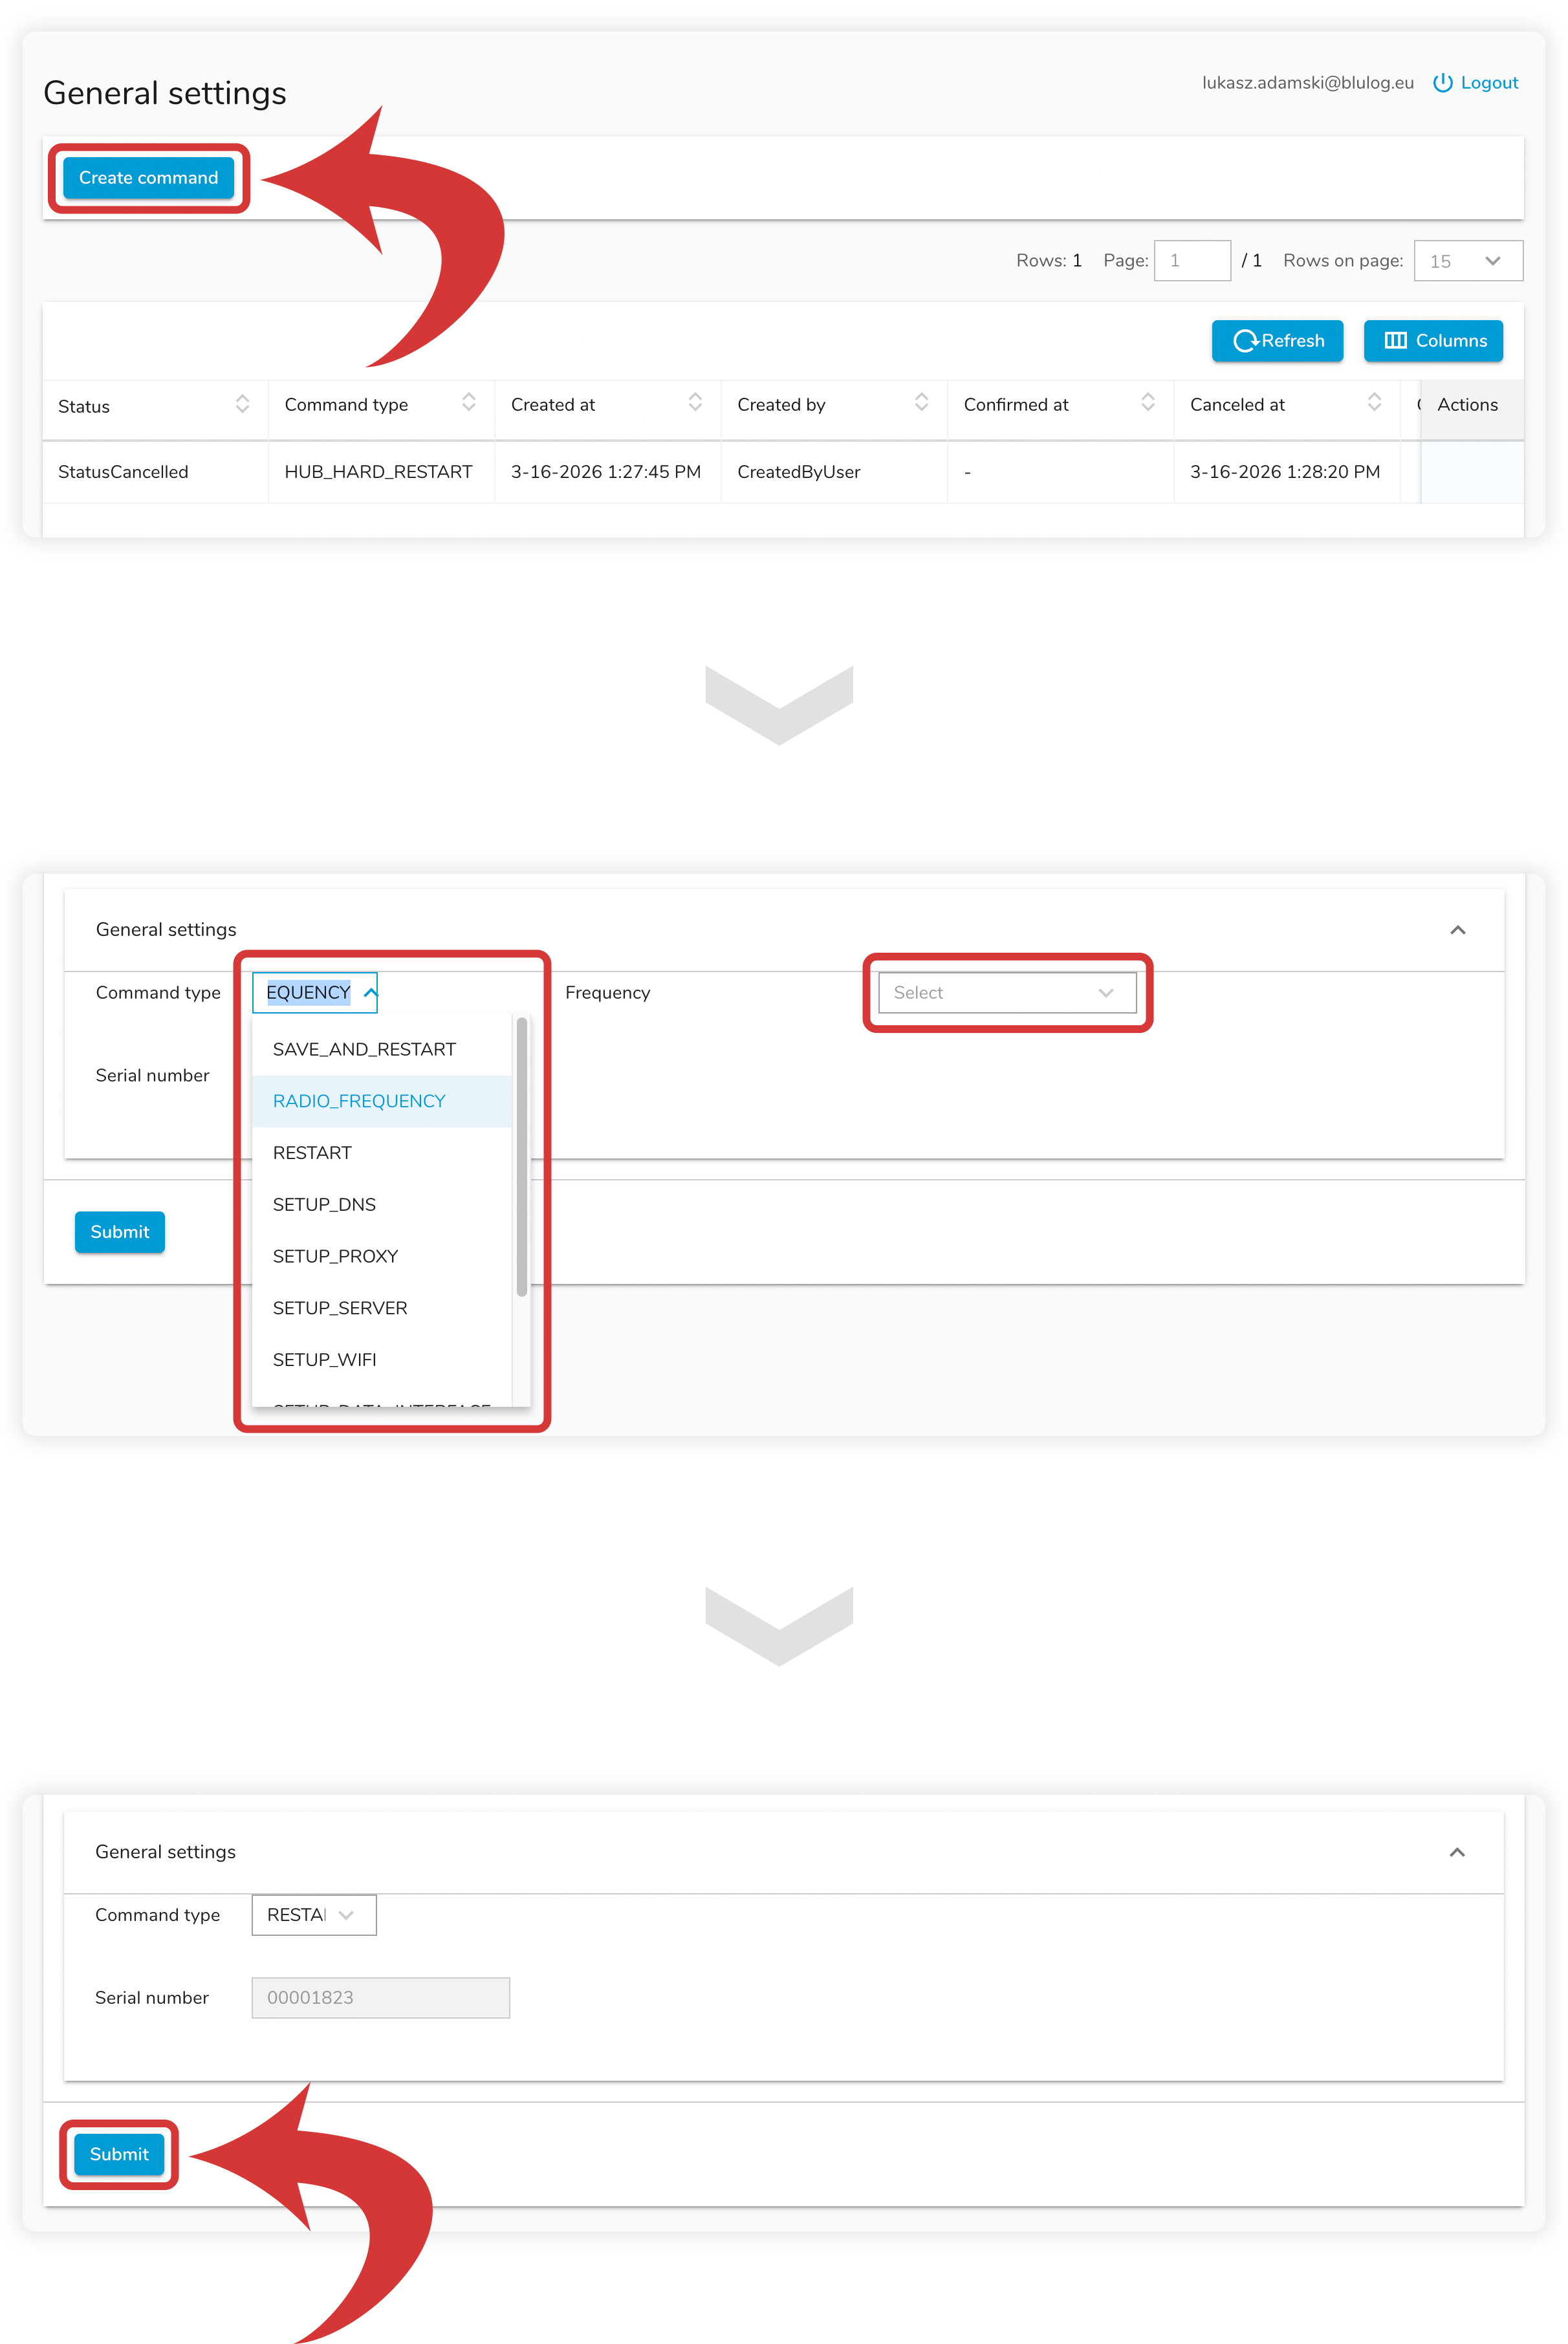
- In order to send command(s), click the “Create command” button at the top.
- Select the command type and fill up the necessary fields if they appear.
- Click the “Submit” button. You should see a “success” message at the bottom.
- Go back to the commands dashboard by click the “left arrow” button at the top. You should see a new line in a table with the command you just submitted.
- Add additional commands you would like to save following the steps above. Once the status for submitted commands changes from “StatusNew” to “StatusDone”, submit a command called “SAVE_AND_RESTART”.
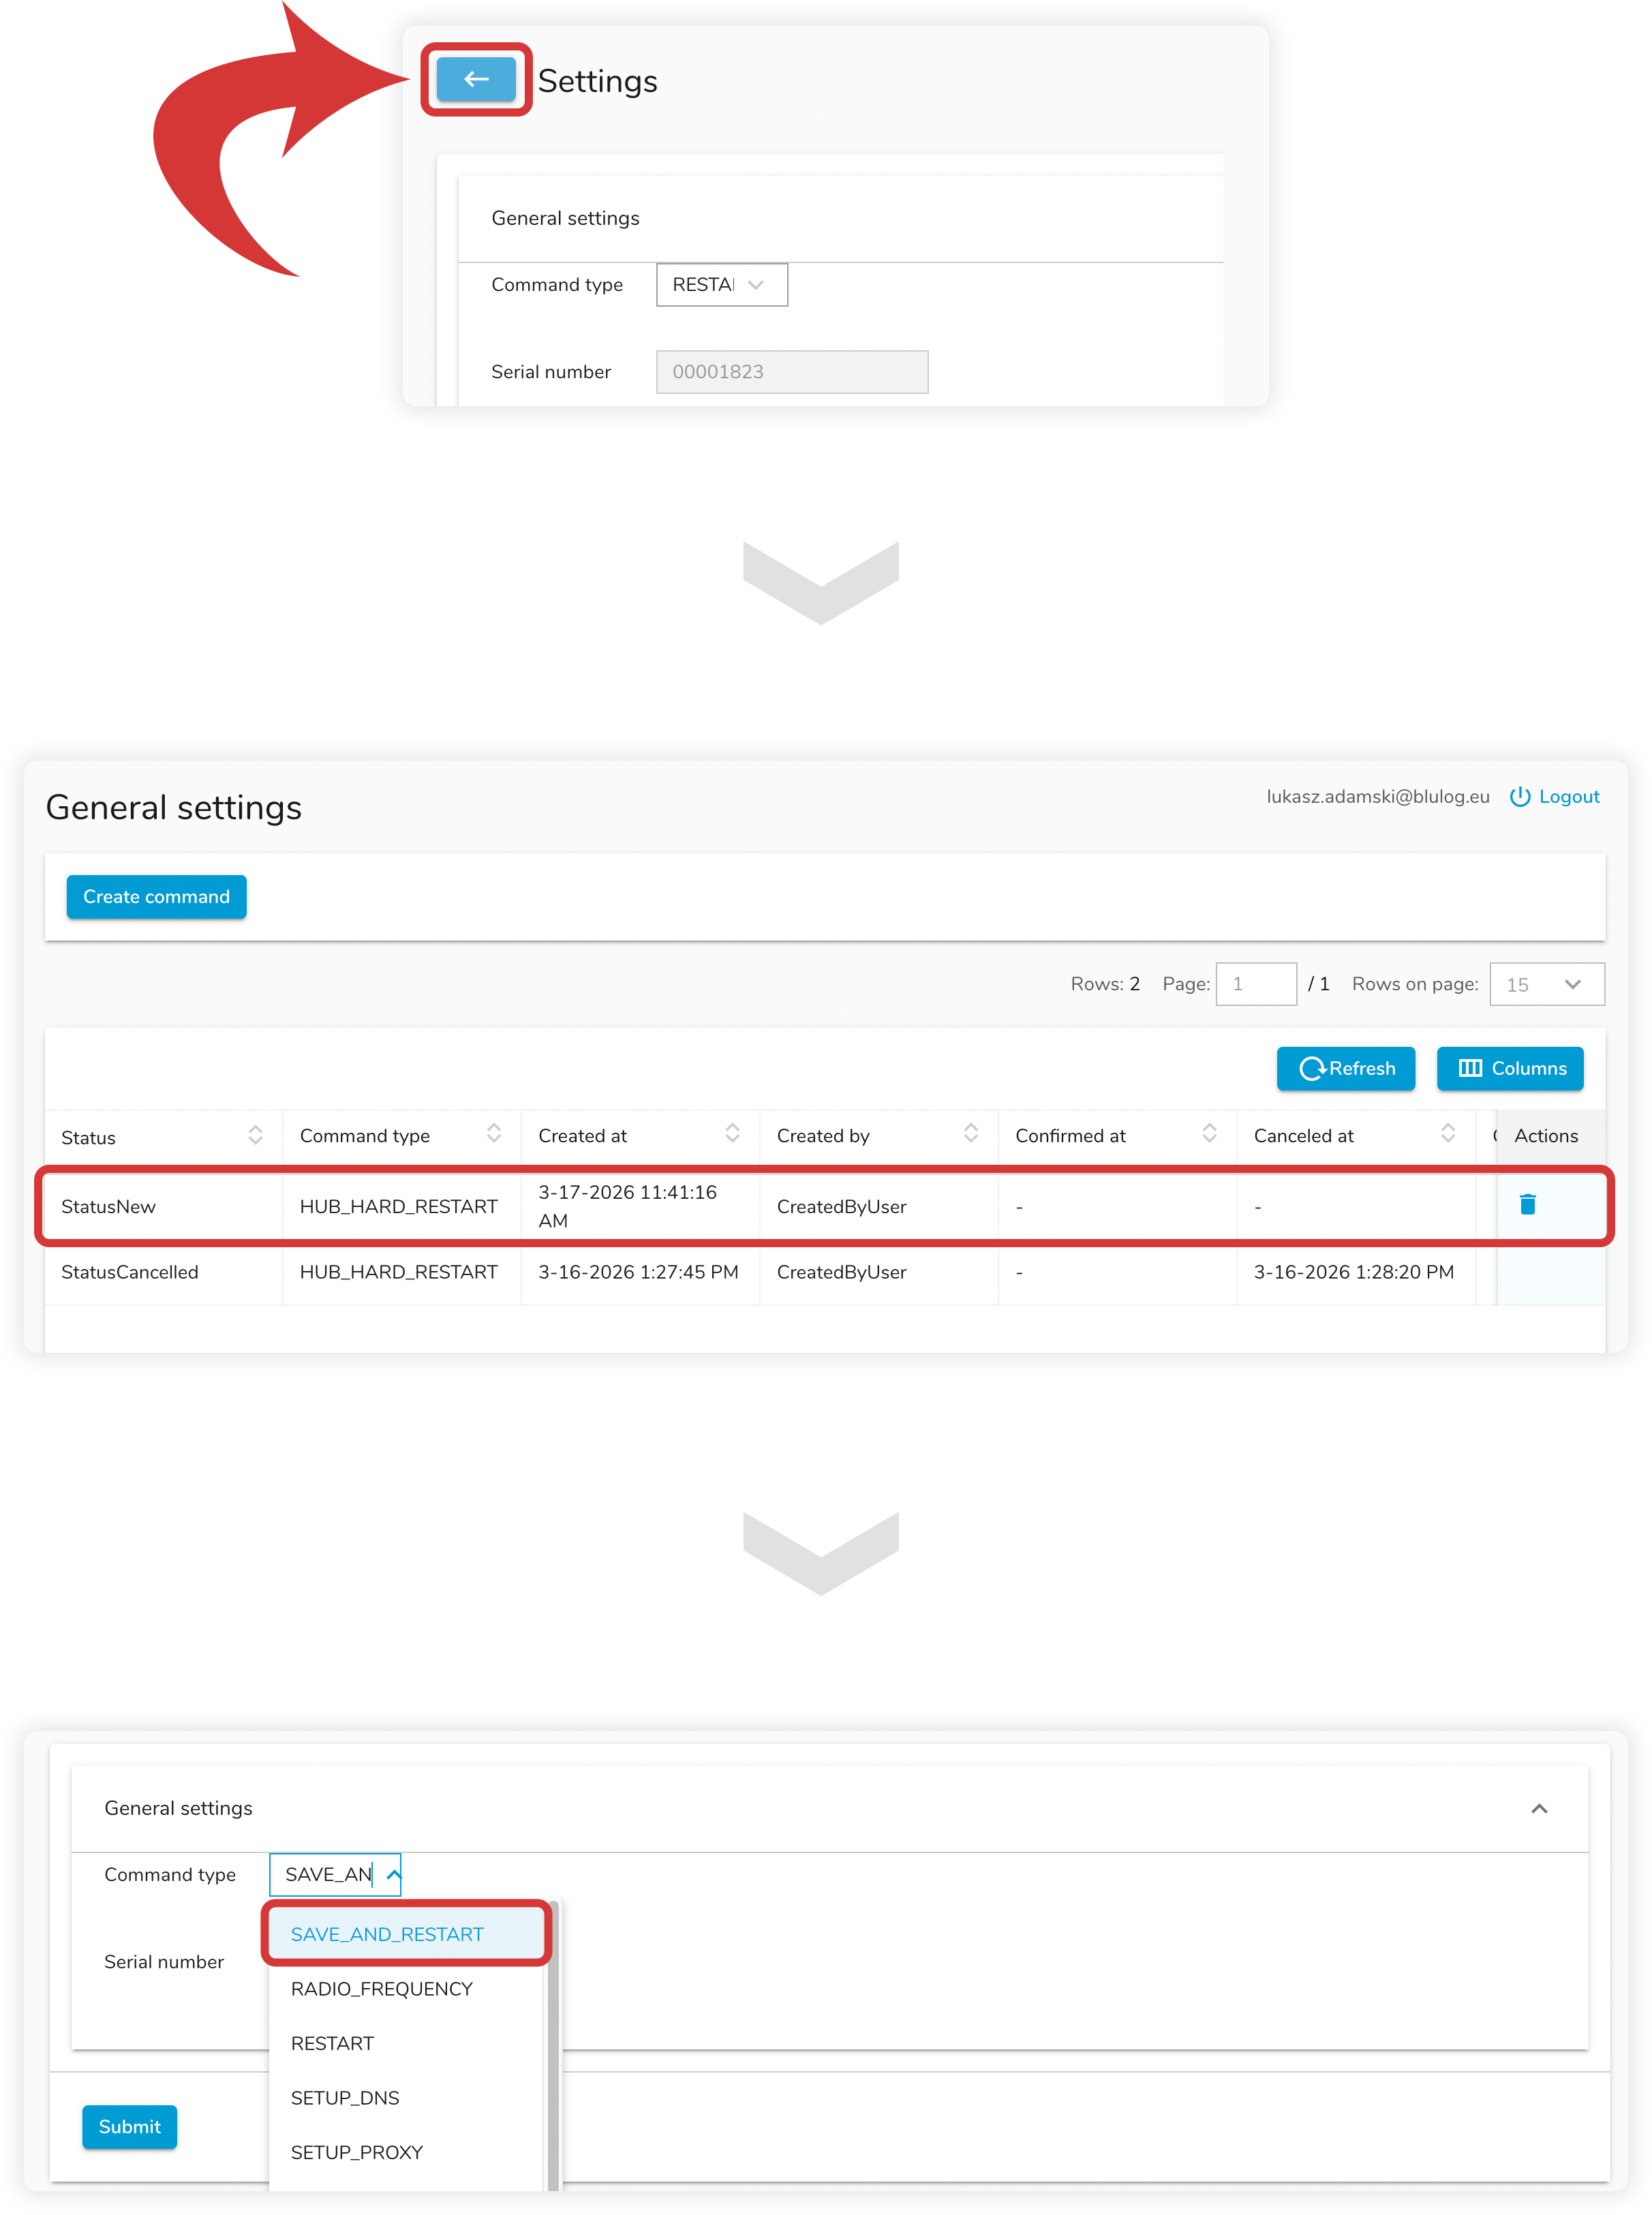
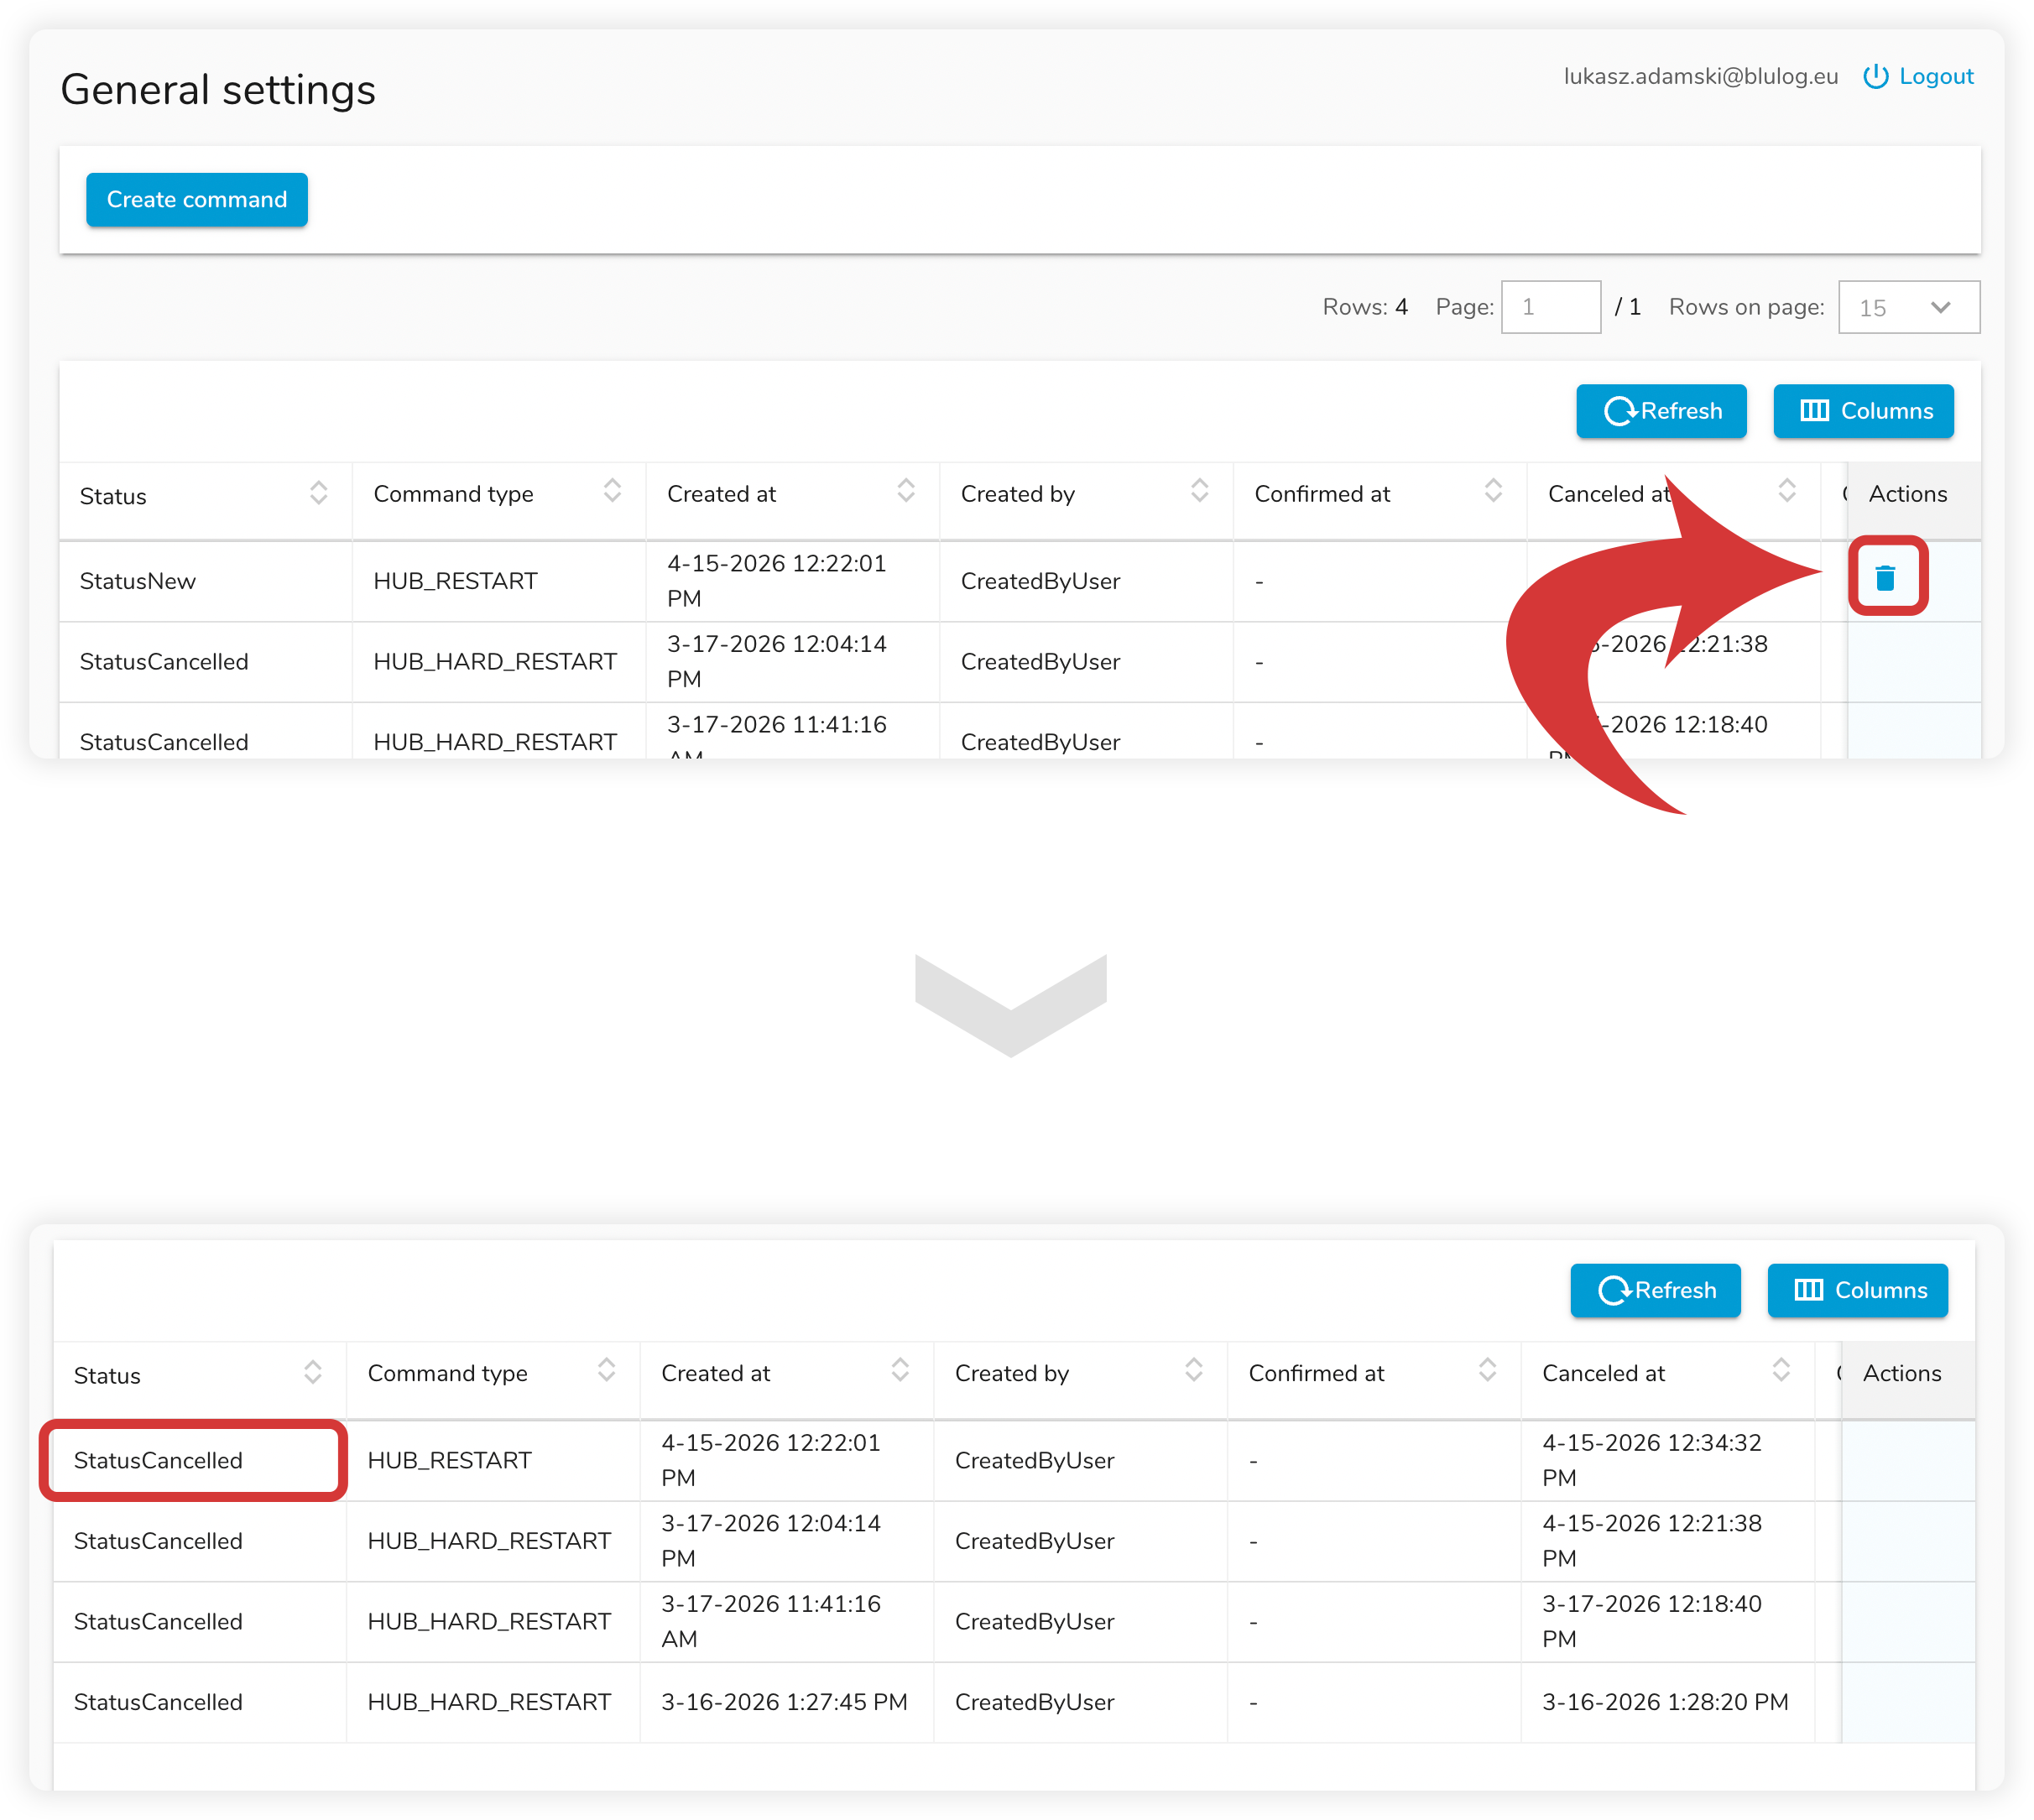
- In order to delete command(s), you can either run the “RESTART” command to clean all the commands and start from a clean slate (follow analogically as explained above), or delete them individually, by clicking the “trash” icon next to them.
- Once clicking the “trash” icon, you should see a success message at the bottom. The status should also change to “StatusCancelled” after refreshing the page.
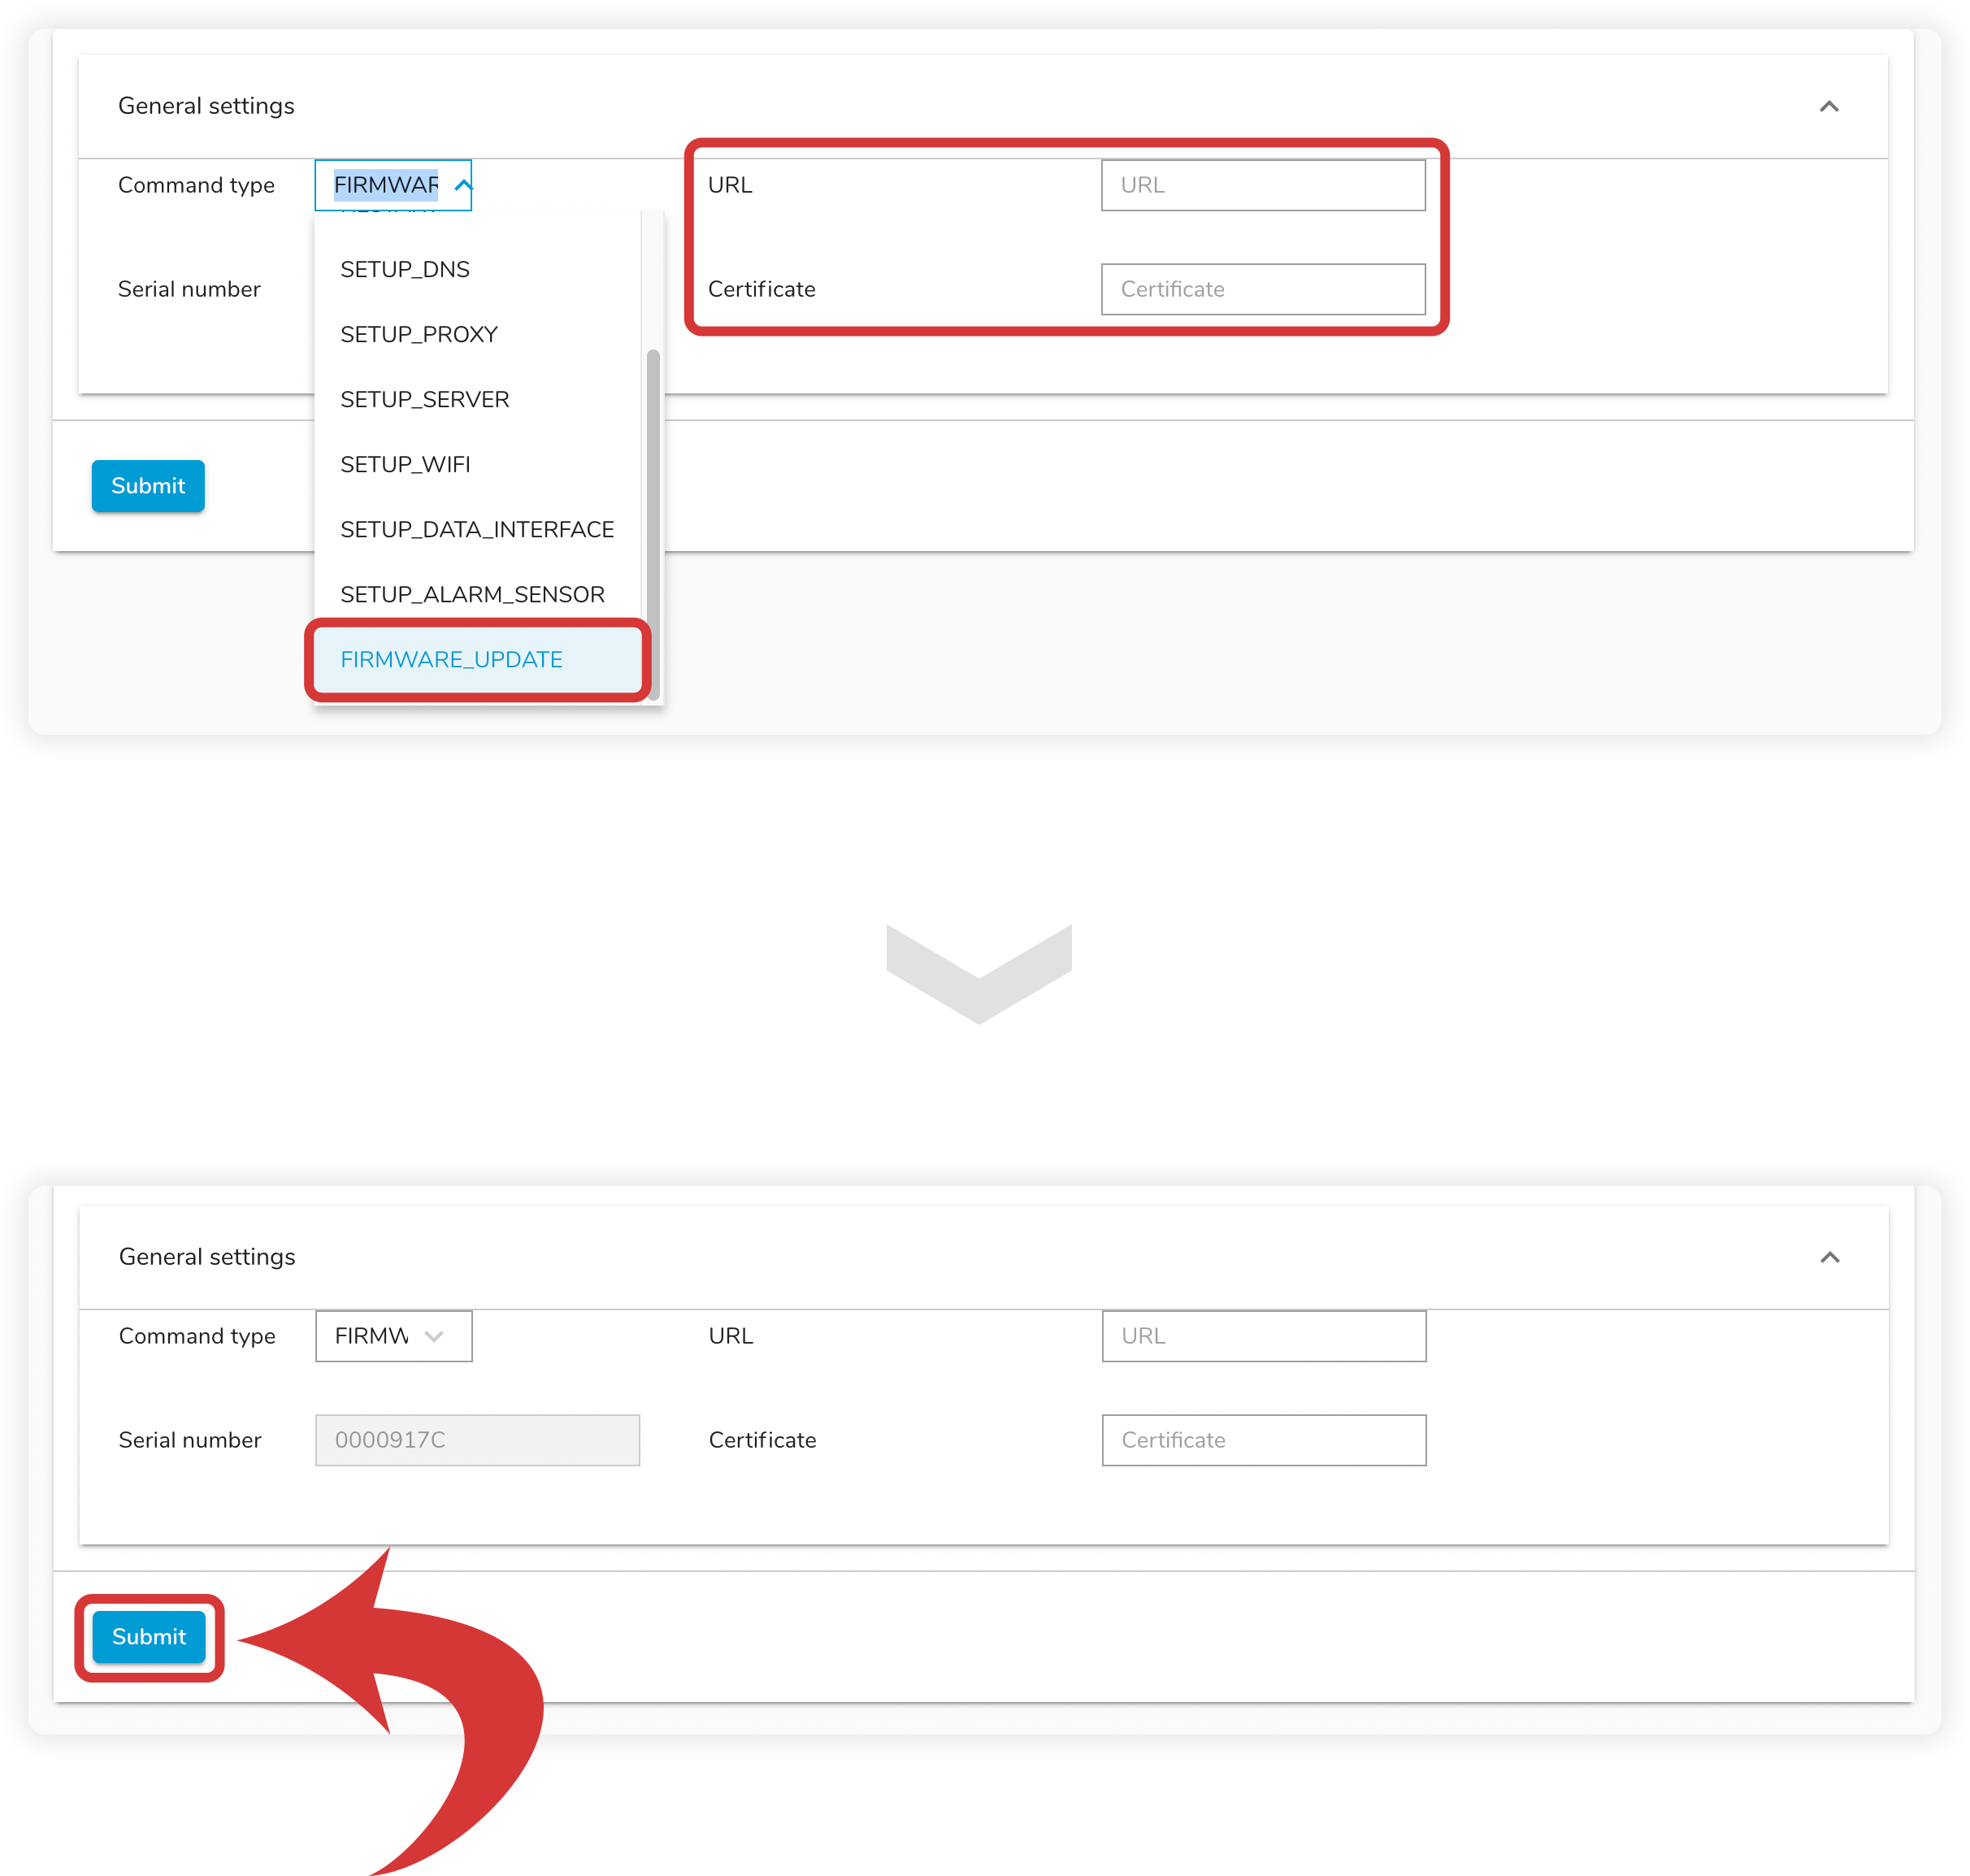
- In order to update firmware, select “FIRMWARE_UPDATE” in command type.
- Insert the URL to the firmware and certificate, in case you were provided with it.
- Click the “Submit” button.
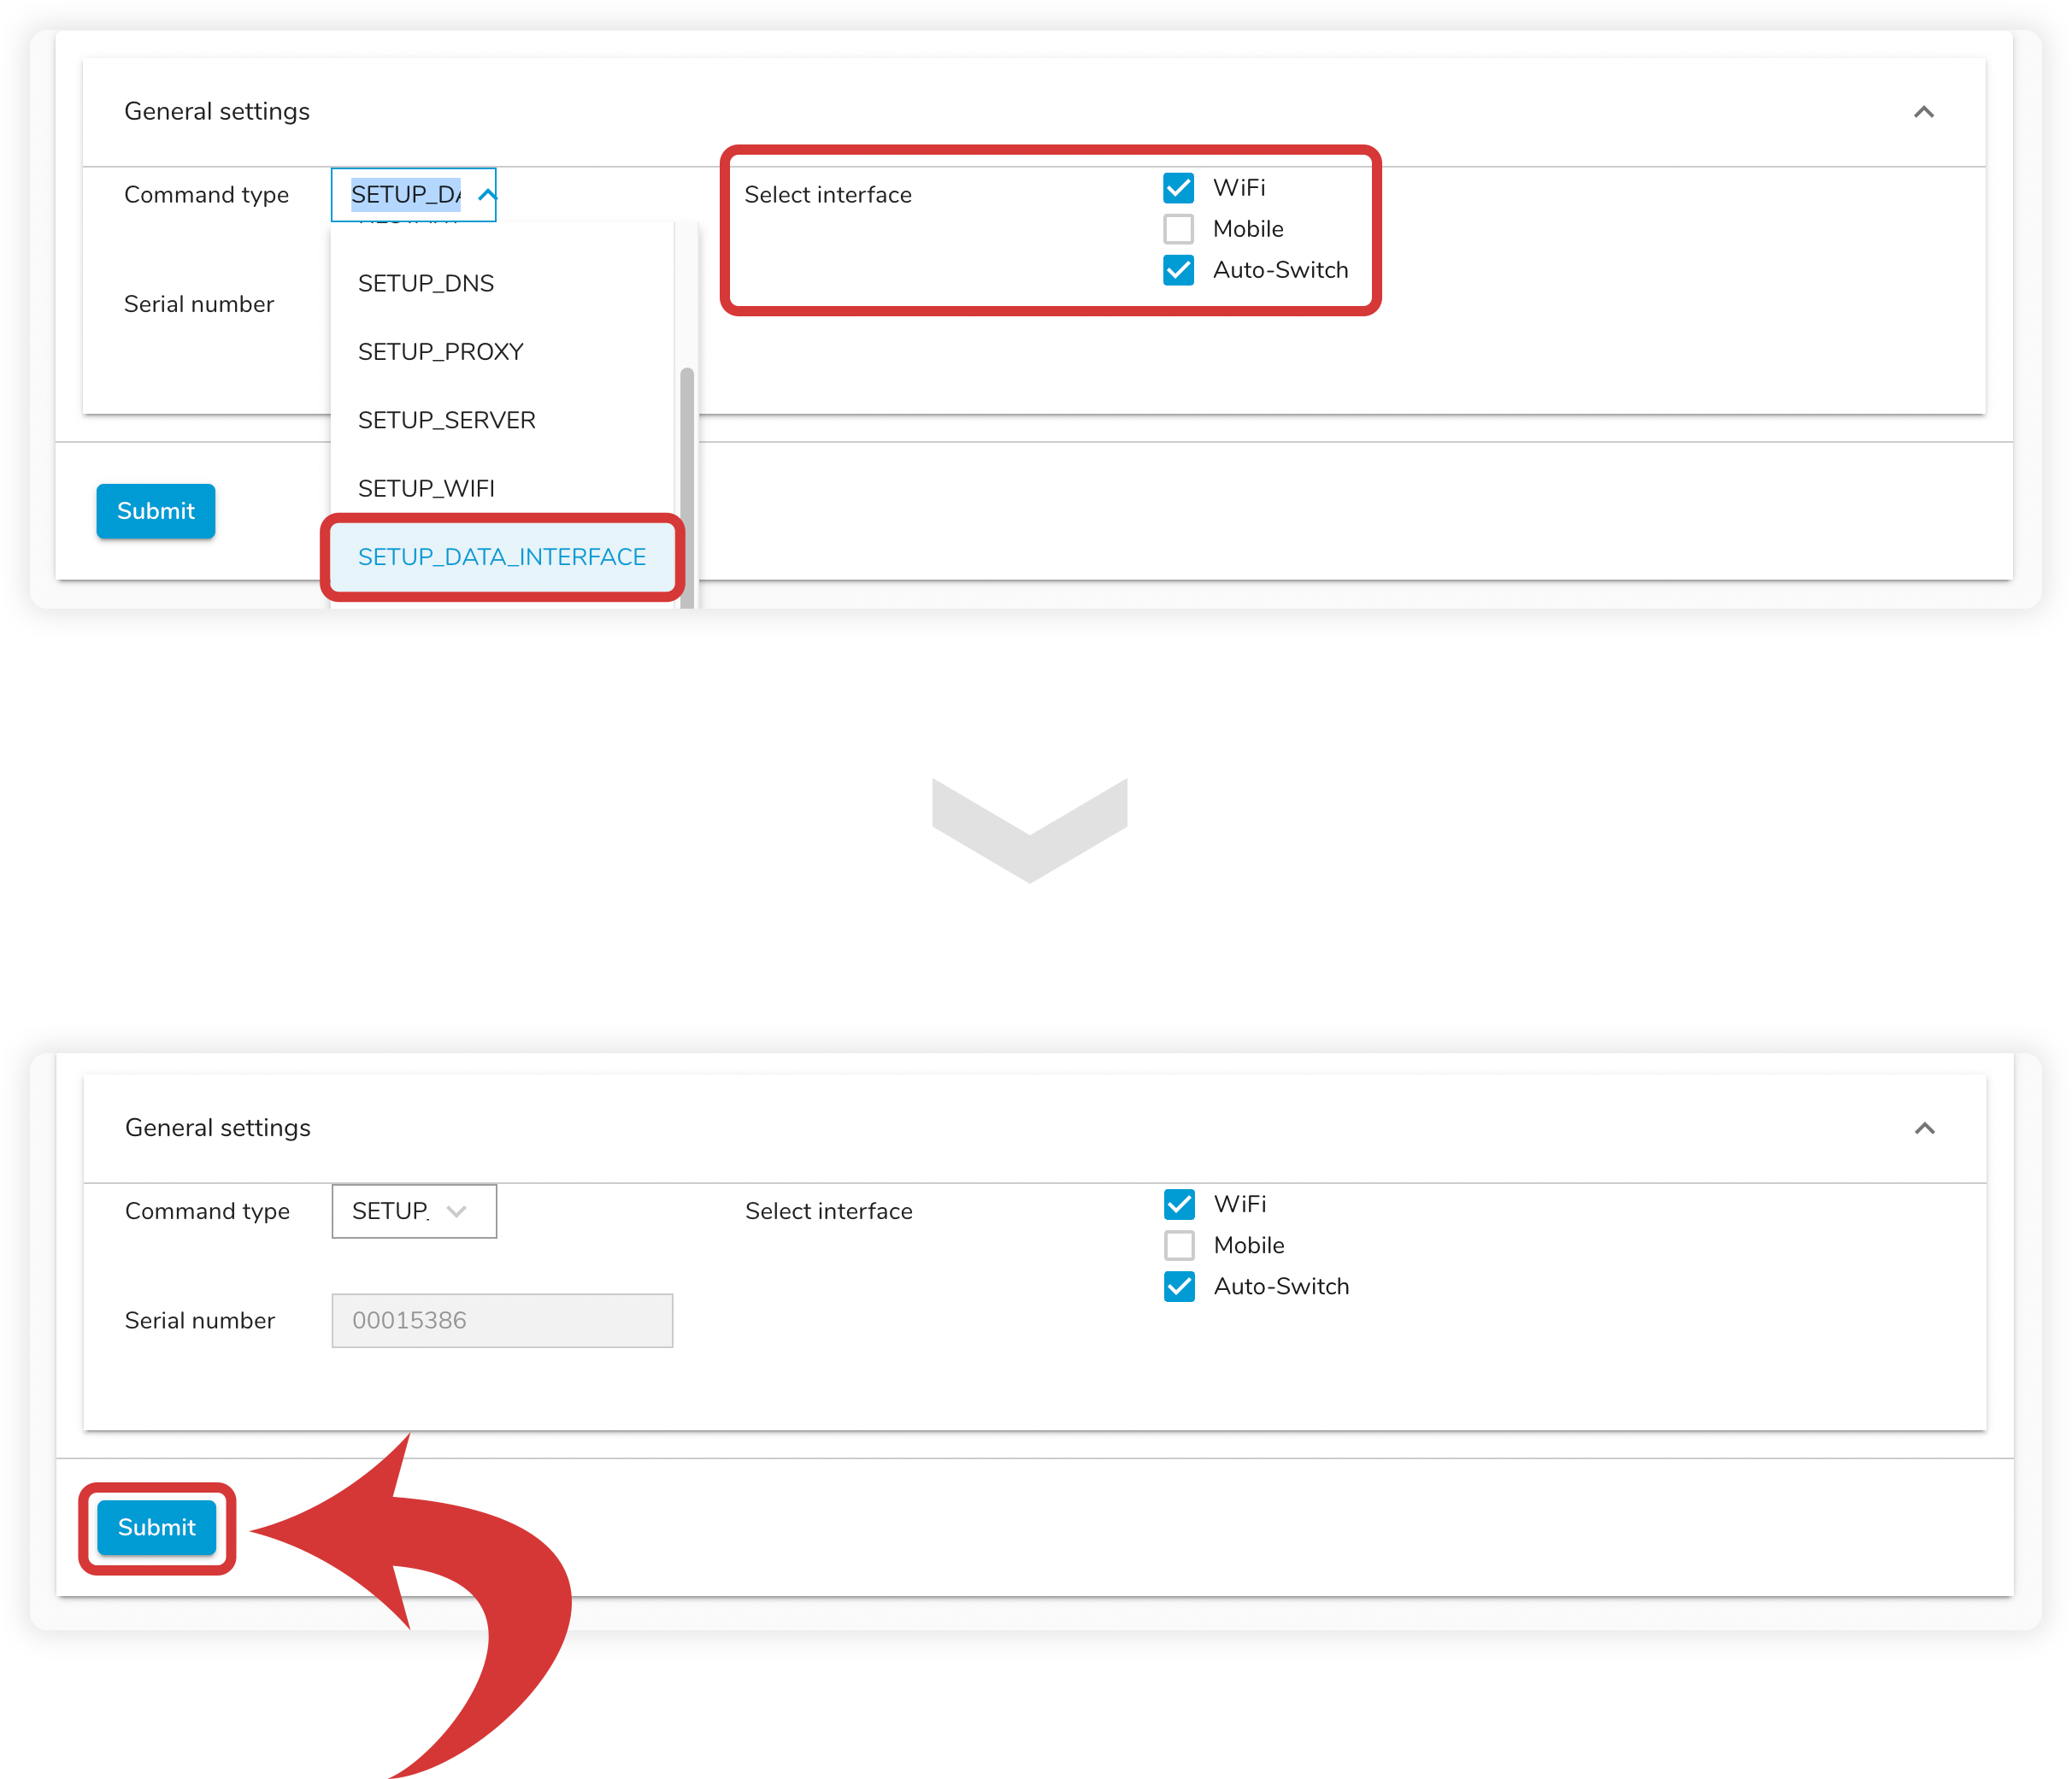
- In order to change data interface, select “SETUP_DATA_INTERFACE” in command type.
- Select the desired interfaces.
- Click the “Submit” button.