Overview
-
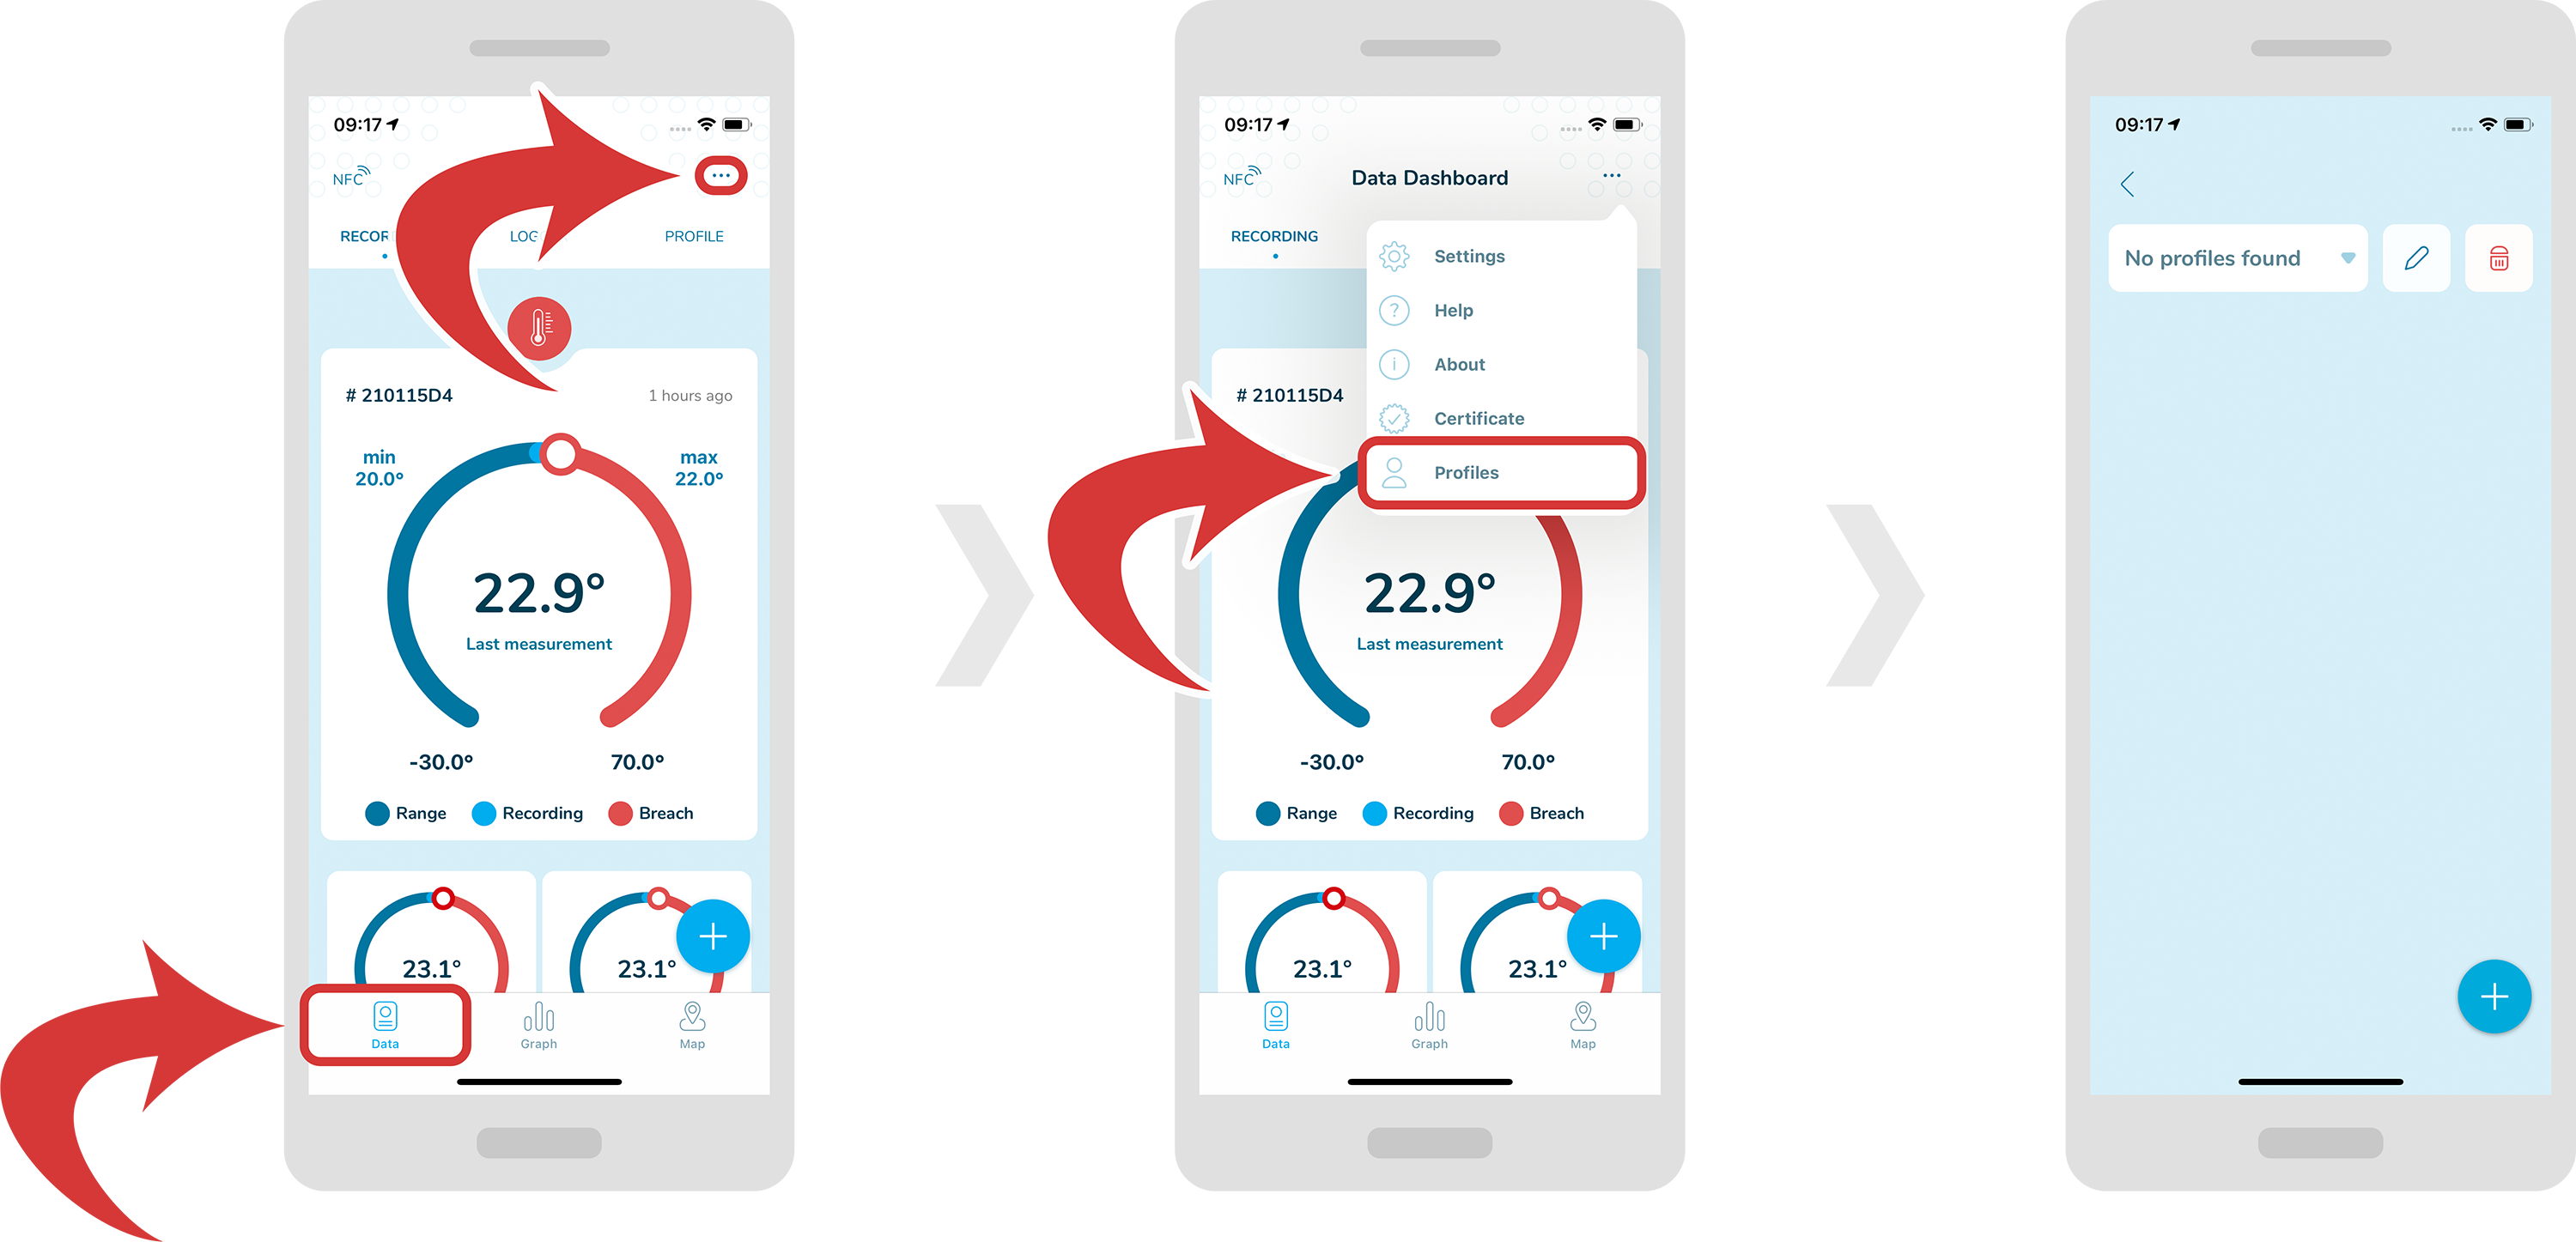
In order to access profiles, first make sure you are inside a “Data Dashboard” page.
-
Now, tap on the “3 dotted” icon at the top right, and select “Profiles”.
-
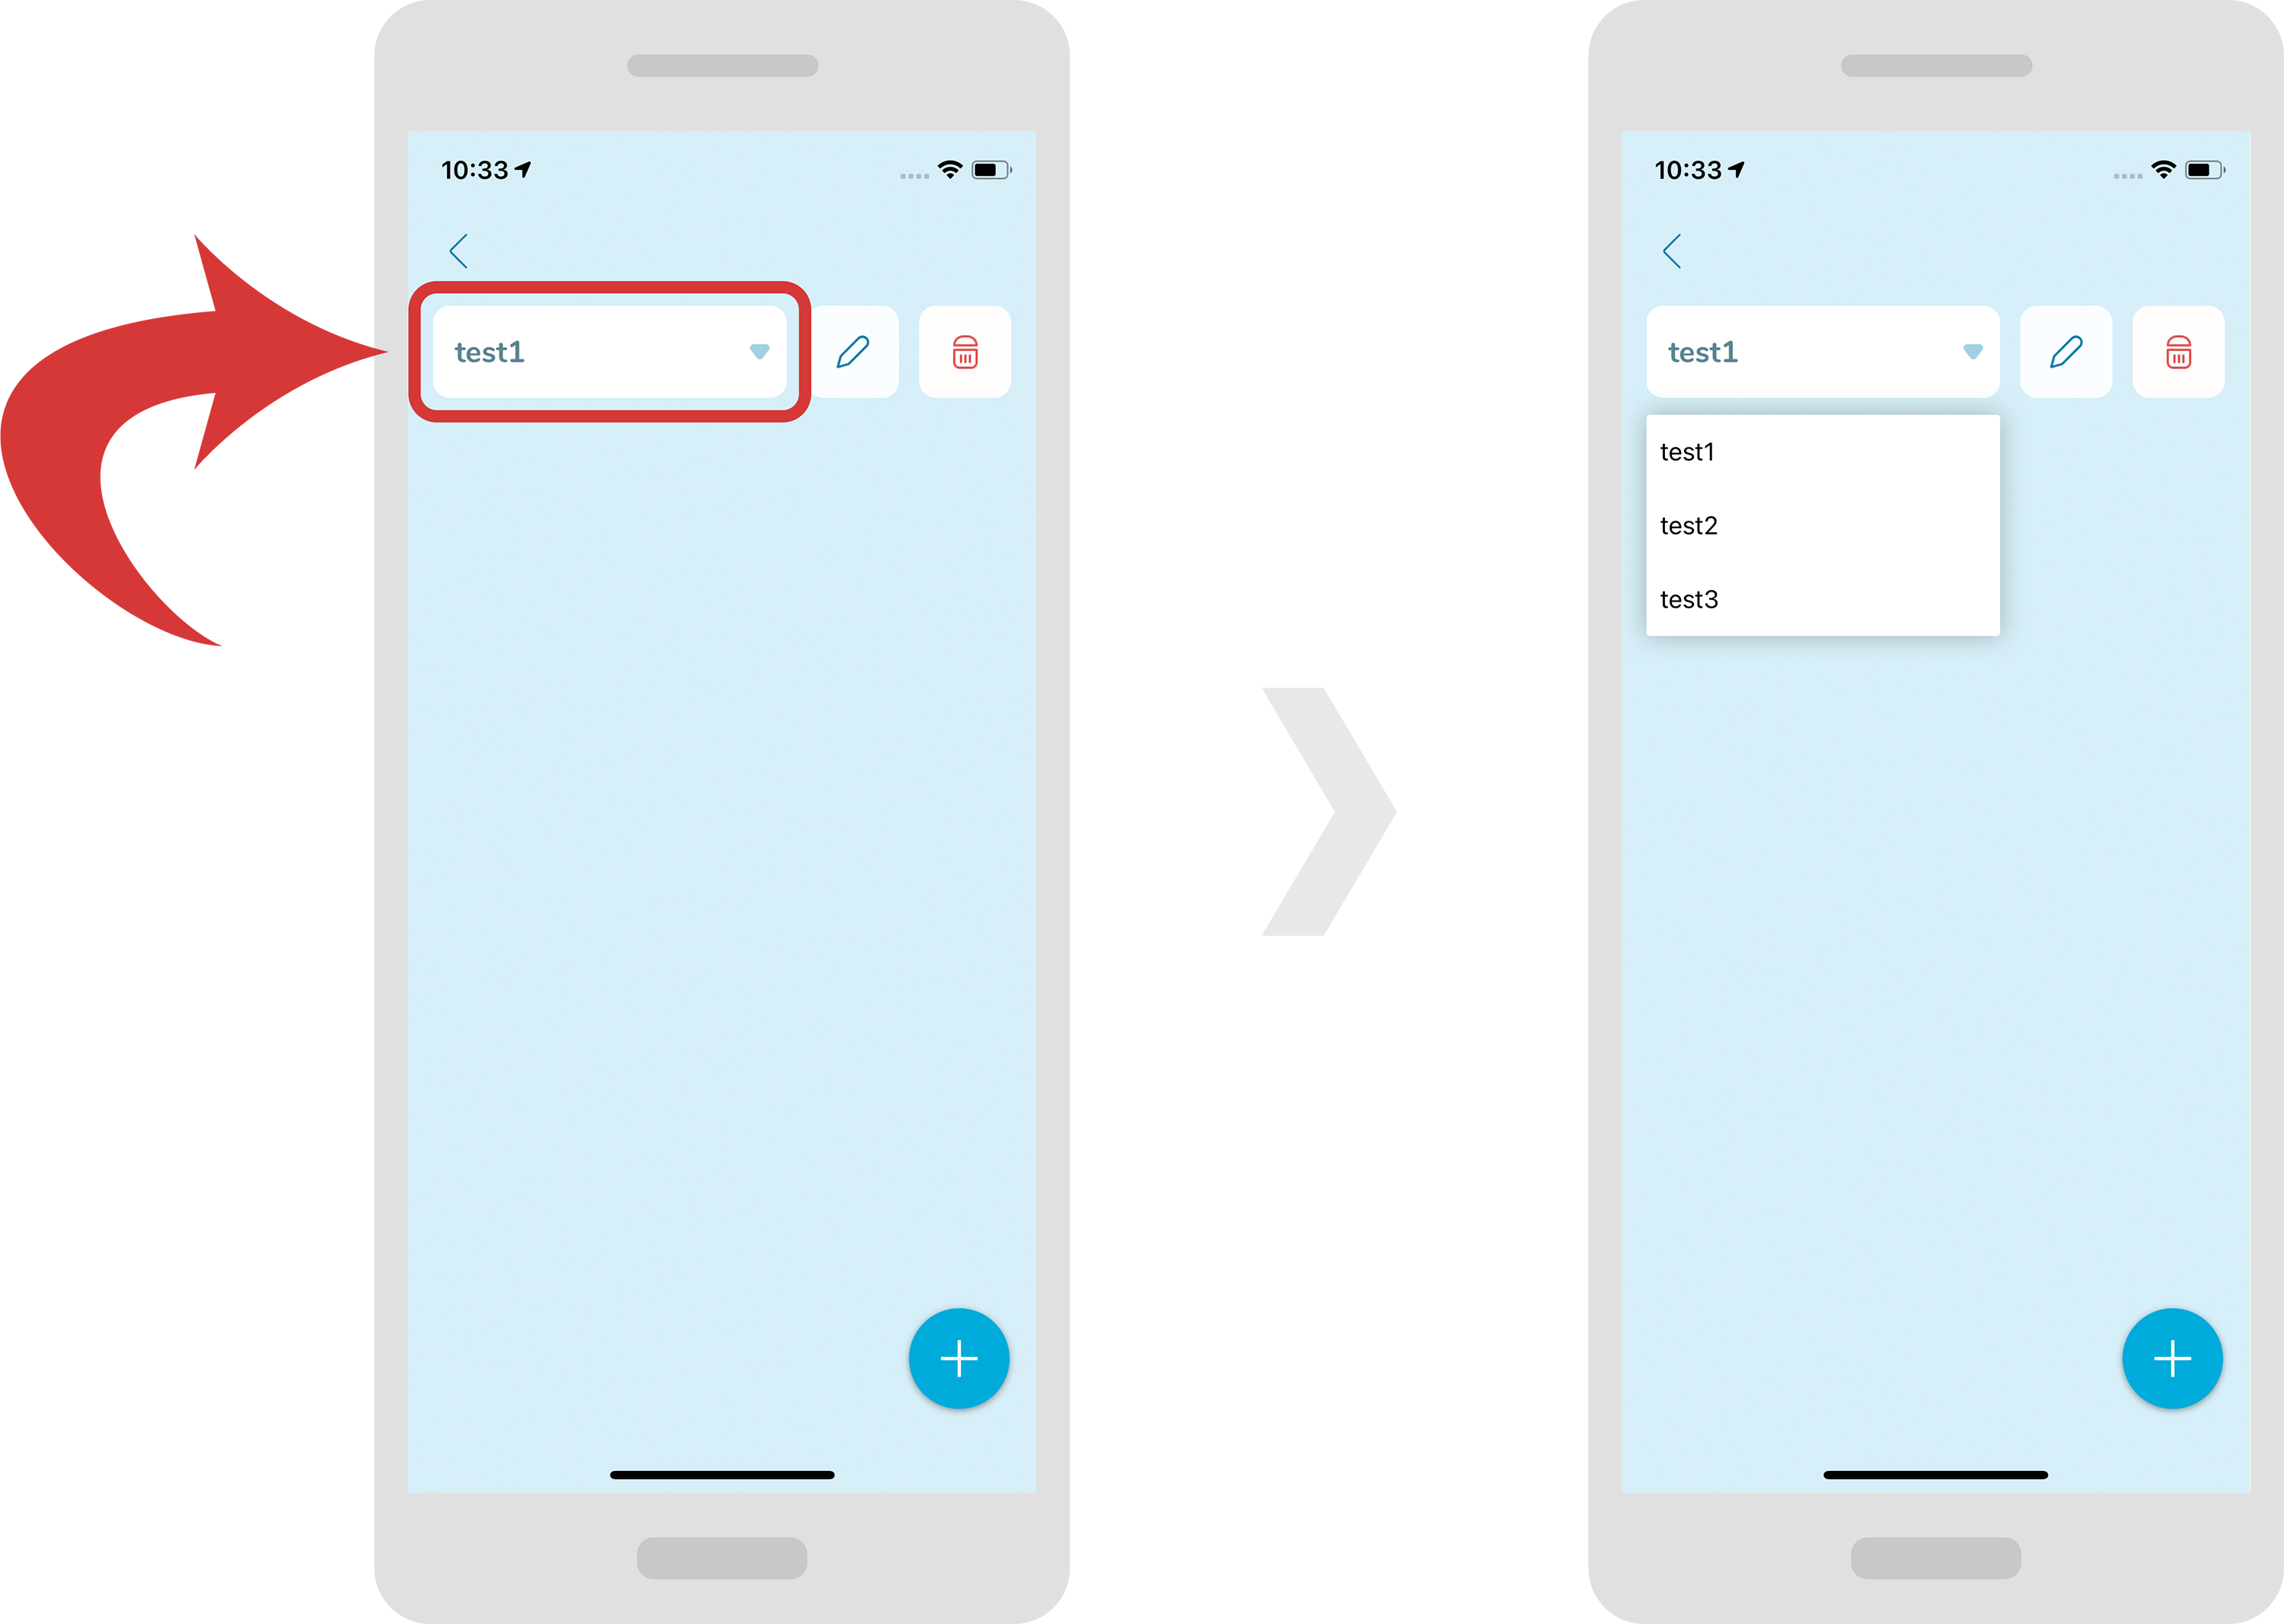
At the top you can select your profile from the drop down menu. As a default there will be no profiles to select.
Create/Edit/Delete profile
-
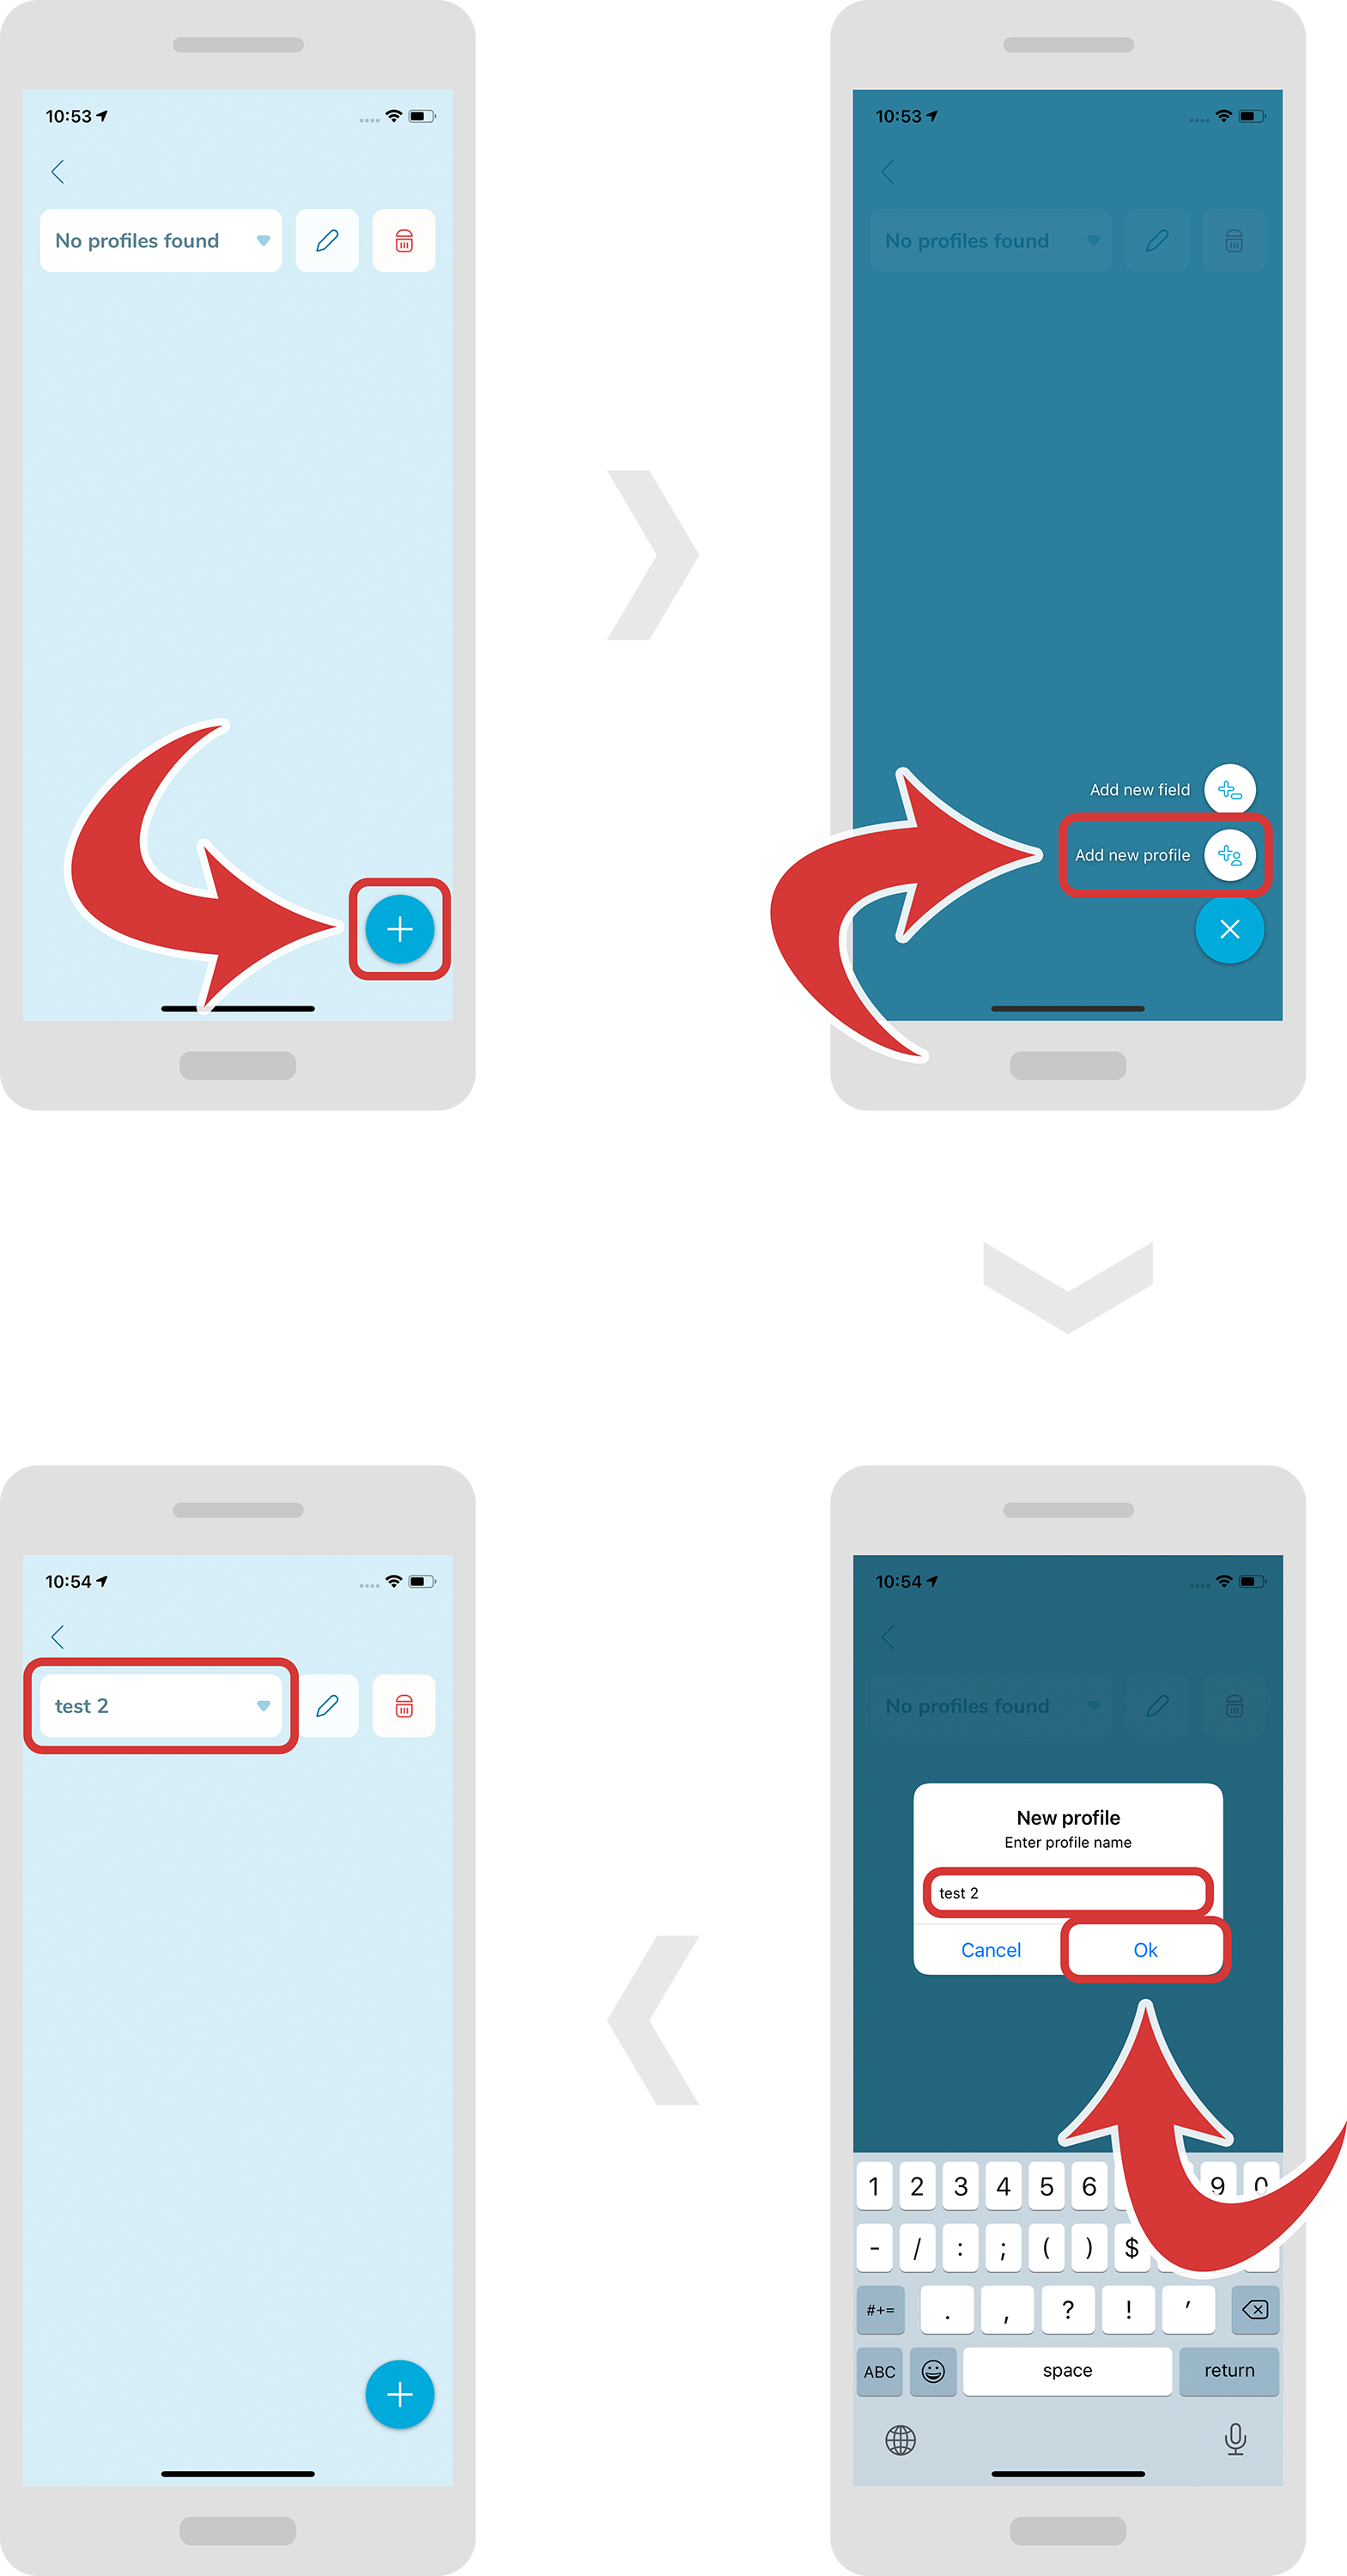
In order to create a new profile, press the “+” button at the bottom right and select “Add new profile”. A new window should pop up where you will be able to put your profile name.
-
Press the “Ok” button to confirm.
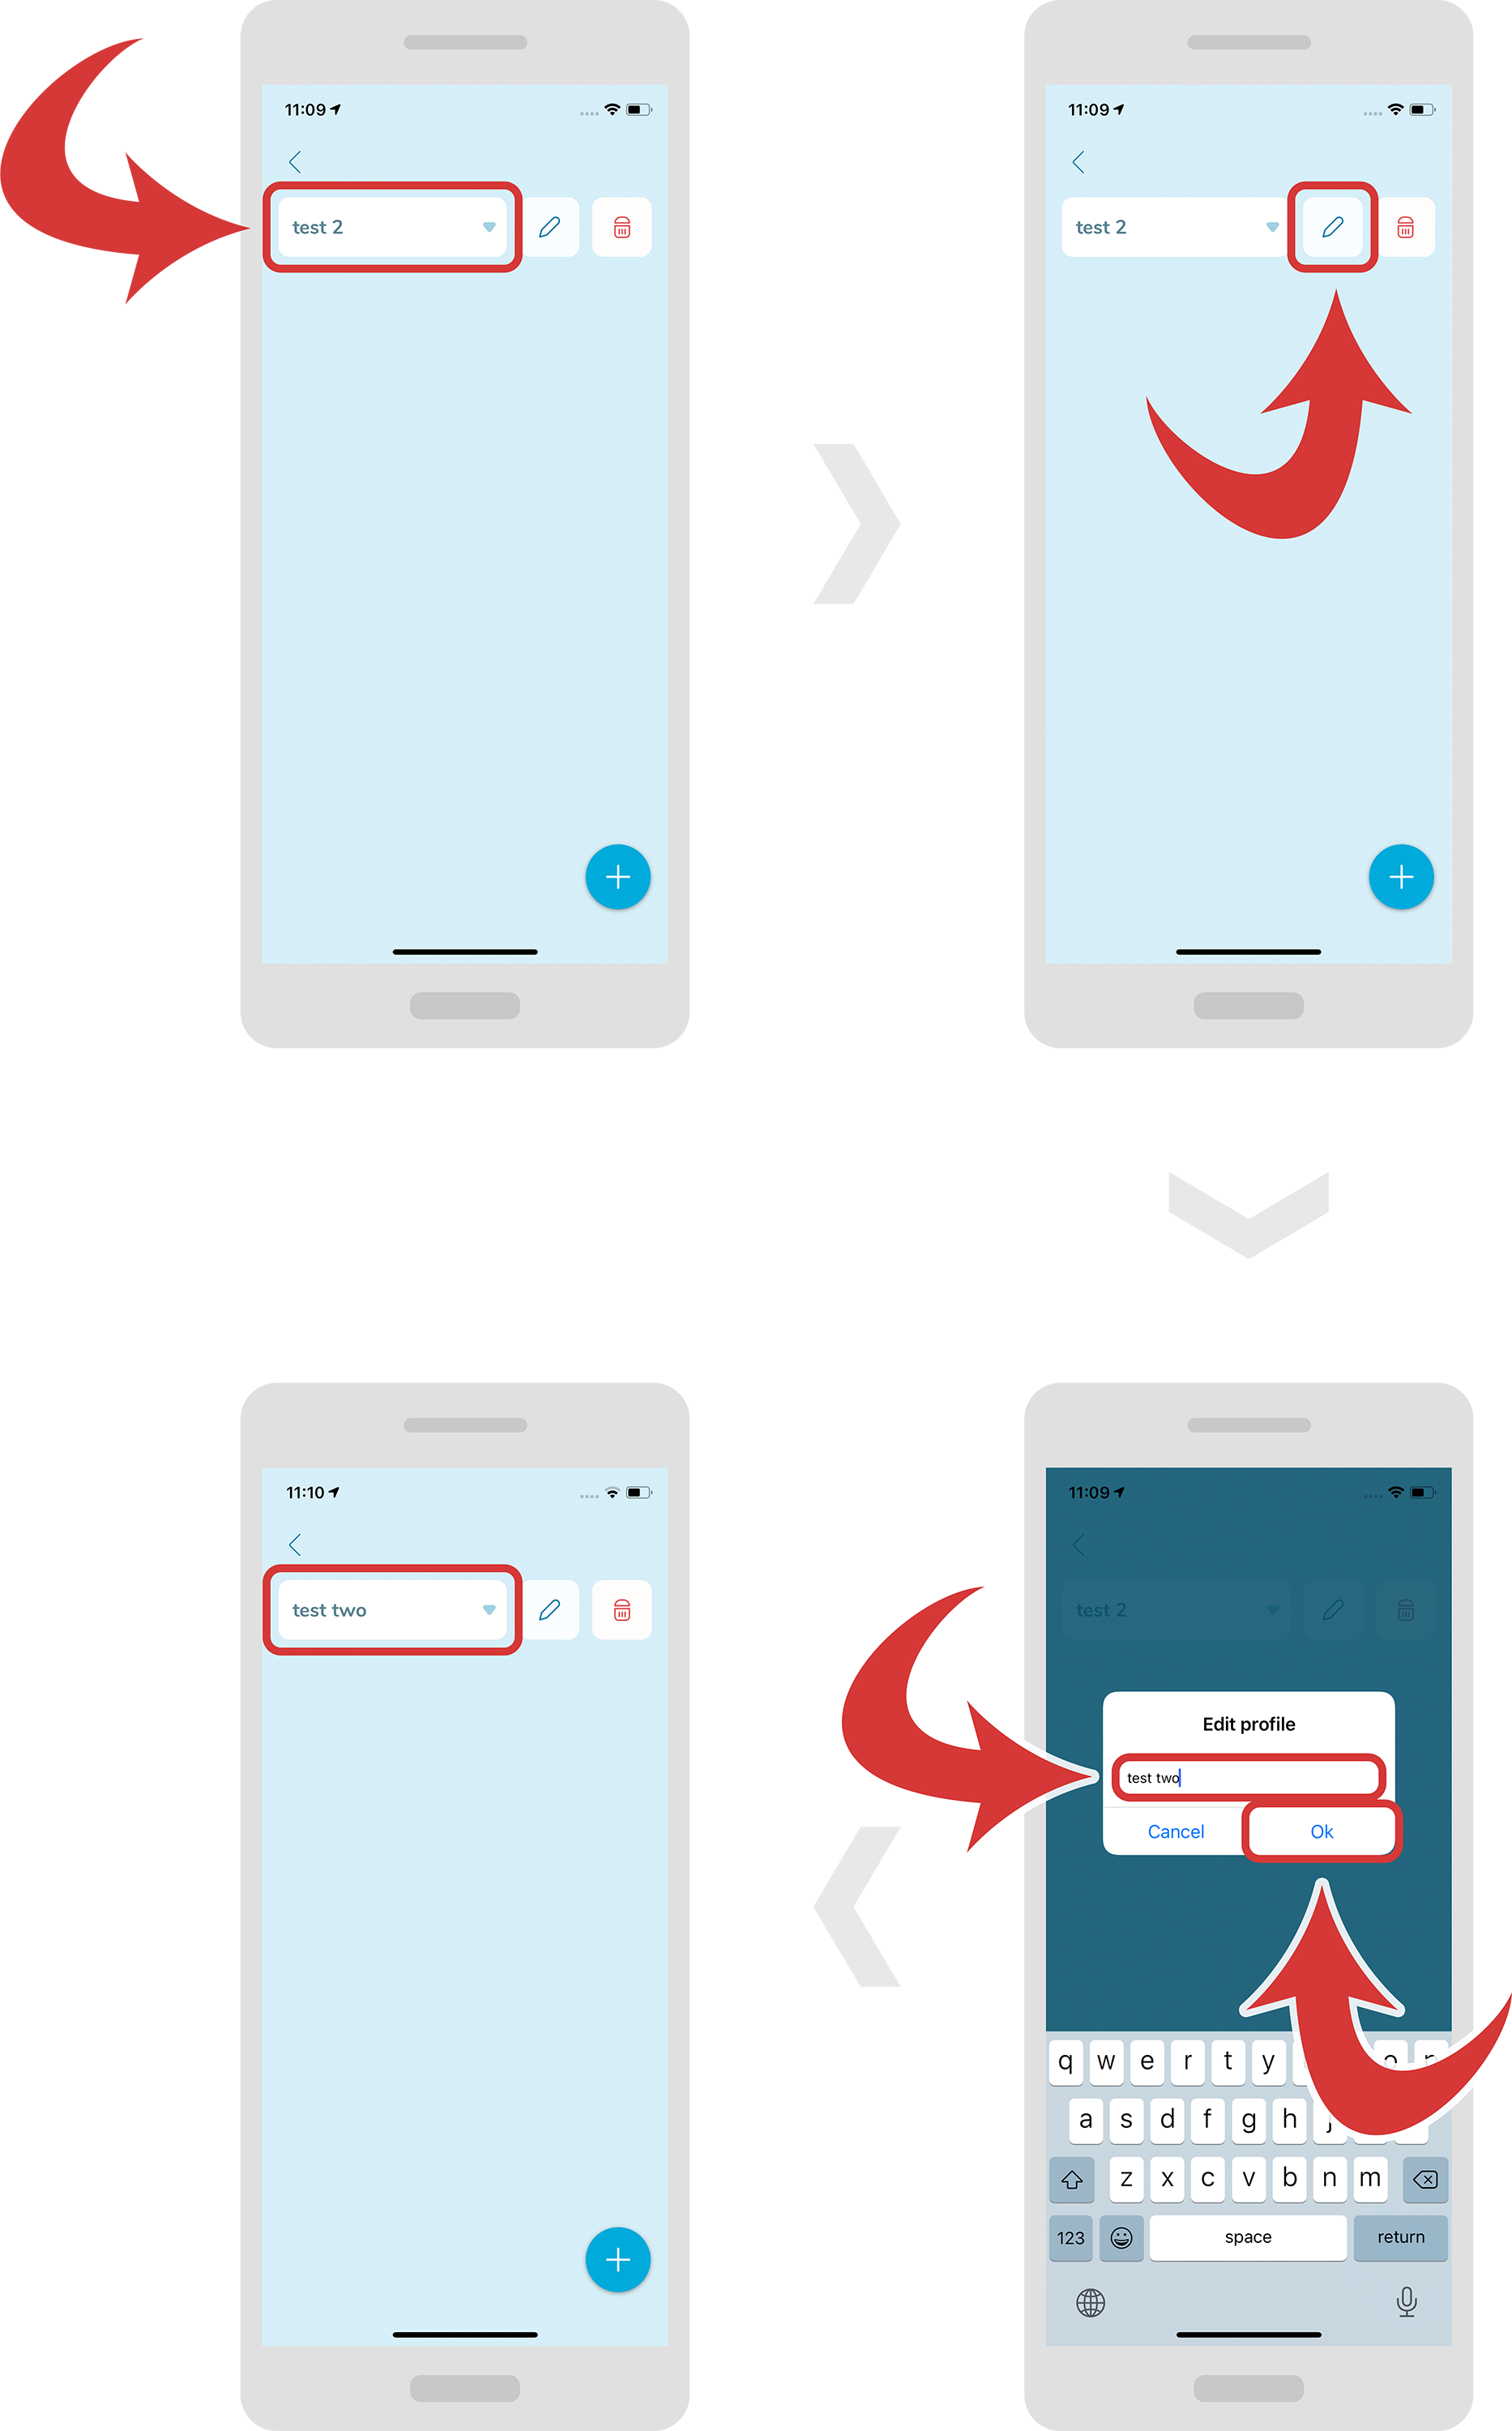
- In order to edit a profile, first select it from the drop down menu.
- Now, press the “pencil” icon near the profile name. A new window should pop up.
- On this new window specify a new profile name and press the “Ok” button.
-
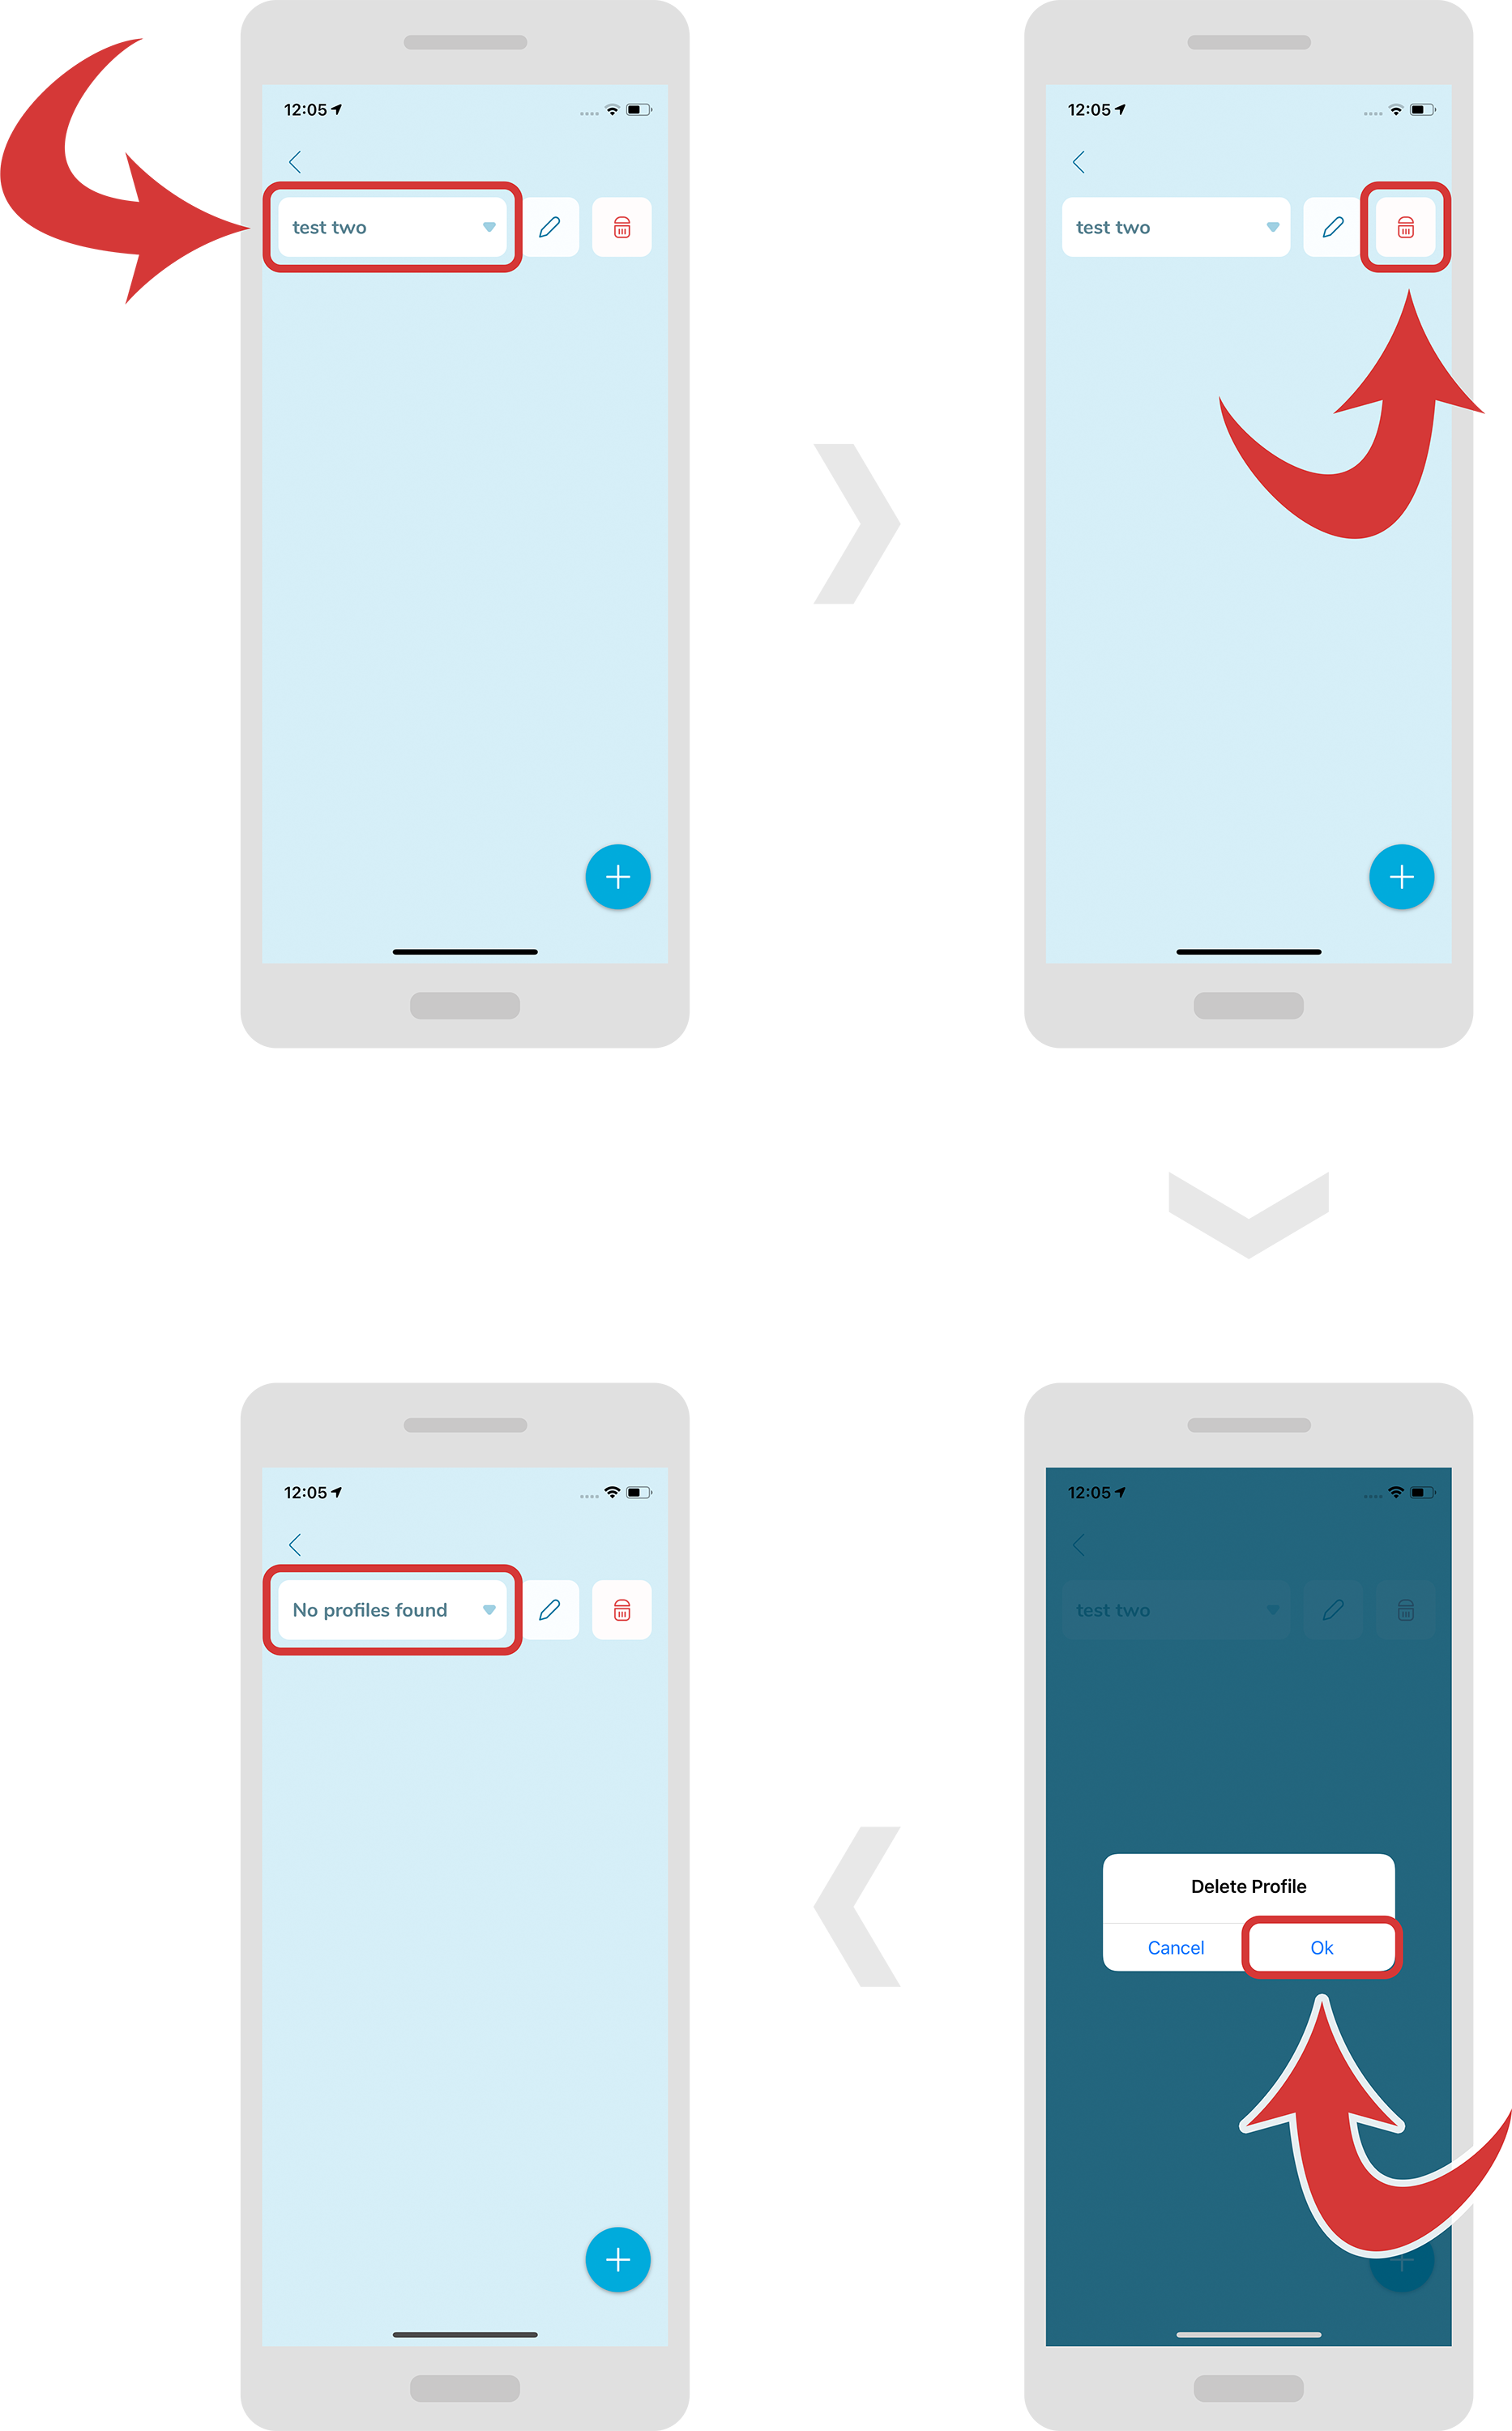
In order to delete a profile, first select it from the drop down menu.
-
Now, press the “trashbin” icon near the profile name. A new window should pop up.
-
Press the “Ok” button to confirm deleting the profile.
Create/Edit/Delete field
-
In order to create a new field, first make sure you have selected the right profile.
-
Now, press the “+” button at the bottom right and select “Add new field”. A new window should pop up where you will be able to put your field name and default field value.
-
Press the “Ok” button to confirm.

-
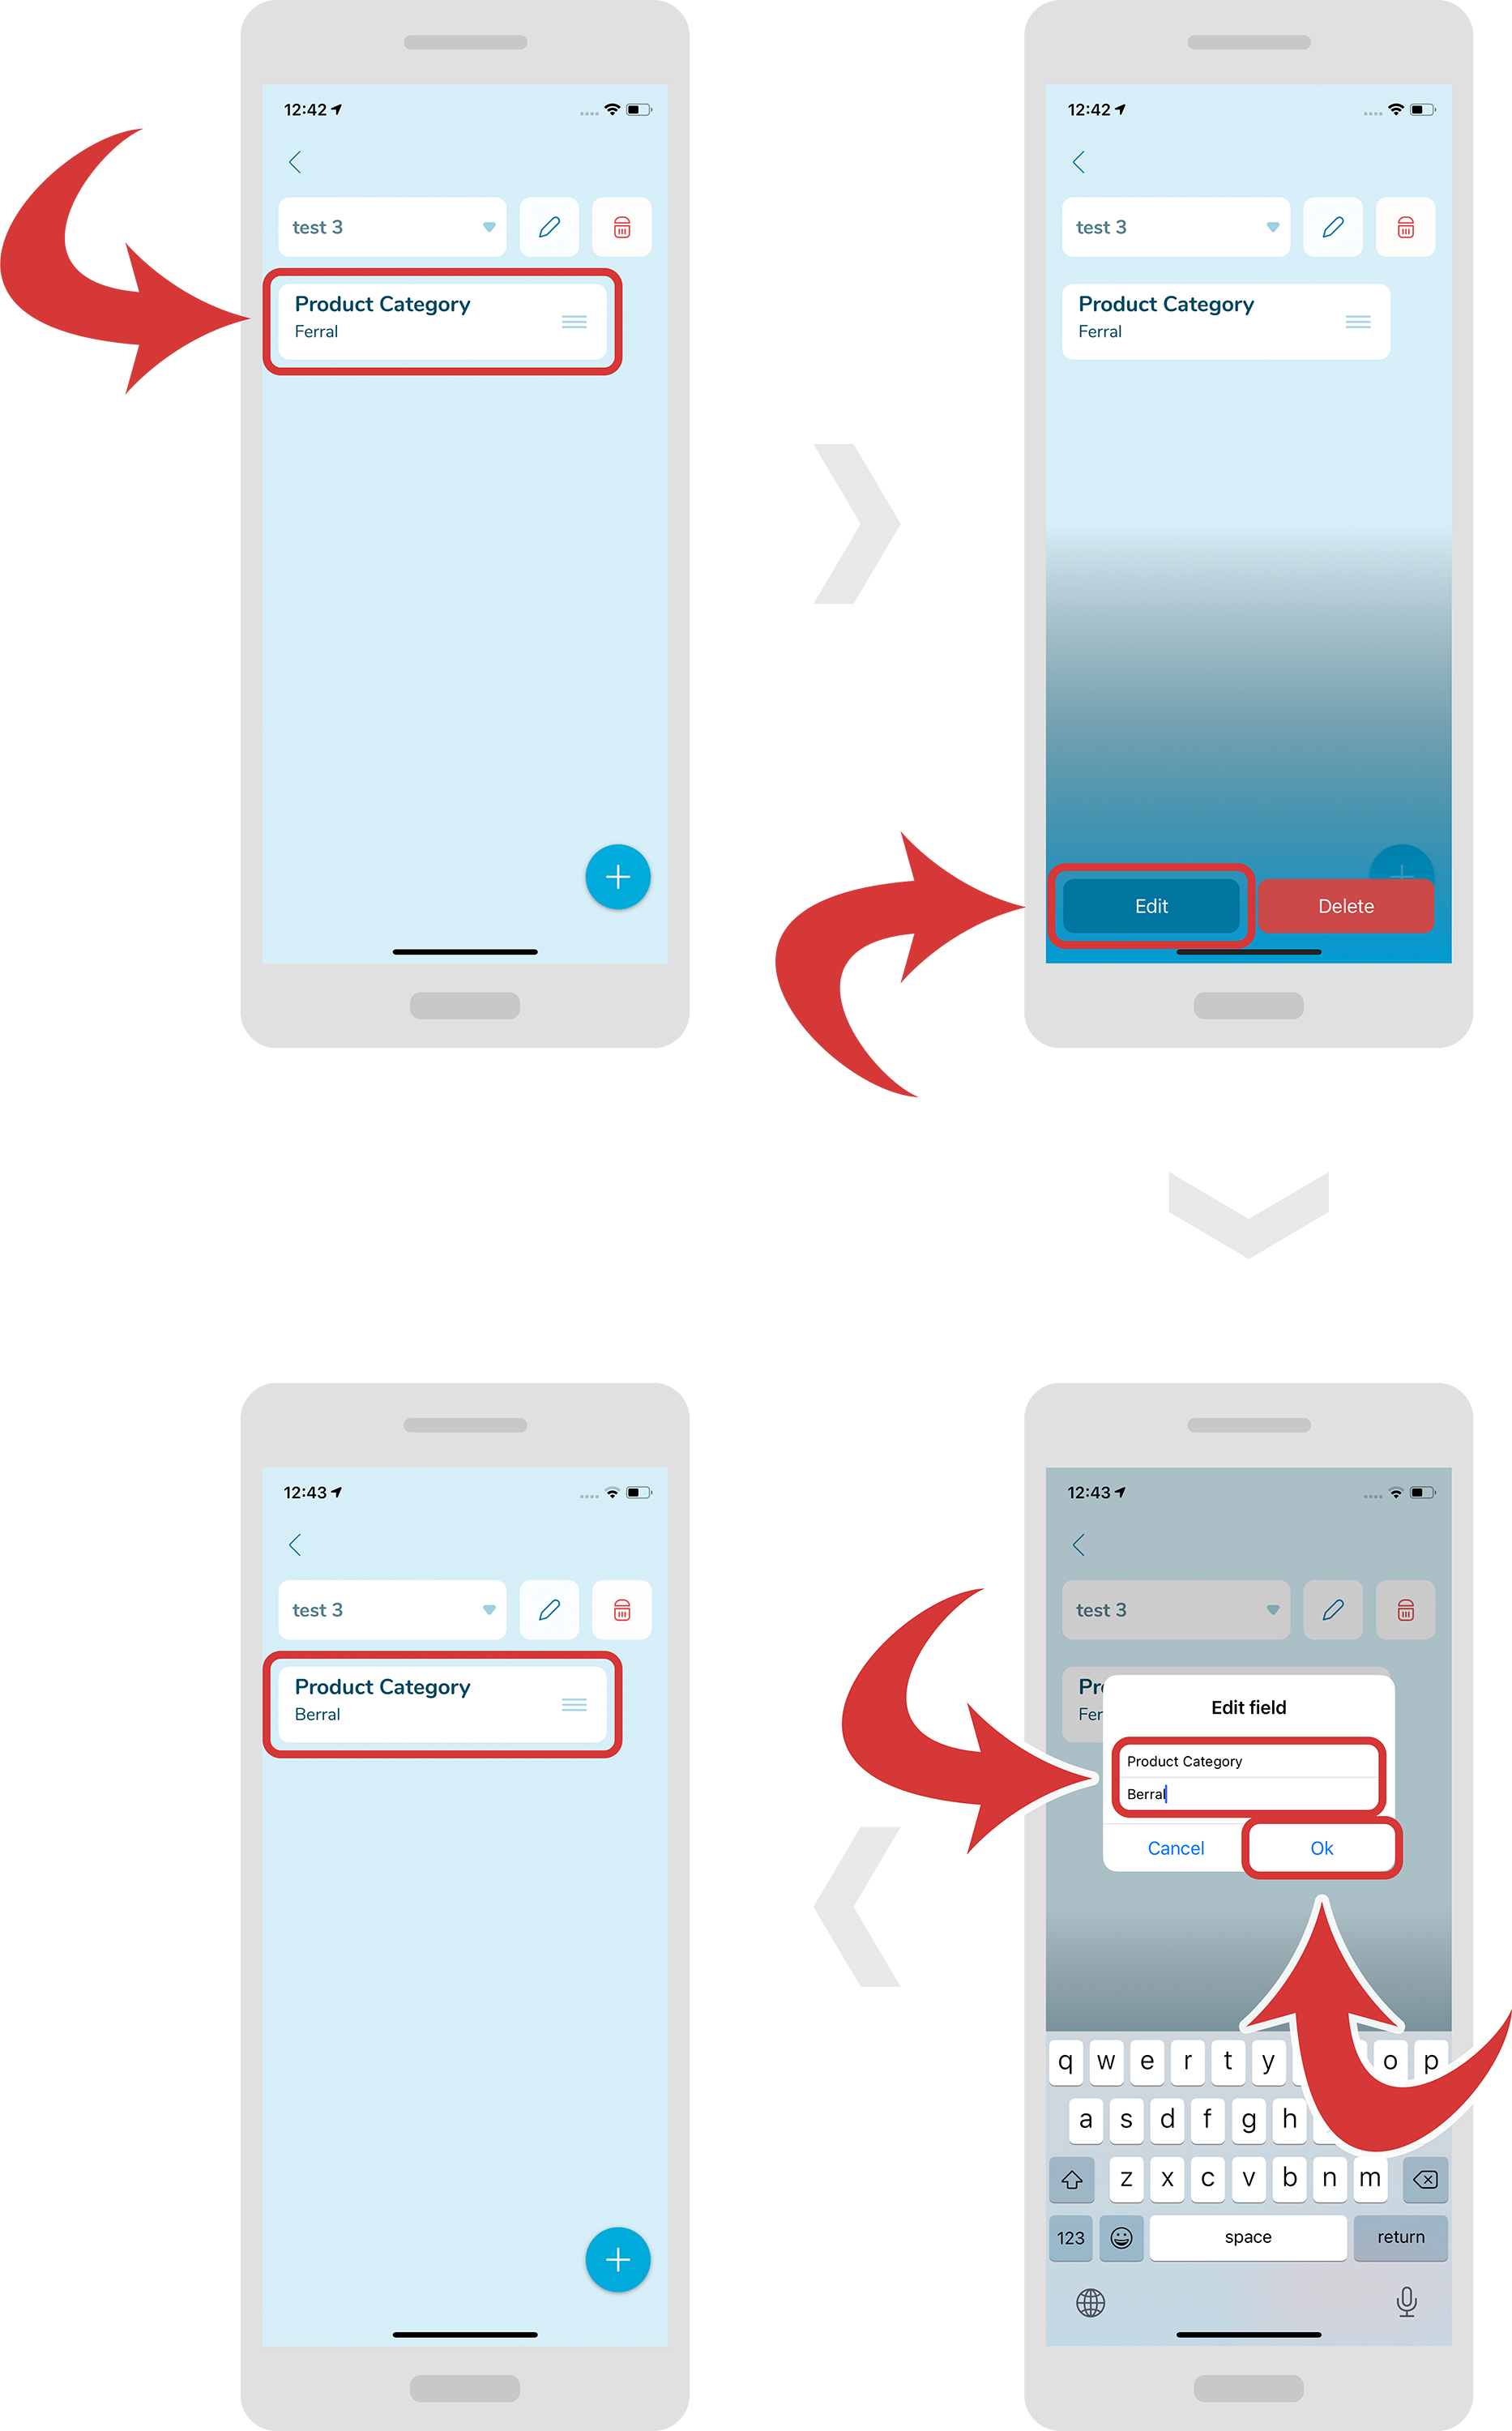
In order to edit a field, first tap it. A blue gradient should appear at the bottom with 2 buttons.
-
Press the “Edit” button. A new window should appear.
-
On this window, type your changes and press the “Ok” button.
-
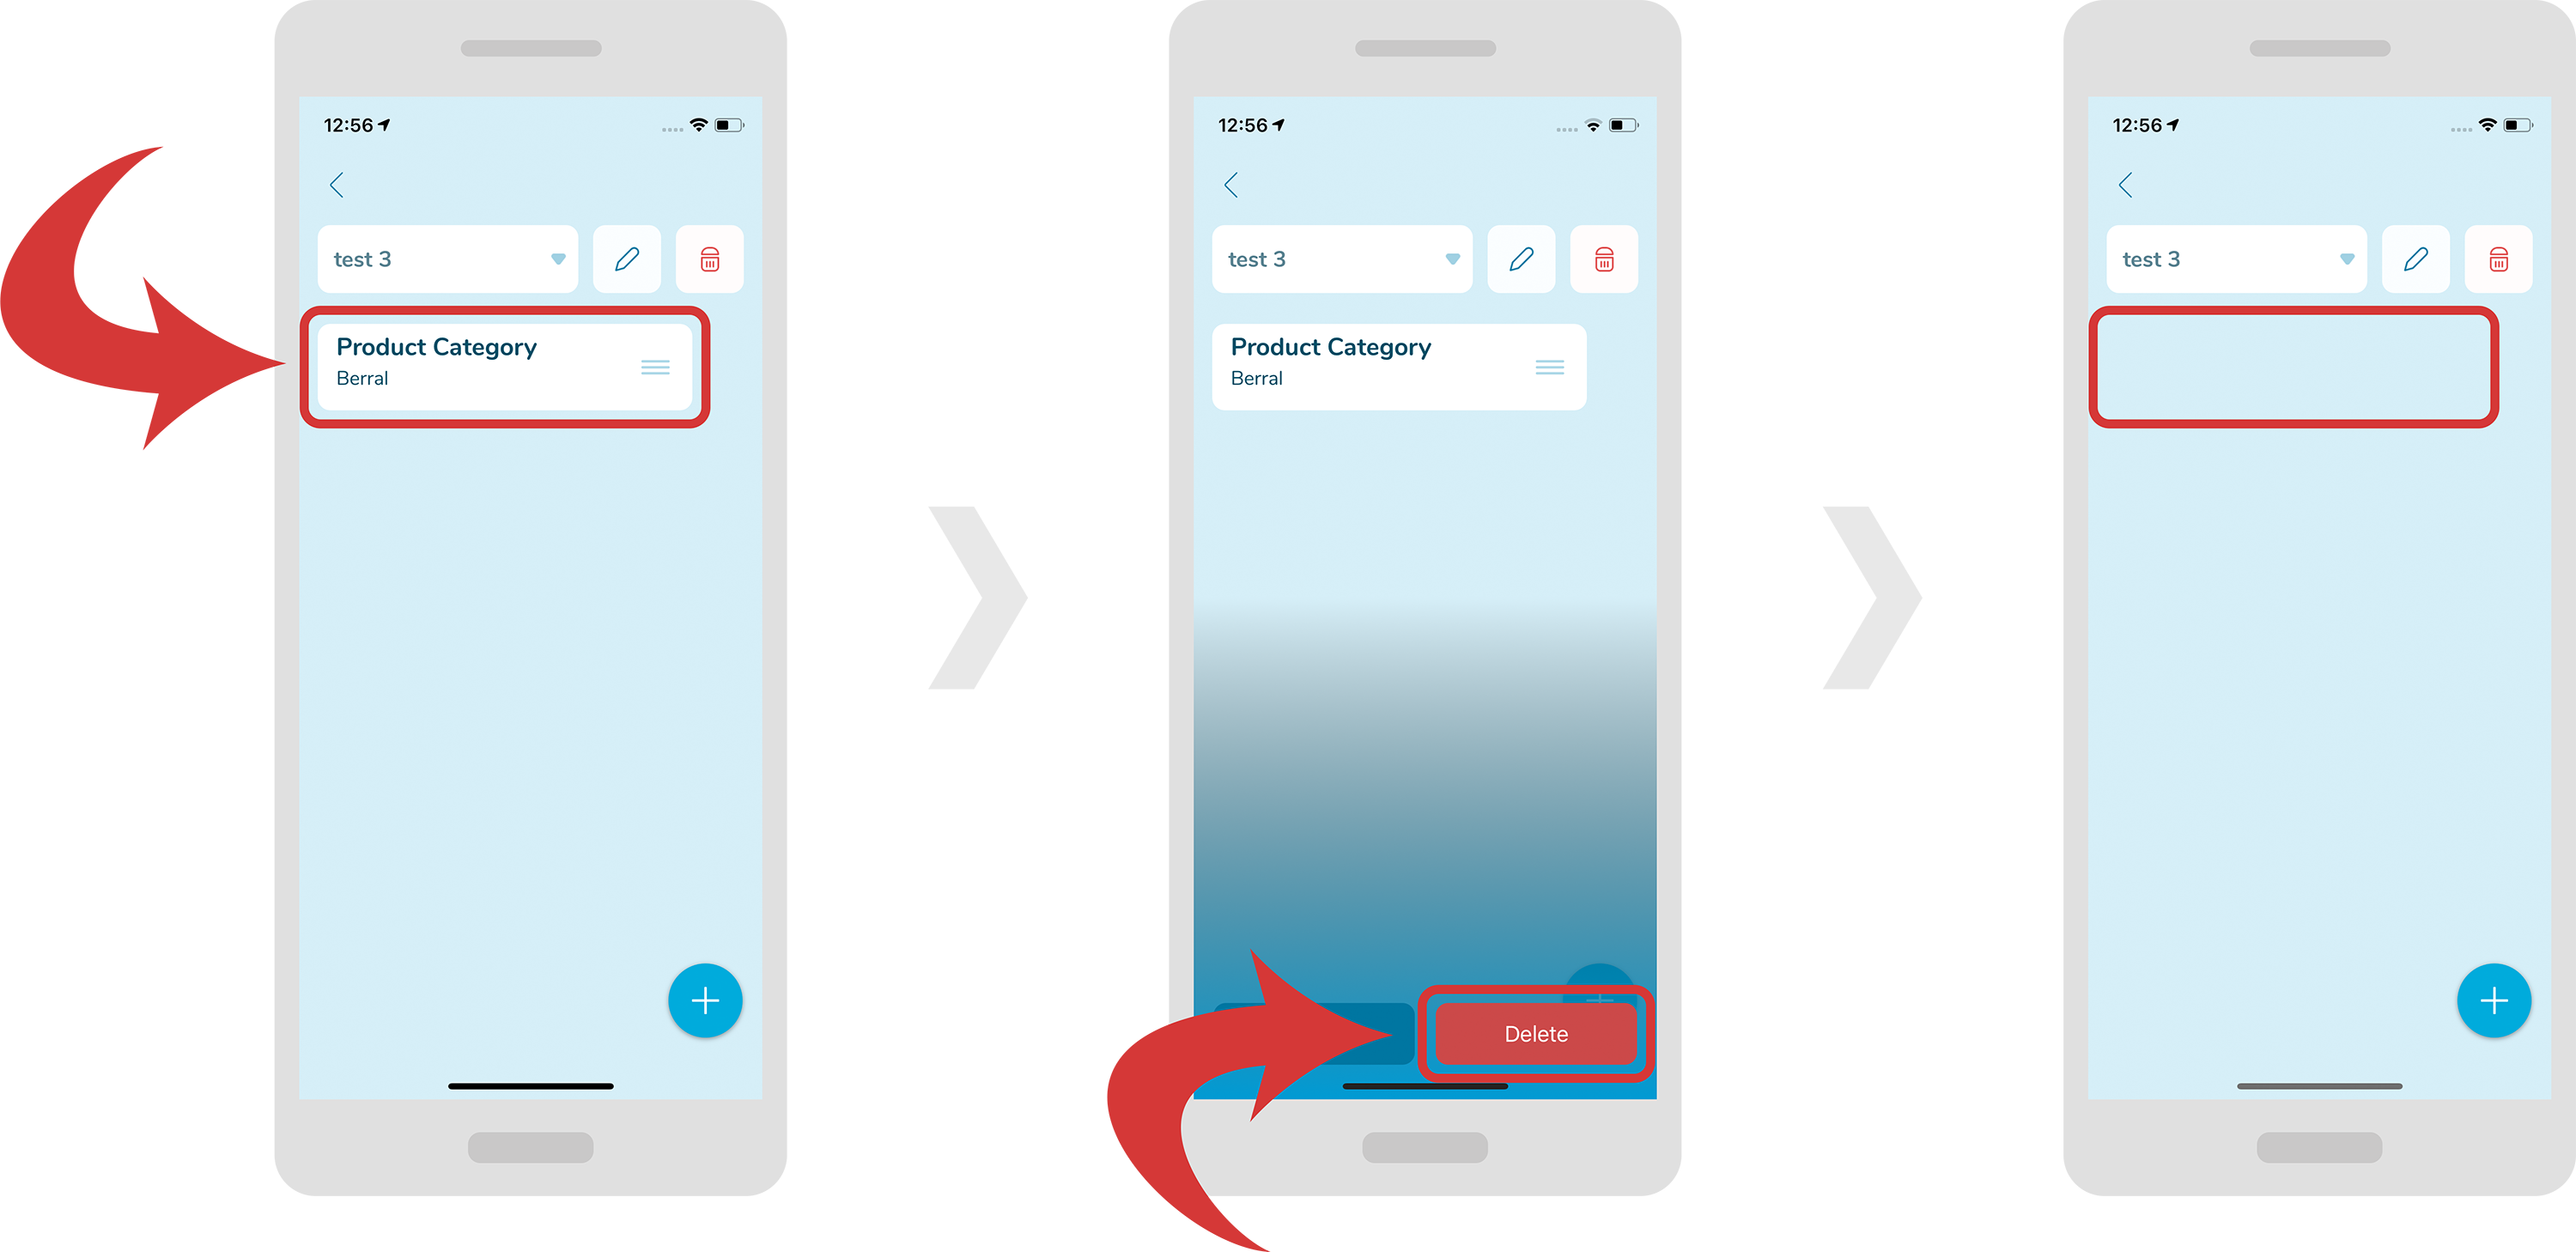
In order to delete a field, first tap it. A blue gradient should appear at the bottom with 2 buttons.
-
Press the “Delete” button.
-
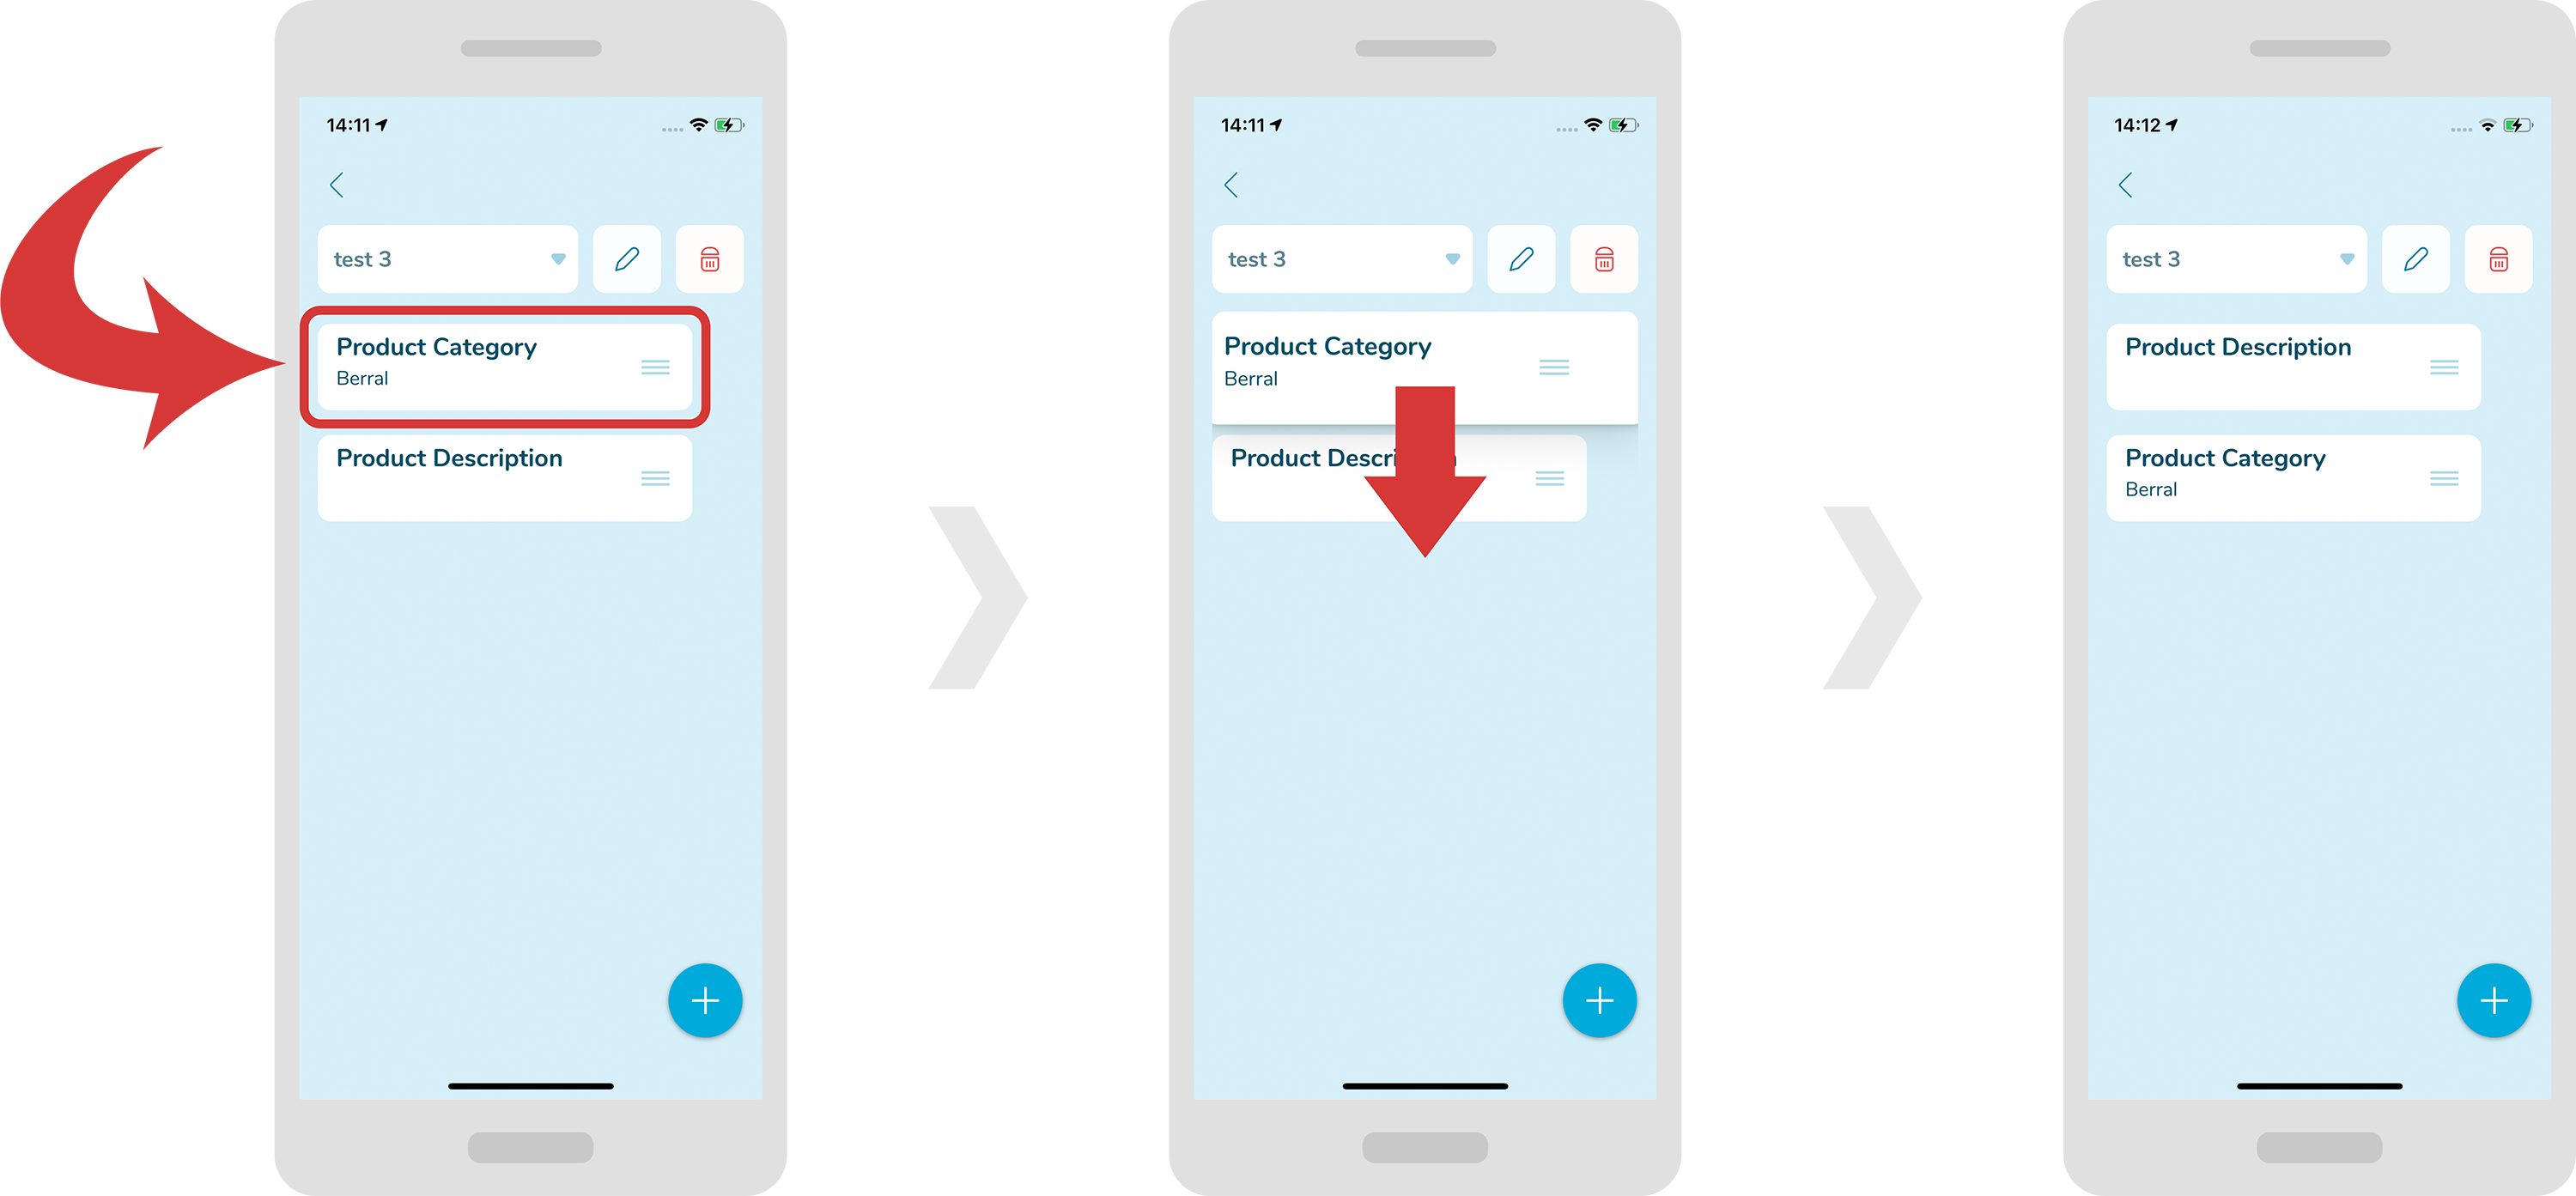
In order to change the order of a field, first hold the field you would like to move. After a moment it will become bigger.
-
Now drag it to your desired position and release. The field boxes should change their order.